Disclosure: This post contains affiliate links. If you click through and make a purchase, I will earn a commission, at no additional cost to you. Read my full disclosure here.
This comparison will be taking a detailed look at all the particulate sensors currently supported by ESPHome, to help you make the right choice when designing your next air quality measuring project. These filters all measure PM10 or coarse particles with a diameter of 10 micrometers (μm) or less and fine particles, also known as PM2.5, with a diameter of 2.5 μm or less.
The table below lists every sensor's specifications, which were taken from their respective data sheet. Further on, I will be explaining what these specifications mean for your ESPHome project, and which sensors you should be considering.
Sources of particulates can be natural, but also man-made. Forest fires and dust storms can cause drastic increases in the number of hazardous air pollutants. Unnatural activities, such as the burning of fossil fuels to power vehicles, power plants, and road dust, also critically influence the air quality.
Coal-fired power plants are perhaps the worst offender of them all. Particulates stemming from these air polluting power plants are linked with asthma, cancer, heart and lung ailments, neurological problems, acid rain, and global warming.
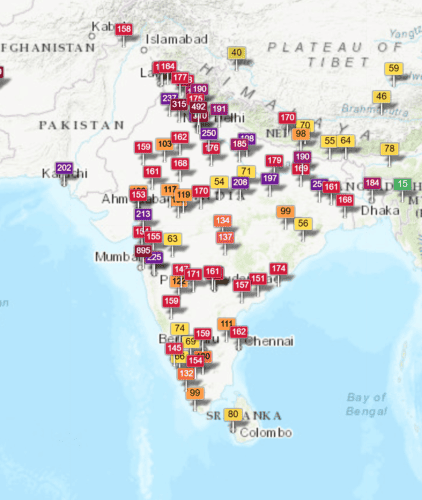
The effect on air quality burning coal has, can be seen in countries such as India, where coal accounts for almost 80% of total electricity generated. Obviously, there are other factors that also influence this poor rating, but coal plays a significant role.
The air quality in India ranges from moderate to hazardous, as seen in Colaba, Mumbai (source: waqi.info)
With all that said, the question I started with still hasn't been answered: Why would anyone want to build a PM2.5/PM10 particulate sensor using ESPHome? I can't argue with the fact that you could go out and buy a smart air purifier, such as the Xiaomi Mi Air Purifier, which has a built-in particulate sensor and adjusts the fan's speed automatically. I'd even go as far as to recommend that if the outdoor air quality is constantly in a bad state.
But perhaps you want to find out whether you even need an air purifier, before making the purchase. A particulate sensor hooked up to a cheap ESP8266 board running ESPHome will definitely come in cheaper. Or maybe you wish to build your own, cheap air purifier using a box fan and some furnace filters, and control it using a smart plug. You might also be interested in the outdoor air quality, as it could influence your decision to hit the roads for a run, or to stick to the treadmill. If you do build an outdoor sensor, you can also feed the data to sensor.community, a project attempting to map the earth's air quality.
Which particulate sensor (PM2.5) should you be using for ESPHome?
Instead of placing this part, which is basically a wrap-up of the whole article, at the end, I have decided to give you the most relevant information up front. If you are interested in further details on each sensor, just keep scrolling.
When designing an ESPHome project to measure particulates, only the Nova Fitness SDS011 and Sensirion SPS30 should be considered. The SDS011 is a solid and economical choice, whereas the SPS30 is state of the art. It's as simple as that. The alternatives all have their issues. The SPS30 has some nice extras, such as automatic cleaning, and is slightly more accurate. It also measures PM1.0 and PM4.0 particulates, in addition to PM2.5 and PM10.
It should be noted, that the SeeedStudio Grove – Laser PM2.5 Sensor (HM3301) offers a better performance than the SDS011 at a similar price. If you can get your hands on a HM3301 at the same price, I recommend going with it instead of the SDS011. The reason the SDS011 still tops the economic list is that the HM3301 can be difficult to get a hold of.
With that said, in the long term, the Sensirion SPS30 will also end up being the economic choice. With its service life rated at 10 years while running day and night without any breaks, it will easily outlast the competitors by a multitude.
Sensirion SPS30
The Sensirion SPS30 not only measures PM2.5 and PM10 particles in the air you breathe, but goes all the way down to PM1.0. It has a rated lifetime of more than ten years, even when it is running continuously all day, every day. Another benefit of using this sensor, compared to others, is that it cleans itself. It does this by spinning the fan up to its maximum speed for just ten seconds to remove any dust that might have accumulated inside the enclosure. The self-cleaning is unlikely to bother you, as it will only run once a week. This setting currently can't be adjusted in ESPHome, and even if you could, you should leave it where it is, as per the manufacturer's recommendation.
The only downside to the Sensirion SPS30 is its price. At around US$50, it isn't exactly cheap, and when used in a multisensor along with a BMP280 or SHT4X, your project will likely cost more than you were hoping for. But, as mentioned earlier, you will get your money's worth eventually, as this sensor will outlast the competition, and then some.
You might say the SDS011 is the reasonable choice for a DIY project running ESPHome. Indeed, it has been used in many projects I have come across when researching content for this site. The SDS011 is only slightly less accurate than the SPS30, but uses the same laser light scattering technology and not the inferior infrared LED to cut costs.
One issue you will be facing when going with the SDS011 for your ESPHome project, is dust. As the images in this article show, dust covers the insides of the casing after it being in use for six months. The article does mention that no dust accumulated on the diode, nor on the laser, so readings should still be accurate, but it might be an issue after one or two years.
When designing an ESPHome project, keep in mind that the whole package is almost double the thickness and 3 cm wider and longer than the SPS30 from Sensorium. Though, Nova Fitness does make good use of the comparatively large design, by giving the sensor an extra large fan.
By default, the Nova Fitness SDS011 will take a reading every second, but by increasing the intervals between readings, you can keep it alive for longer. For example, when setting the update interval to one minute, the sensor will sleep for 30 seconds and then take measurements for 30 seconds. When set to two minutes, the SDS011 will sleep for one and a half minutes between the 30-second-long measurements, and so on.
SeeedStudio Grove - Laser PM2.5 Sensor (HM3301)
At around US$30, the SeeedStudio Grove - Laser PM2.5 Sensor (HM3301) should be the economic choice, ahead of the similarly priced SDS011. However, as it isn't as readily available from online marketplaces, I can't recommend you search hours for a listing, when the SDS011 is as ubiquitous as it is. If you do find the HM3301 at a similar price, though, it gets my definite recommendation.
One downside of using the SeeedStudio Grove - Laser PM2.5 Sensor (HM3301) with ESPHome, is that you can't configure the update interval. The sensor will perform a reading every second, and although there have been attempts made to put it to sleep, none have been a success. As things currently are, the sensor will have a service life of more than two years. With an increased update interval, you should expect the SDS011 to last longer, and neither comes nowhere near the SPS30. One would hope that it will be possible to adjust the update interval of the HM3301 in the ESPHome configuration at some point in the near future, as that would allow any maker to extend its lifetime by years.
Plantower PMSA003I
Price wise, the Plantower PMSA003I sits somewhere between the SDS011 and SPS30. Regarding its capabilities, it is comparable with the SPS30, as it measures both the mass concentration and number concentration of particulates in the air using laser light scattering.
What makes me dissuade you from using the PMSA003I is its MTTF (Mean Time To Failure) of only three years. That means that you can expect to replace the sensor every three years, as it won't be possible to repair. It also doesn't have any self-cleaning programme, which means that you might have to occasionally clear any dust from inside the case.
If you were considering the PMSA003I for your next ESPHome project, do yourself a favour and spend the ~US$10 more on the SPS30.
The SM300D2 is somewhat of an enigma, as I've only been able to find very little information on it. According to a GitHub user, its real codename is SM300D2-V02, and it is produced in Shenzen by SmartMeasure Inc. However, I haven't been able to find any information on the alleged manufacturer, and not even a data sheet for the sensor itself.
Another thing I wasn't able to find were many listings for the SM300D2. While researching, there were four vendors selling this sensor on AliExpress and just a single one on Amazon.
What makes this model unique is the fact that it is a 7-in-1 Air Quality Sensor. Besides the PM2.5 and PM10 measurements you expect from a particulate sensor, it also measures formaldehyde, the total volatile organic compounds (TVOC), eCO₂, temperature, and humidity. Many listings claim that the SM300D2 measures the CO₂ in parts per million, but in actual fact this number is an estimate based on the TVOC. For a true CO₂ reading, a sensor such as the MH-Z19 is required.
I can't recommend the SM300D2 because there is so little information available on it. Forum posts discussing this sensor all seem to be from the last two years, so I'm assuming it is relatively new. Perhaps in another year's time, or maybe two, when more makers have had it in their hands, I will be able to recommend the SM300D2.
Cubic Sensor and Instrument Co., Ltd. PM1006 (aka IKEA VINDRIKTNING)
Finally, we have the PM1006 from Cubic Sensor and Instrument Co., Ltd. Technically, this sensor should not be on this list, as you should definitely not be using it. There are two reasons for that: It is difficult to find, so even if you wanted to use it, you probably couldn't. And it uses inferior technology to the other sensors on this list.
The only reason for the PM1006 to be on this list is that it is possible the easiest to work with. If you haven't heard yet, IKEA sells a USB-C powered air quality sensor called the VINDRIKTNING. Inside it is the PM1006 and enough space for an ESP8266 board. Any data coming from the sensor can be passed to Home Assistant using such a board.
About Liam Alexander Colman
Liam Alexander Colmanis an experienced Home Assistant user who has been utilizing the platform for a variety of projects over an extended period. His journey began with a Raspberry Pi, which quickly grew to three Raspberry Pis and eventually a full-fledged server. Liam's current operating system of choice is Unraid, with Home Assistant comfortably running in a Docker container. With a deep understanding of the intricacies of Home Assistant, Liam has an impressive setup, consisting of various Zigbee devices, and seamless integrations with existing products such as his Android TV box. For those interested in learning more about Liam's experience with Home Assistant, he shares his insights on how he first started using the platform and his subsequent journey.