Reliably informing Home Assistant whether someone is occupying a room has to be one of the most challenging tasks we face on our home automation adventure. In an attempt to cover all bases, I built a cheap (~US$25) and simple chair occupancy sensor, and in this guide I will show you how you can do the same. Although it is a DIY project, This sensor requires no soldering, 3D-printing, or knowledge of electronics.


A must for the home office
As remote work becomes the norm, I've discovered that motion sensors, or passive infrared sensors (PIR), are not sufficient when sitting at a desk for hours. These sensors need substantial movement to activate, more than what typing on a keyboard provides. With my DIY chair occupancy sensor, the lights stay on, regardless of how motionless I may be.
What you will need to build a Zigbee chair occupancy sensor
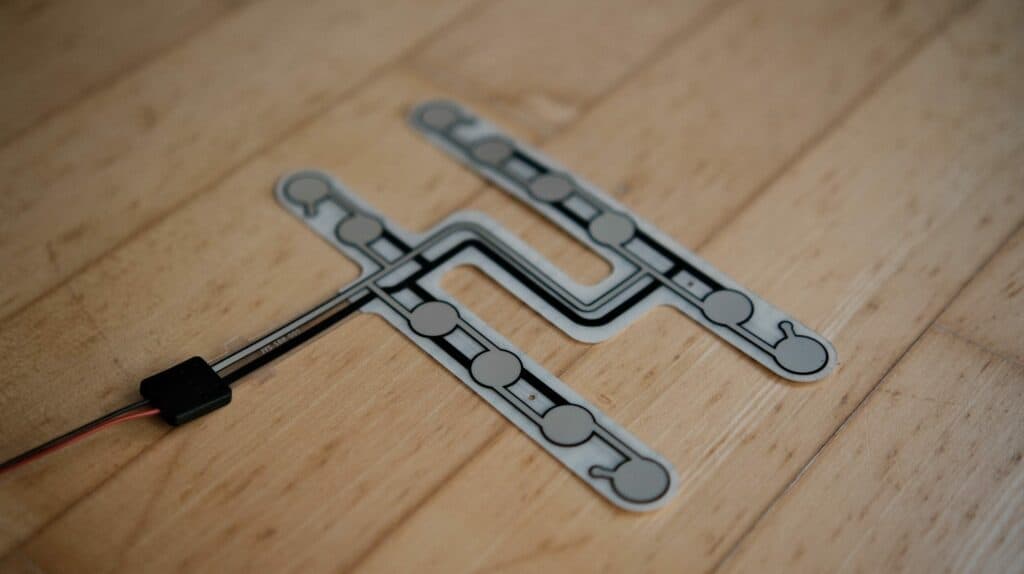
As the title suggests, this project relies on Zigbee, so you'll need one of the Zigbee integrations set up in Home Assistant. I am using Zigbee2MQTT, and ZHA will also work. You'll also need an Aqara/Xiaomi water leak sensor (model SJCGQ11LM). Yes, you read that correctly, a water leak sensor is required. Lastly, to detect a person in a chair, we'll utilize an existing solution: a car seat pressure sensor.
Why I'm using Zigbee for my chair occupancy sensor
A Zigbee sensor offers numerous benefits, primarily its ability to be powered by a single button cell. Its compact size allows for discreet placement under the chair or attachment using double-sided tape. With everything neatly concealed, you can enjoy the chair without worrying about accidentally damaging any cables.

The reason for choosing the Aqara/Xiaomi water leak sensor is quite simple: like other binary sensors, such as a door/window sensor, the water leak sensor is either on (circuit closed) or off (circuit open). Water leak sensors function by completing a circuit when two exposed terminals are submerged in a conductive liquid, like tap water.
Attaching the car seat pressure sensor
What the Aqara/Xiaomi water leak sensor allows you to do is attach wires to the terminals and use the sensor in whatever way you want to. The terminals on this sensor are two small screws you can loosen, wrap a wire around, and tighten again to make sure the wires don't come loose.

The wires we are attacking to it are the two stemming from the car seat pressure sensor. It doesn't matter which wire you attach to which terminal. Simply strip a short section of the sleeving, loosing the screw on the Aqara/Xiaomi water leak sensor, wrap one exposed wire around each screw, and tighten the screws again.
Completing the car seat pressure sensor
Congratulations, you've just created your very own chair occupancy pressure sensor. If your chair has a removable case, you can conveniently place the car seat pressure sensor underneath it. Many popular IKEA office chairs seem to accommodate this.
Ensure that the car seat pressure sensor isn't weighed down too much when the chair is unoccupied, or it may continuously register the seat as occupied.
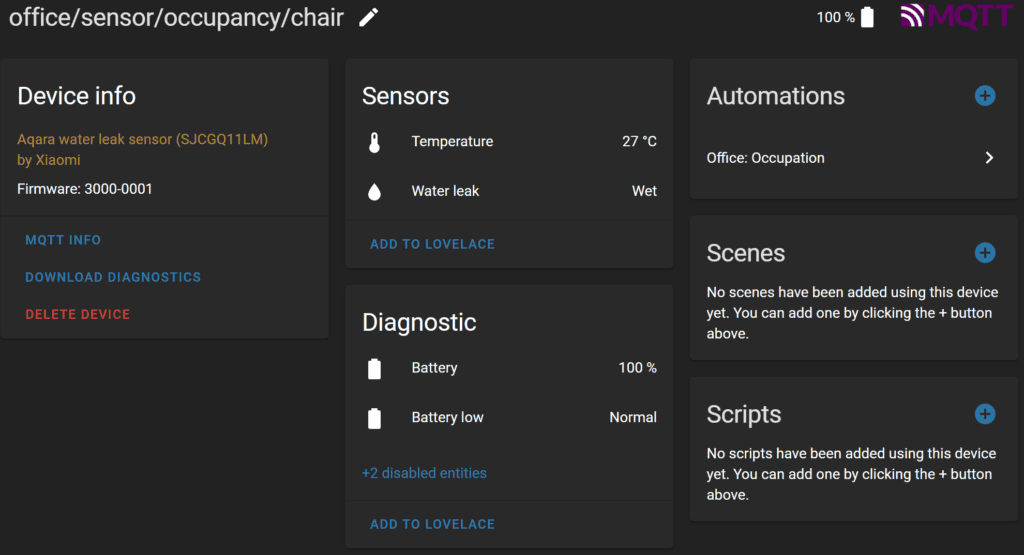
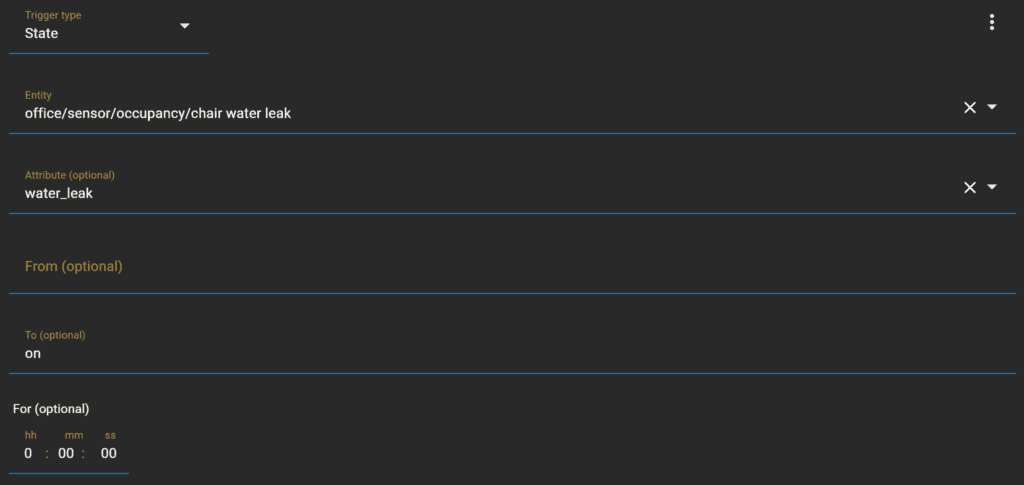
In Home Assistant, this DIY sensor will still appear as a water leak sensor. When using it in automations, simply select the water_leak attribute and use the states on (chair occupied) and off (chair unoccupied). The sensor detects a leak within a few seconds but takes around ten seconds to switch back. This delay should rarely pose an issue.
It's worth noting that the sensor's temperature reading, as seen in the screenshot above, is not useful. I'm unsure if it measures the internal temperature to protect the battery, but in any case, it provides no valuable information. I recommend disabling this entity altogether.

Great info man, I always wanted to build something like that and now I will thanks to you.
One question – can you please post a pic on where exactly did you put the car sear pressure sensor?
Hey there. Sure, I can do that when I have the time. I have a pretty basic IKEA chair (this one) which allows you to remove the fabric part (which is blue in the image). I can then place the sensor between the fabric and the padding, so it’s literally right under my behind, with nothing pressing down on it when the chair is empty.
Regarding the built in temperature sensor – this is similar to other Aqara/Xiaomi sensors. You can set an ‘offset’ to the temperature value in Zigbee2MQTT if you are able to get another reliable sensor close by and see if it tracks it closely. I have this for a motion sensor and it gives a reasonably accurate room temperature with a large offset – although this sensor will probably track your butt temperature!!!
Yes, I read that. However, I put the chair next to my open window when it was much colder outside and the reading didn’t budge. Either way, I have much more reliable temp sensors in the room.
how well is your car seat pressure sensor? since i’m sitting on it all day, now it refuse to bounce back to “unoccupied” state
Hi there. Mine still works as expected. Is there anything else button pressure on yours?