It's highly likely that many Home Assistant users are also 3D printer enthusiasts, thanks in part to ESPHome. Why not bring these two interests together by integrating your 3D printer with Home Assistant? This guide will walk you through the process of achieving this integration using OctoPrint, while also explaining why the most straightforward approach may not always be the best.
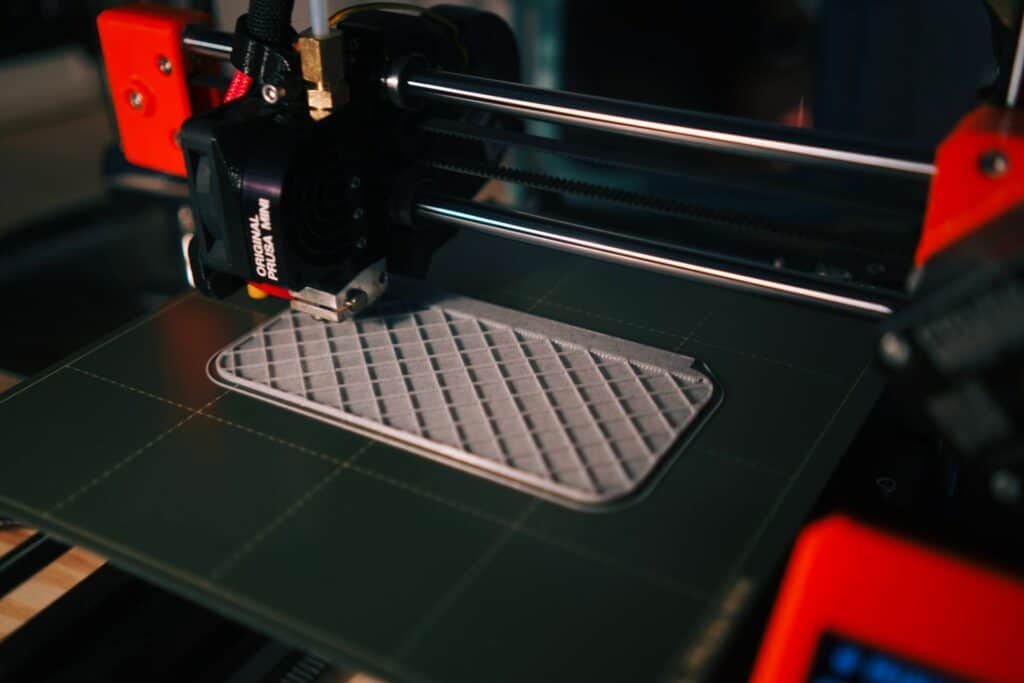
3D printers are thriving
Though the initial buzz around 3D printers may have settled down, these innovative devices continue to be indispensable tools for many creators. A reliable 3D printer can open up a realm of custom projects, including those crafted with ESPHome. Far from becoming obsolete, 3D printers are thriving, albeit without the exaggerated hype of their early days.

Using the native OctoPrint integration in Home Assistant
The most straightforward method for syncing your 3D printer with Home Assistant is by utilizing OctoPrint's native integration. Home Assistant should automatically detect any OctoPrint instances running on your network, but if it doesn't, you can manually select OctoPrint from the list of integrations.
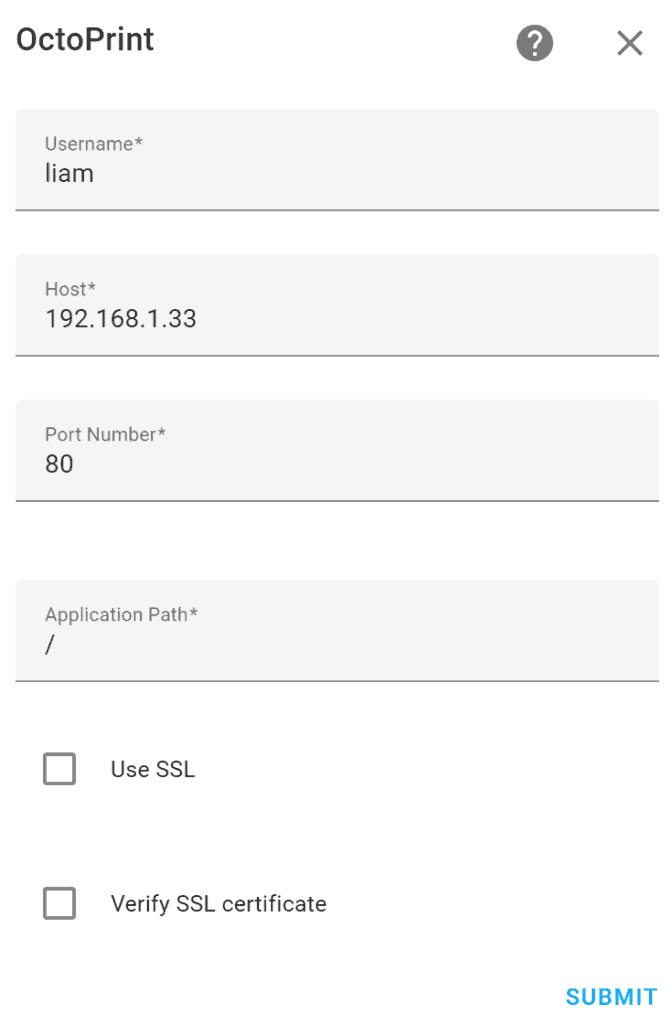
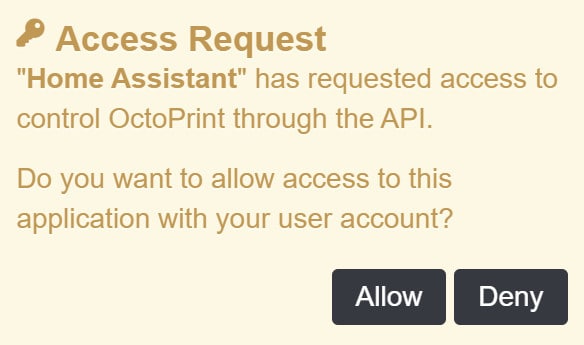
Input your details, including username and host, and remember to disable both SSL options if you're not using certificates. After clicking 'submit', open a new tab, navigate to OctoPrint, and click the 'allow' button in the notification.
What the OctoPrint integration with Home Assistant grants you
This integration grants you access to sensors such as the 3D printer's current status, estimated completion time, target and actual temperatures of both the heated bed and tool, among others. Additionally, you'll have basic control functions like stopping, pausing, and resuming a print.

You can also set up automations, such as sending a notification to your mobile phone whenever a print has finished or the printer encounters an error. While this integration does seem fully featured, it is not what I recommend for those that want total control. For example, the native OctoPrint integration with Home Assistant does not allow for control of OctoPrint itself, nor does it provide you any information on the print. Fortunately, there's a more advanced alternative.
Enhancing the OctoPrint integration with Home Assistant using MQTT
OctoPrint is a powerful platform in its own right, but its true potential is unleashed through the addition of plugins. These nifty extensions can help you keep tabs on your filament spools, receive notifications via Pushover, and even craft timelapses with a connected camera. For our purposes, we'll focus on two particular plugins:

As the name would suggest, these plugins require an MQTT broker, the setup of which I will not be covering here. If you, like me, are running Home Assistant in a Docker container on Unraid, I have a post detailing the setup of the Mosquitto MQTT broker on a sister-site. If you already have a broker setup, this integration is a no-brainer.
Configuring the MQTT plugin for OctoPrint
After installing both plugins and following OctoPrint's instructions, it's time to tweak the MQTT plugin. This entails inputting your host, port, username, and password.
In the tab titled topics, you can select which events the plugin publishes via MQTT. These options should give a clue as to how much more information OctoPrint sends to Home Assistant, compared to the native integration. Finally, you also have the option of customizing or disabling the last will and status messages.

Configuring the HomeAssistant Discovery plugin for OctoPrint
Configuring the HomeAssistant Discovery plugin is a breeze – simply fill in three fields: your device name, the manufacturer, and your 3D printer's model. Avoid tampering with the discovery topic, as this may prevent Home Assistant from utilizing MQTT auto-discovery. The node ID, a random string, can be left as is.

Conclusion: Use MQTT to integrate OctoPrint with Home Assistant
With both plugins configured, Home Assistant will discover the entity and automatically add controls and sensors. Compared to the native OctoPrint integration, this options not only allows you to pause/resume/stop a print, but also gives you control over the system. You can reboot or shutdown the system, or restart the OctoPrint server if something is going wrong. Additionally, you have access to an emergency stop button, and you can control OctoPrint's connection to the 3D printer.

Moreover, the MQTT integration retains access to the same sensors while enhancing your monitoring capabilities. It keeps you informed about the connection status of the 3D printer, the file being printed, additional time options, and the SoC's temperature. This valuable data can help you determine if relocating your motherboard outside the enclosure is necessary.
To sum it up, integrating OctoPrint with Home Assistant via MQTT offers a comprehensive and detailed user experience. If you're already running a broker, this should be your go-to choice. And if you're not, it's time to give serious thought to embracing MQTT for an upgraded OctoPrint experience.

If you use the standard integration, and are using https:// for octoprint web app, don’t forget to check Use SSL AND ALSO CHANGE THE PORT TO 443!!
Can’t believe I spent nearly 40 minutes banging my head over that.