The Home Assistant Beginner’s Guide Part 3: Integrating Home Assistant with the Google Assistant/Google Home
Disclosure: This post contains affiliate links. If you click through and make a purchase, I will earn a commission, at no additional cost to you. Read my full disclosure here.
Update: May 31, 2019
Google Home is now Google Nest
Since my fingers first hit the keyboard for this piece, the Google Home line-up has given way to the Google Nest range. Currently, we're talking about the Nest Audio and Nest Mini. However, both are still powered by the same trusty Google Assistant found on the original Google Home devices. I've tweaked this beginner's guide to reflect these updates.
But let's be clear, this integration isn't just about turning your smart speaker into a Home Assistant sidekick. Google Assistant is sprouting up everywhere, expanding its footprint by the day. From your trusty smartphone, to wristwatches, security cams, and even car dashboards, Google Assistant is popping up like mushrooms after a rainstorm. It just so happens that Google Home was the pioneer that first introduced Google Assistant to our humble abodes.
Welcome back, home automation enthusiasts! As we dive into the third installment of our Home Assistant Beginner's Guide, we're tackling the exciting task of syncing your Home Assistant with Google Assistant, which encompasses devices like Google's Nest Mini, Nest Audio, Nest Hub, and Pixel smartphones. By the end of this guide, you'll be commanding your Google Assistant to adjust lights to your preferred hue and control various devices connected to Home Assistant.
This guide will walk you through integrating Home Assistant with Google Assistant, sans the assistance of Nabu Casa. While subscribing to Nabu Casa simplifies the process and supports Home Assistant's future development, I've chosen the more hands-on approach, managing several services alongside Home Assistant on my server. However, if you decide to support through Nabu Casa, you're contributing to a worthy cause.
But be warned, this part of the Home Assistant Beginner's Guide may be the most challenging yet. It involves a fair amount of coding and handling multiple tools. But don't worry, I'll simplify it as much as possible. We're all beginners here!
Clarifying the confusion: Google Home, Google Nest, and Google Assistant
Before we jump into the guide, let's clear up some common confusions. When referring to Nest Audio or Nest Mini, I'm talking about the hardware—the physical smart speakers in your home. Google Assistant, on the other hand, is the software brain behind these devices, powering their capabilities. These terms are often used interchangeably, sometimes even by Google, which can lead to confusion. Lastly, Google Home is the overarching home automation service from Google, with apps available for your smartphone, smartwatch, smart speakers, and smart displays.
What You Need to Get Started
Before you begin pairing your Google Assistant with Home Assistant, there are a few essentials you'll need:
Smartphone with Google Home App: Start with a smartphone capable of running the Google Home app. This can be any iOS or Android device. While it's not mandatory to have a Google Home, Nest, or Nest Mini device, possessing one can significantly streamline the setup process.
Online Access for Home Assistant: Your Home Assistant should be accessible over the internet. If you're uncertain about setting this up, a detailed guide is available in Home Assistant Beginner's Guide Part 2.
Advanced Text Editor: It's highly recommended to use a sophisticated text editor like Visual Studio Code for file editing. This will greatly simplify your coding endeavours and enhance the overall experience.
Guide Focus: Please note, this guide is tailored primarily for Windows users, as I'm unable to verify the steps on Apple devices.
By ensuring you have these items ready, you'll be well on your way to a successful integration of your Google Assistant with Home Assistant.
Getting started with gactions CLI
Your first port of call is downloading the gactions CLI — this is the command line interface that you'll use to test and update your integration.
Once you've downloaded the correct version for your operating system (most likely x86_64), copy the file into a new, empty folder. In that same folder, create a text file and rename it 'project.json' (be sure to enable 'file name extensions' in Windows Explorer, or you'll end up with a file named 'project.json.txt').
Open the file with Visual Studio Code, and populate it with the following code, replacing the URL with the one you set up with Duck DNS:
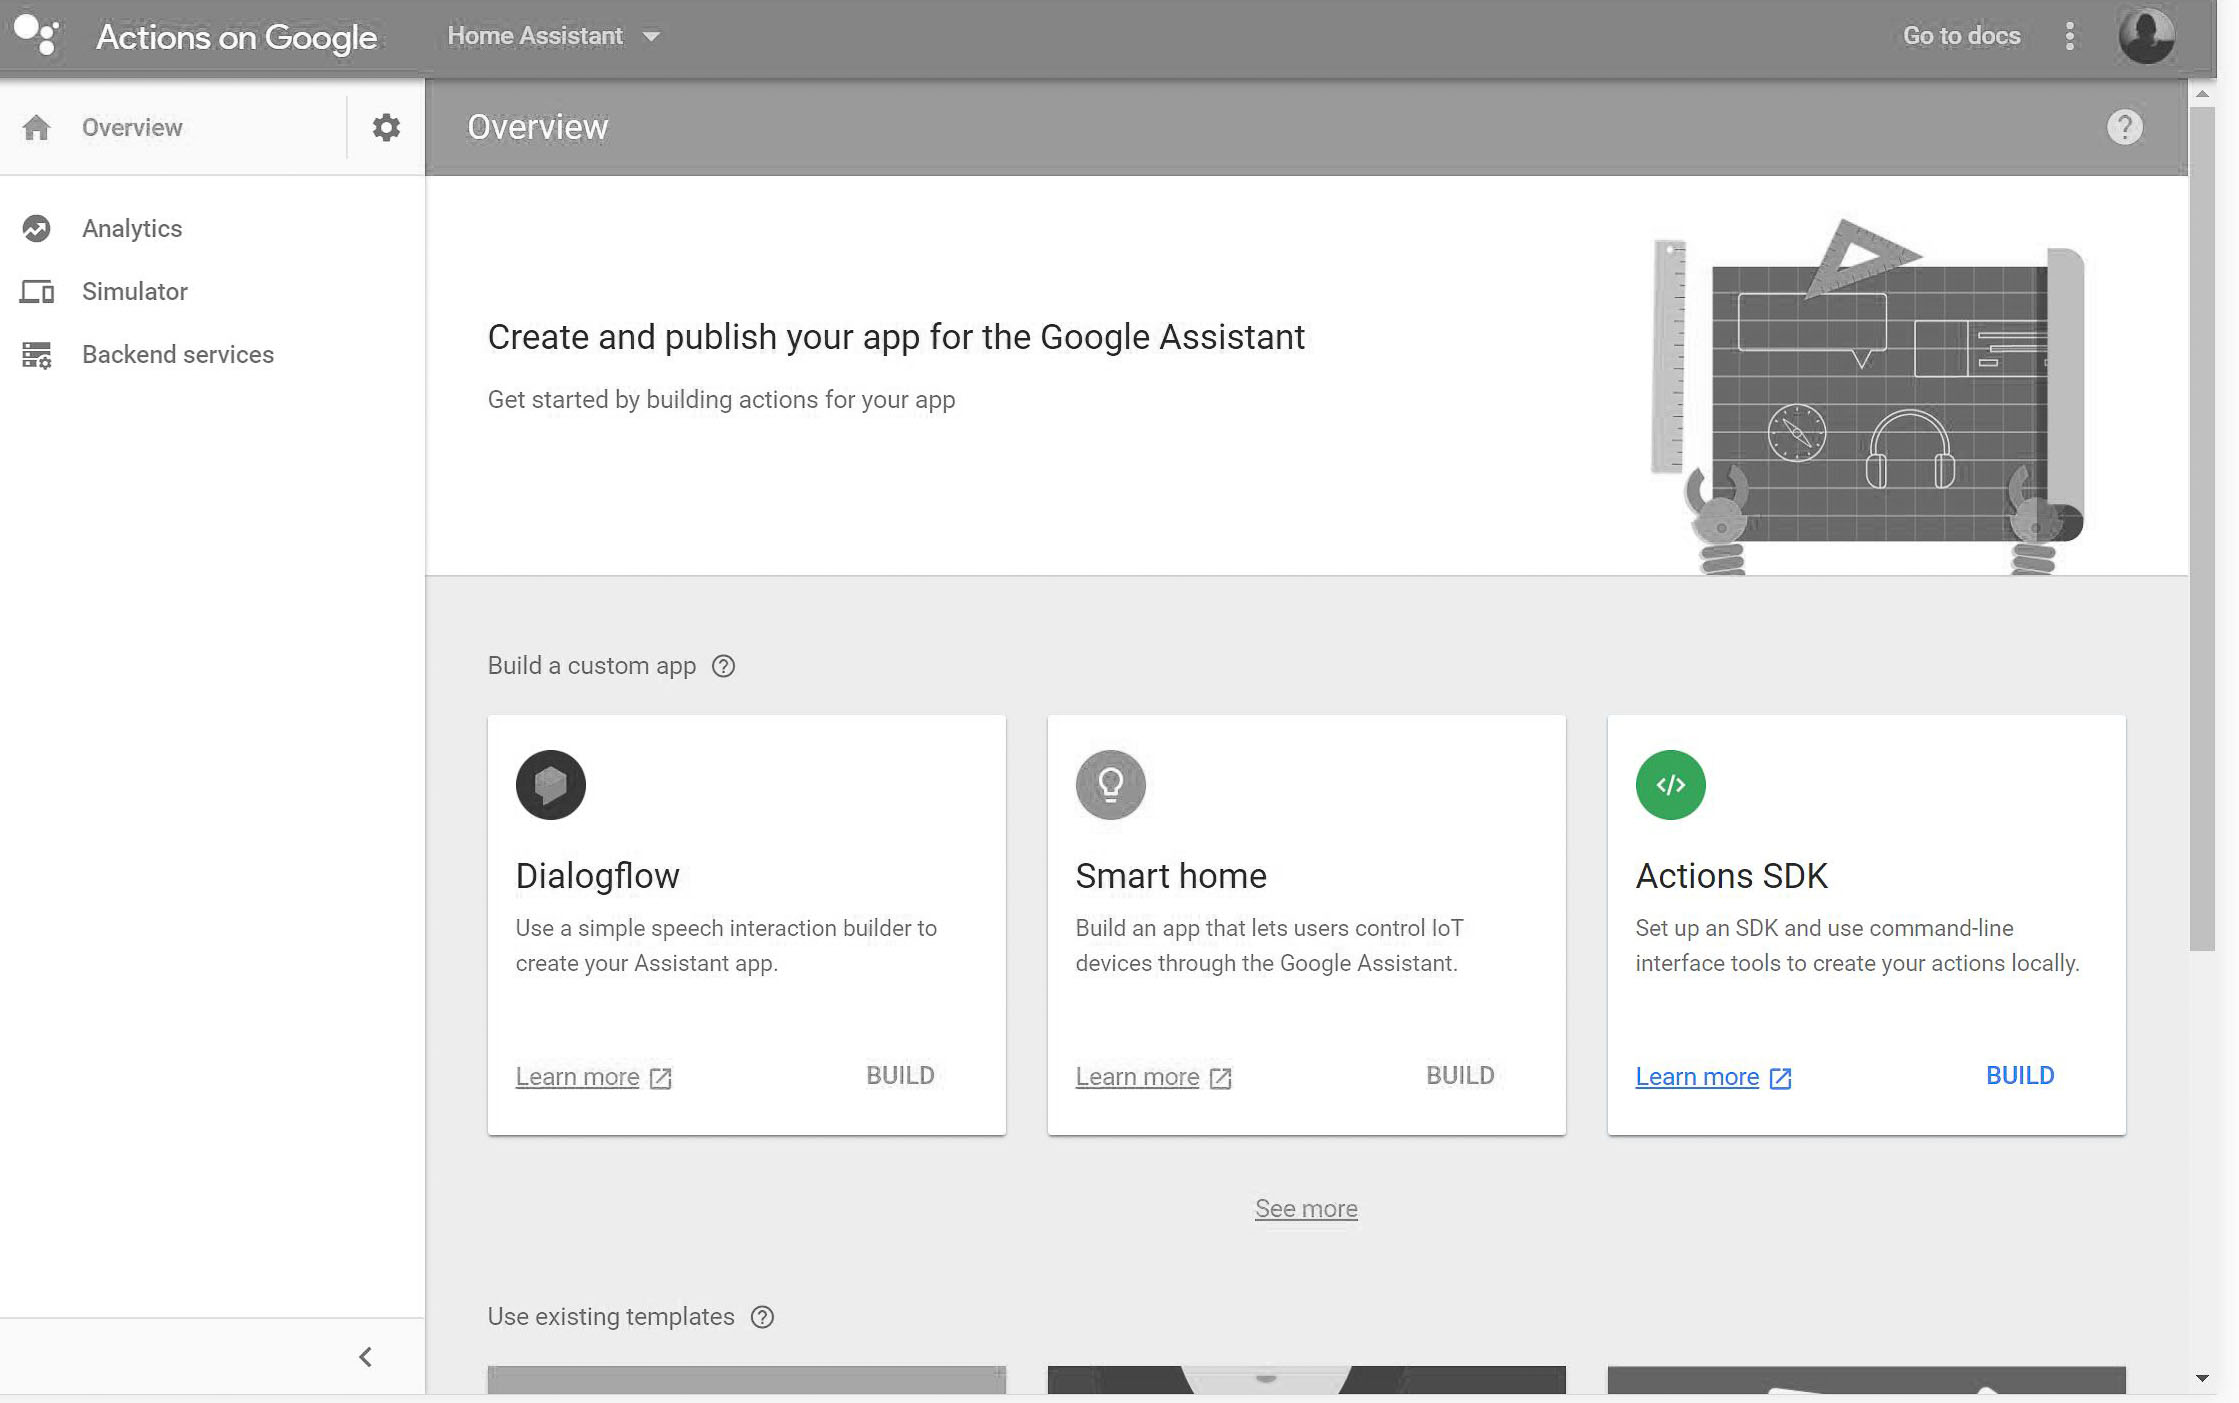
Head over to the Actions on Google developer console and start a new project. Choose a project name and your country, then hit 'create project'. You'll be greeted by a lot of jargon that might as well be in another language. Don't worry, we're only interested in the 'Actions SDK'. Click on 'Build'.
Copy the code ('$ gactions update…') and paste it into an empty notepad – we'll need that later. In the notepad, replace 'PACKAGE_NAME' with project.json and replace the '$' with './' if you're using Windows.
Here's what your code should look like on a Windows machine:
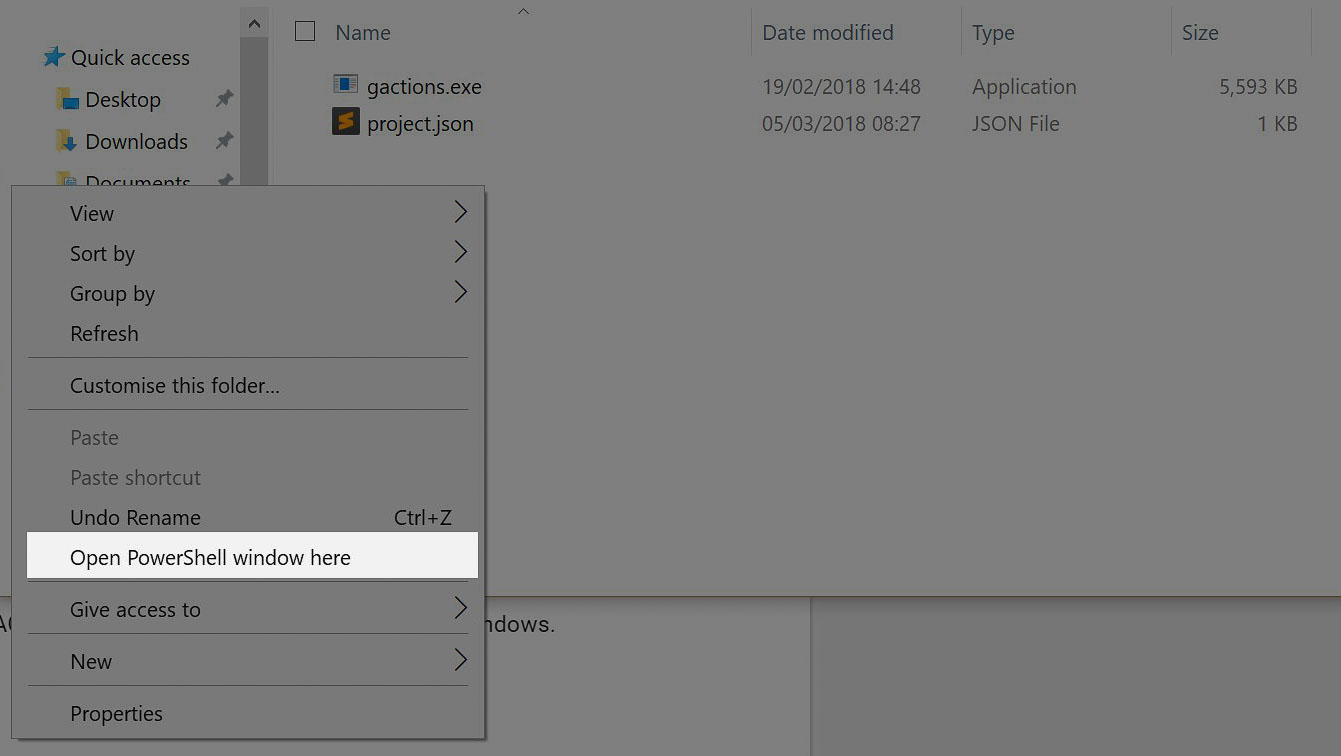
Open the folder we created for the gactions CLI in the Windows Explorer. While holding down shift, right-click anywhere inside the folder. You should see an option titled 'Open PowerShell window here' – click on that.
Copy and paste the code from your notepad and paste it into the PowerShell window using 'CRTL+V'. Press 'Enter/Return' on your keyboard to run the code.
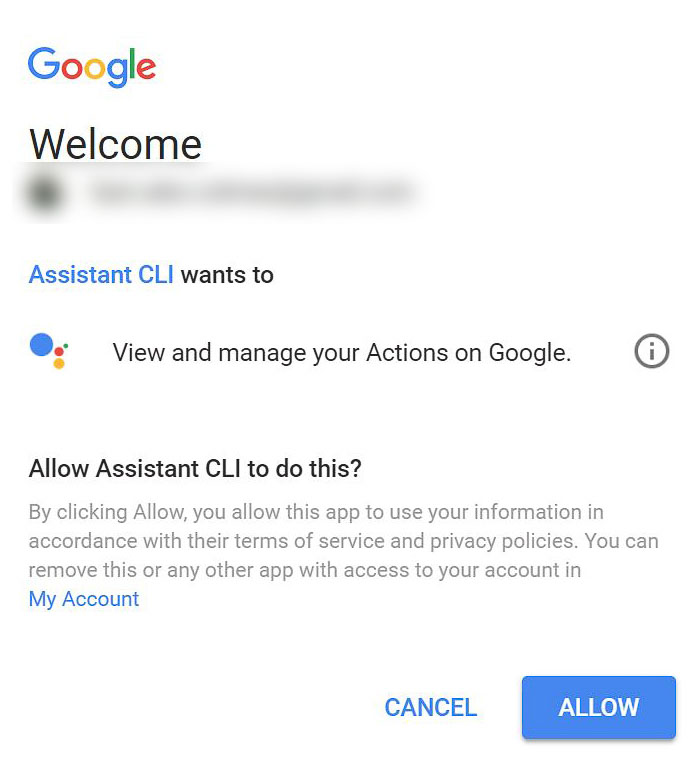
After running the code, you'll be prompted to visit a URL. Copy and paste that URL into a browser and allow 'Assistant CLI' to view and manage your Actions on Google. You'll be given a long string of code in return – copy it and paste it into the PowerShell window. Soon, you'll get a message with a URL – copy that URL.
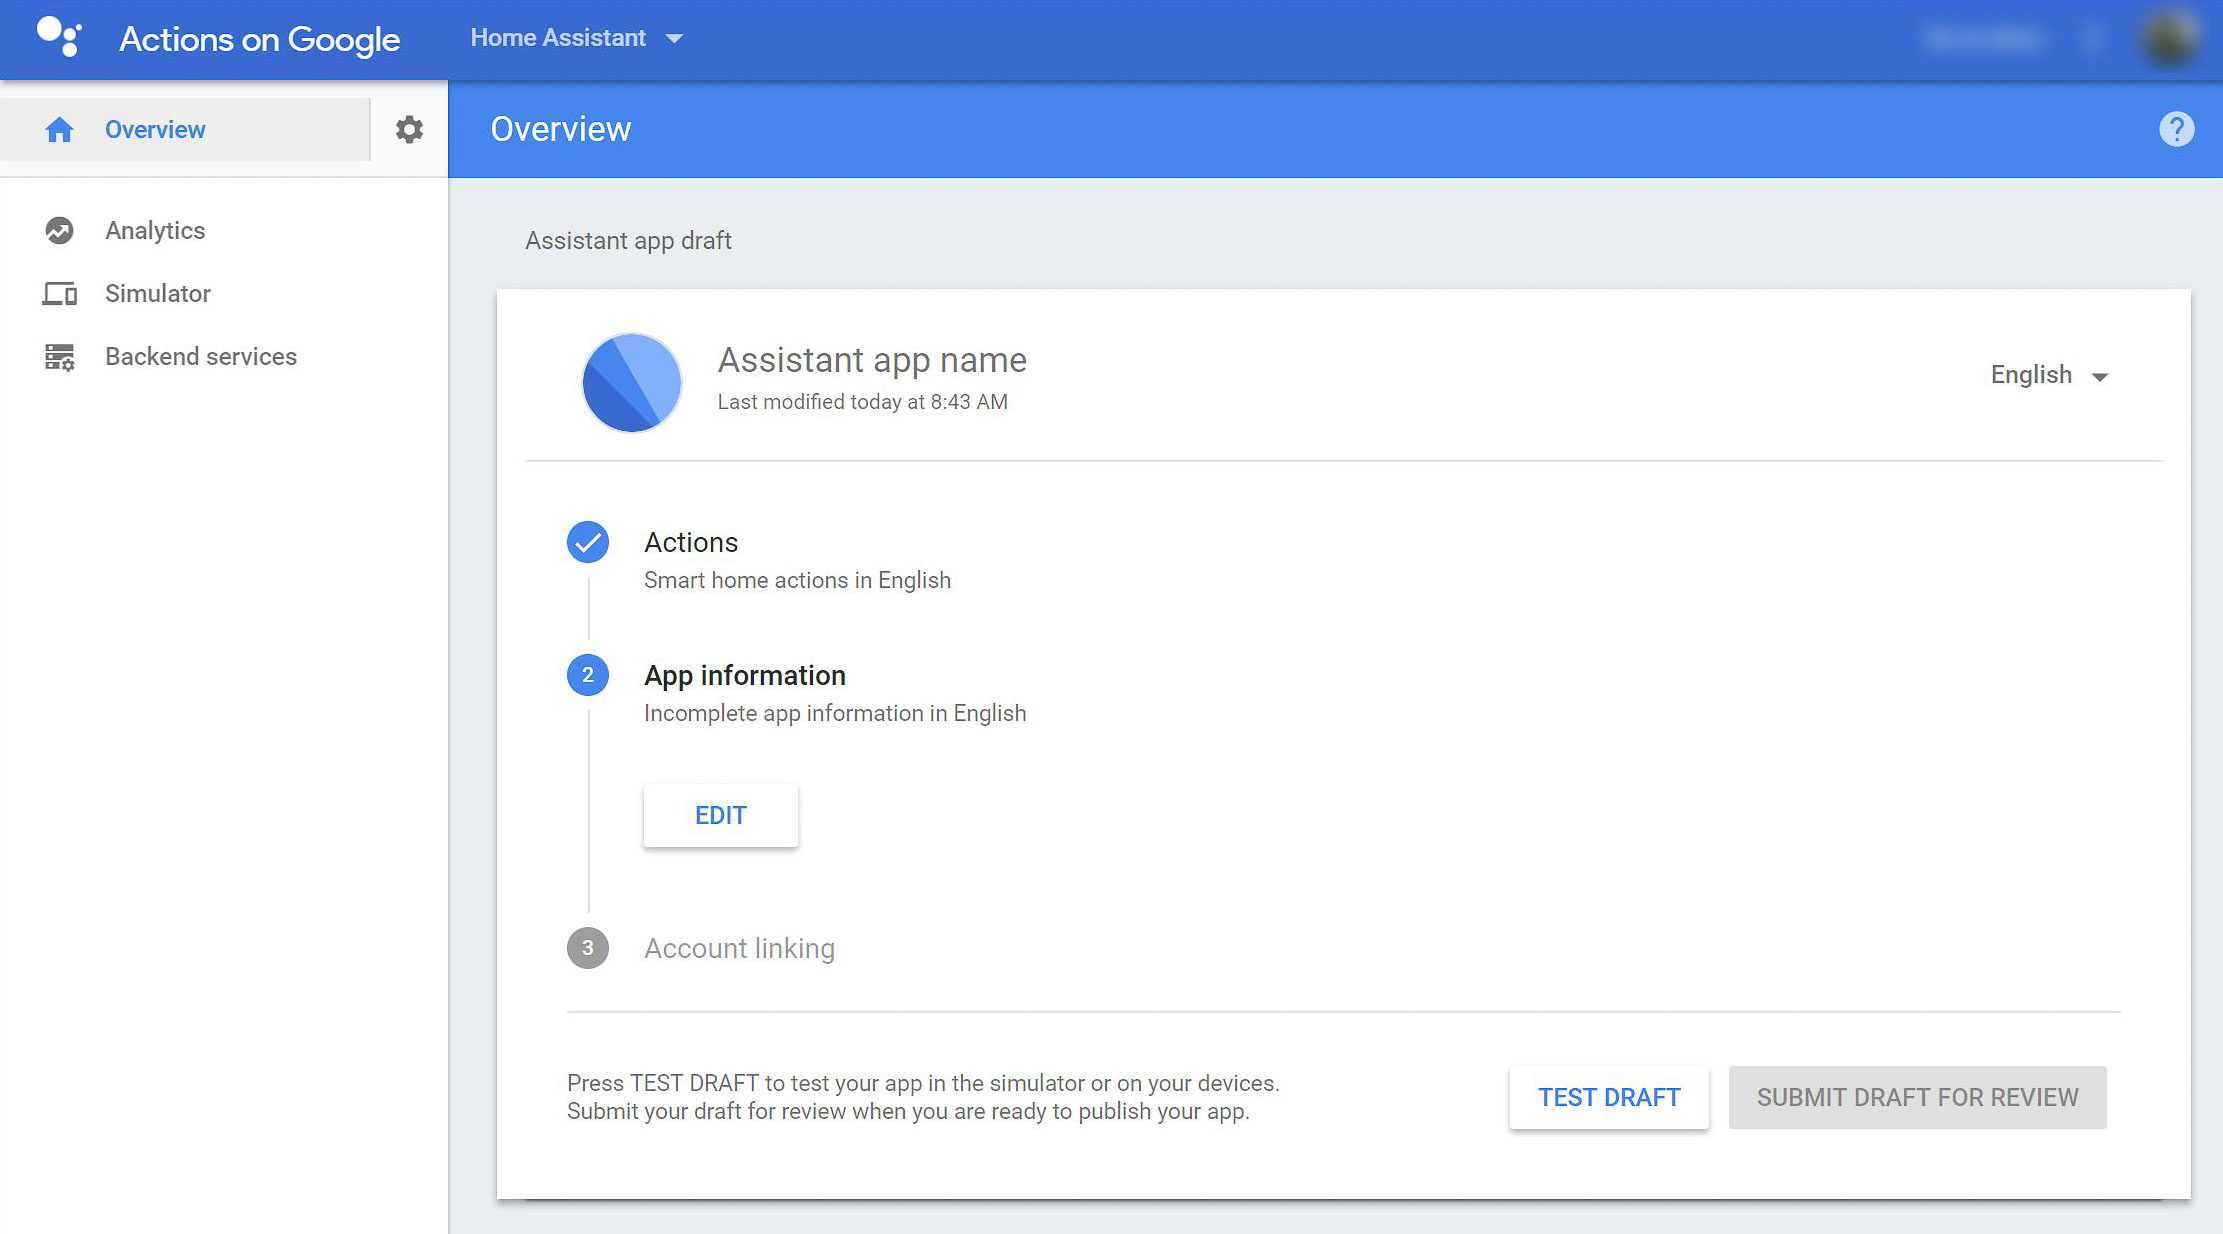
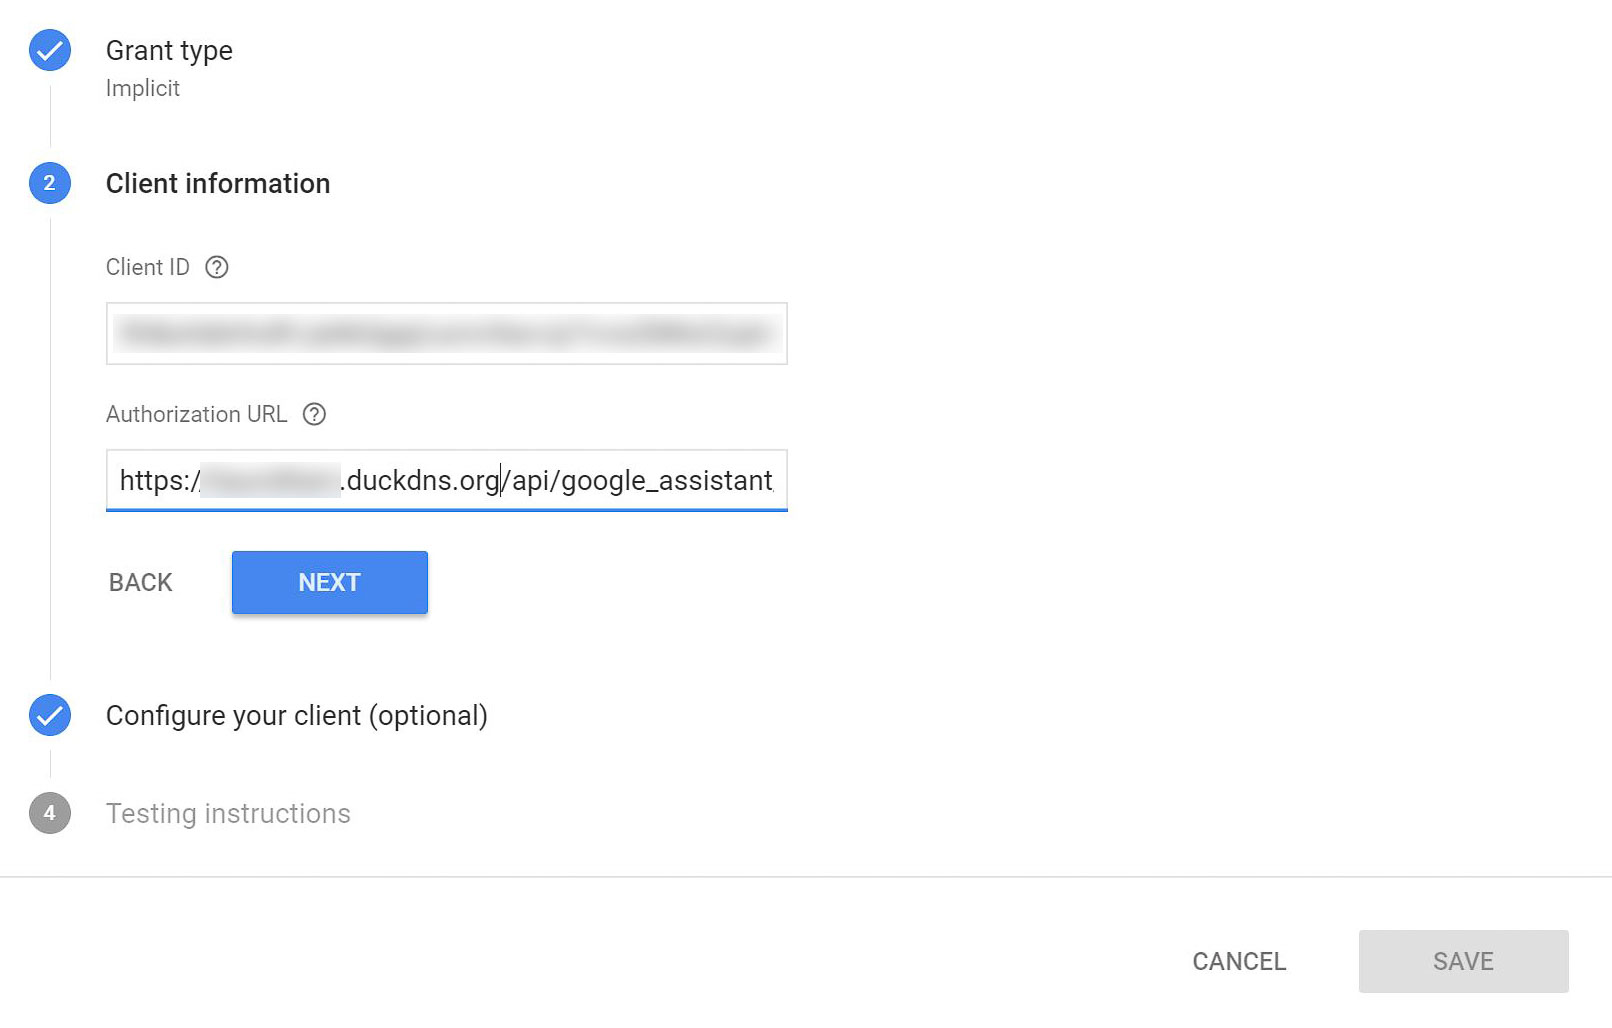
Open the copied URL in a browser and fill in the required 'App information'. Once Google is satisfied with the details you've provided, click save. Next, click on 'back', select 'Account linking', and click on 'Edit'. Fill in the necessary information, and when prompted, select the implicit grant type. For the 'Client ID', you're going to need a long, random, and secure string. You could use something like the Random Password Generator for this – just make sure to select the maximum length.
Save this string in a notepad, we'll need it later. The 'Authorization URL' should be your Home Assistant URL, plus '/api/google_assistant/auth': https://YOUR_HOME_ASSISTANT_URL.duckdns.org/api/google_assistant/auth
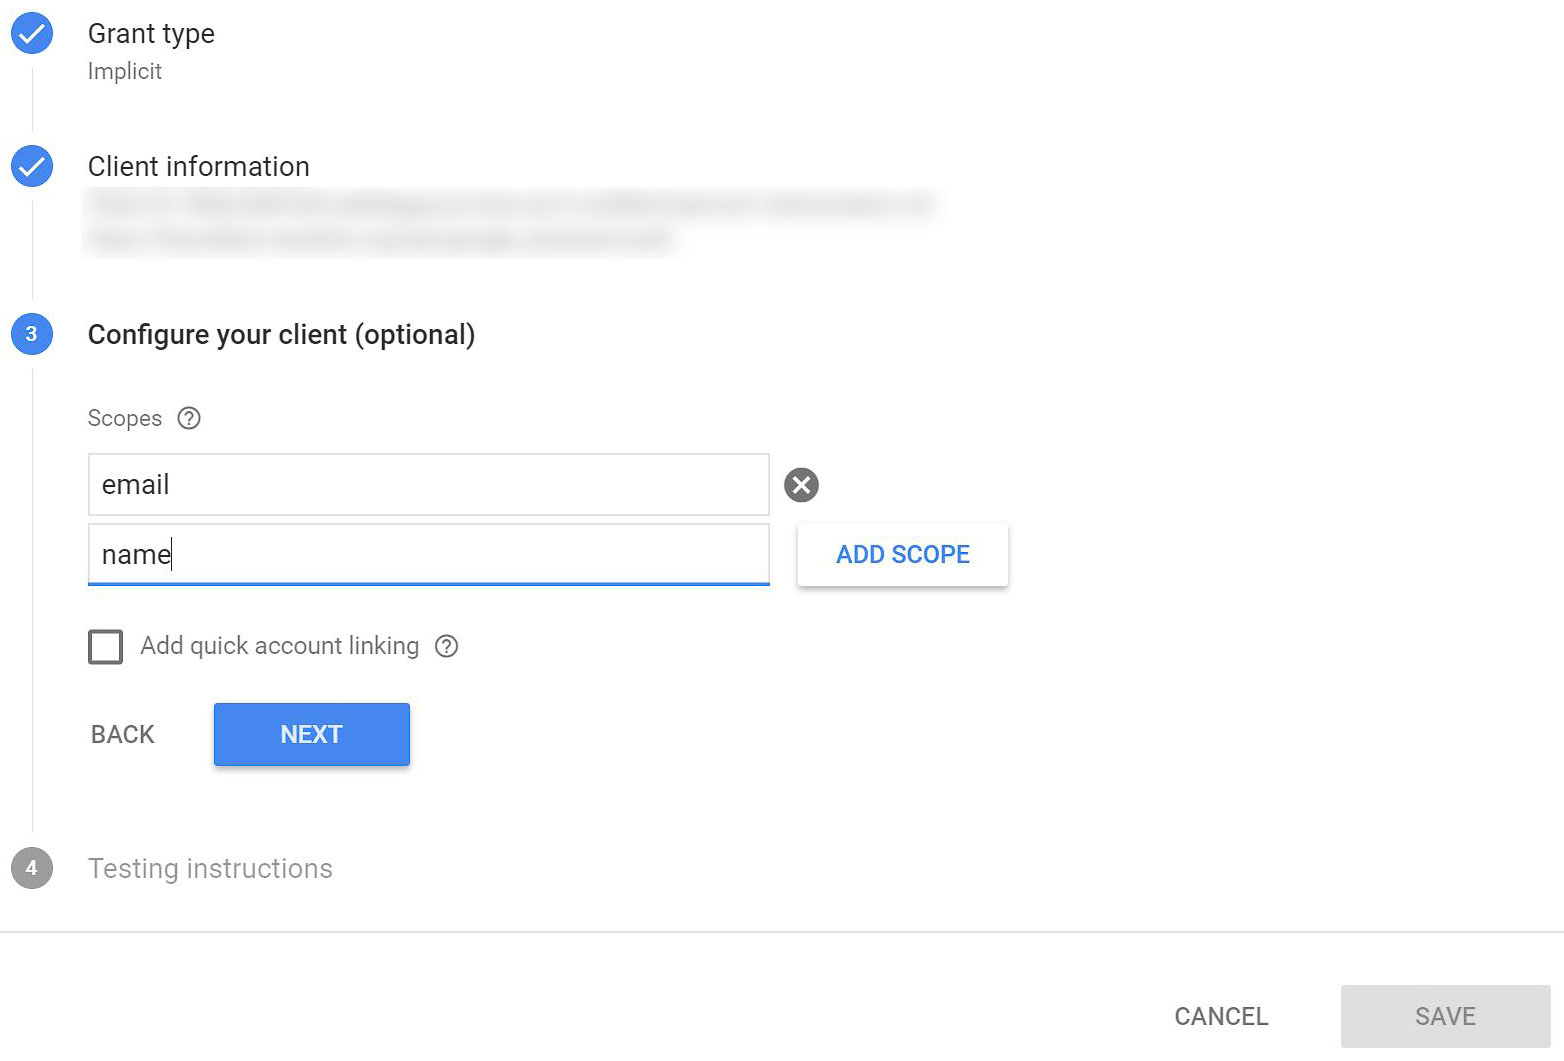
Add two scopes: 'name' and 'email'. Thereafter, add some random gibberish in the testing instructions and click save.
Finally, with all the information entered, click on 'TEST DRAFT'.
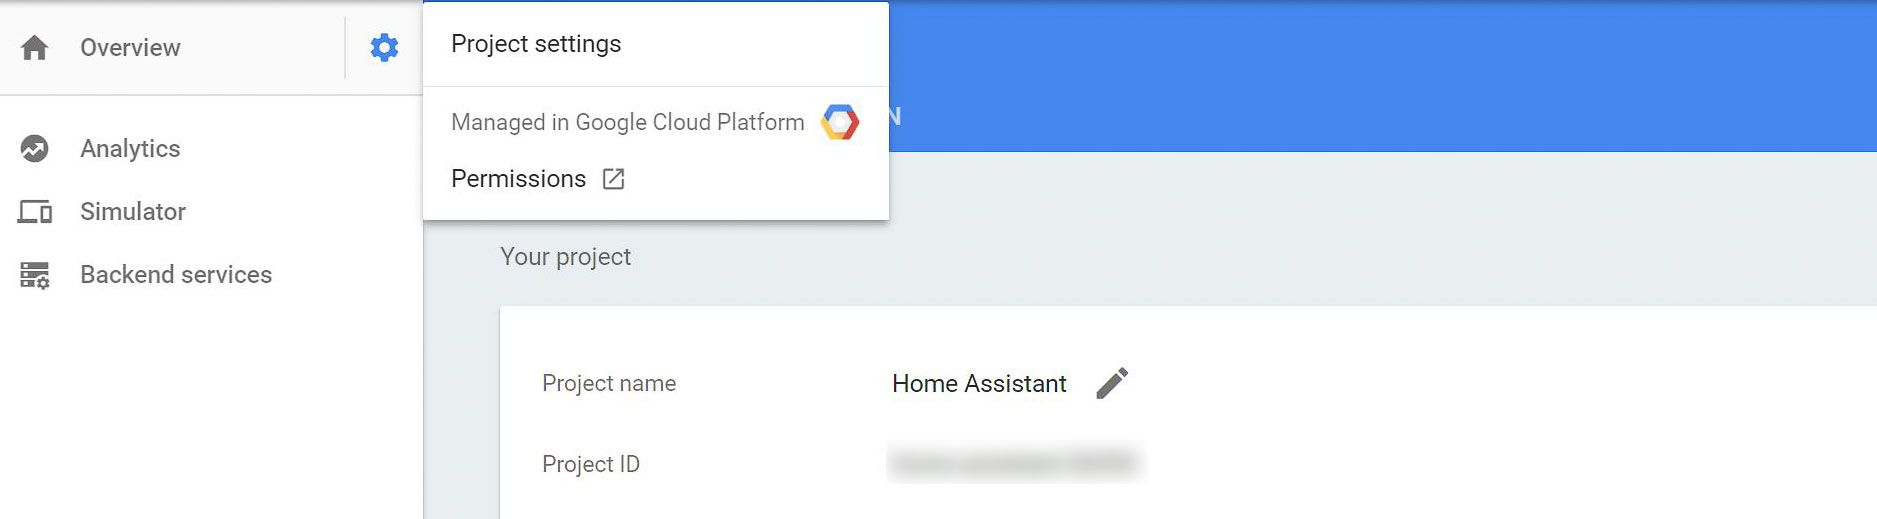
Once you've done that, click on the settings cog in the top-left corner and open the 'Project settings'. Here you'll find your 'Project ID'. Copy it into your notepad.
Giving your Home Assistant the HomeGraph API power-up
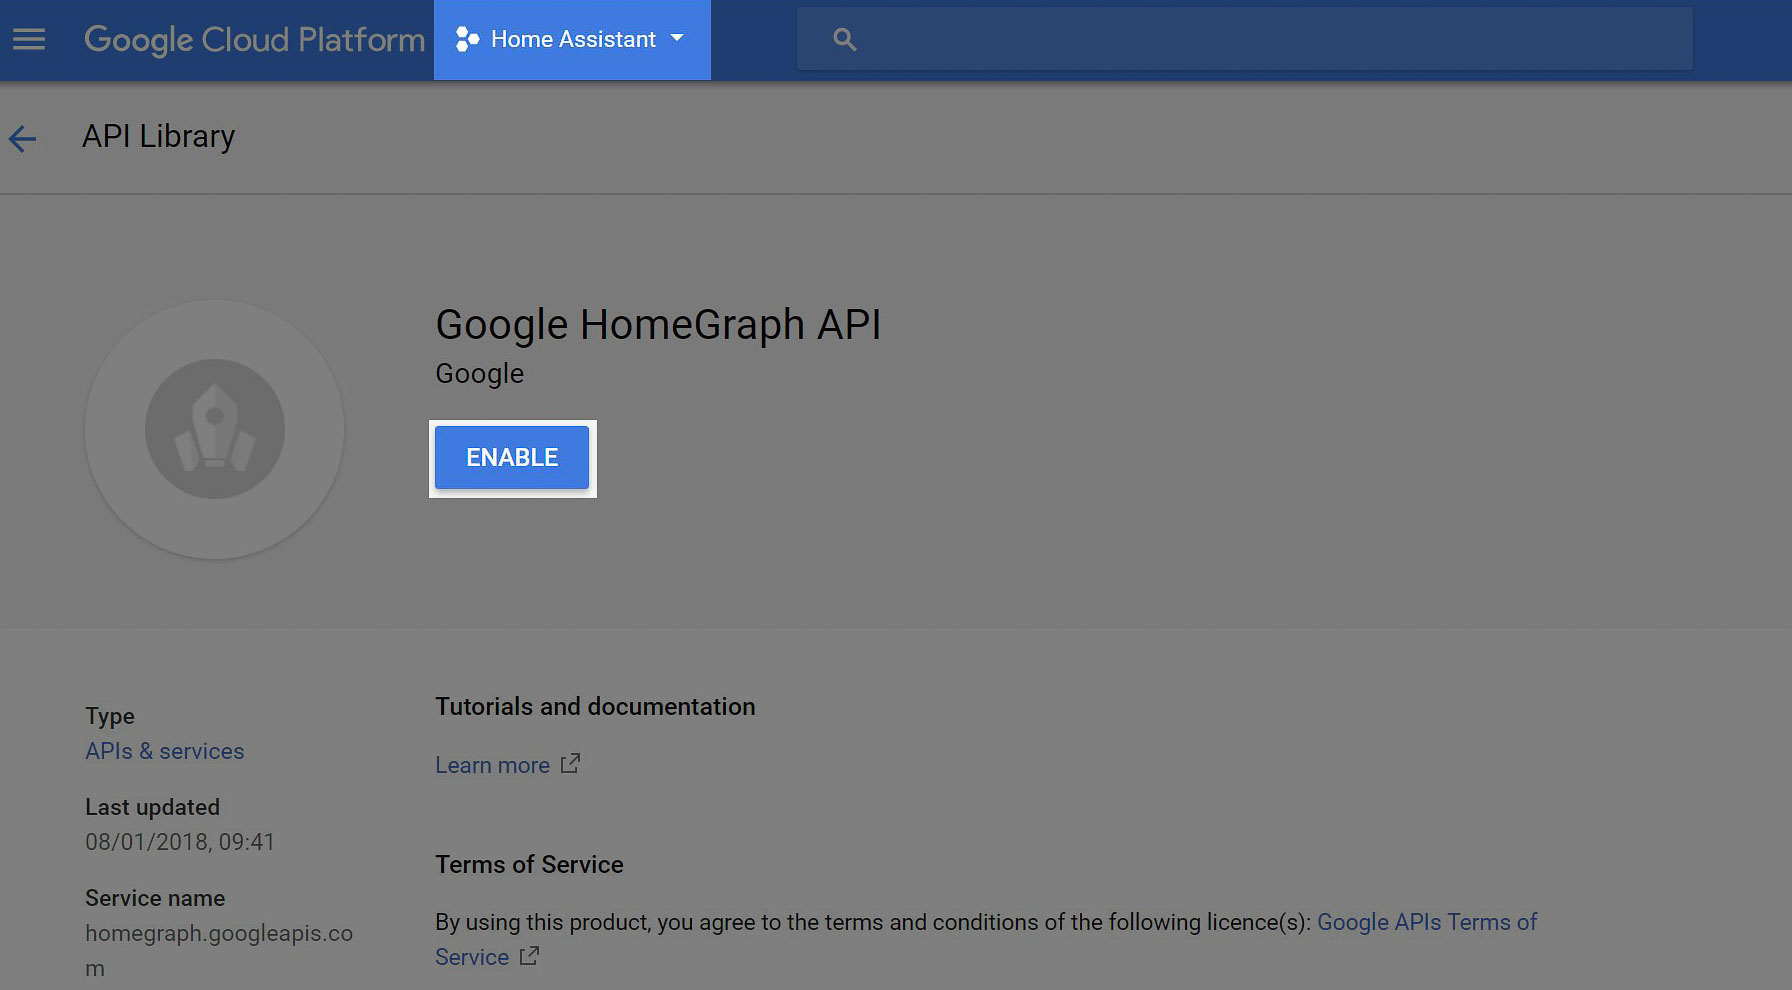
While this isn't a must-do, it's a step that's sure to make your life easier, and who doesn't want that? With the help of the HomeGraph API, your Google Assistant will be able to keep up with the latest updates on your tech terrain. Just tell it to “sync my devices”, and it'll align your Home Assistant devices with itself every time you bring a new gadget to the team or tweak an existing one. So, let's get to it. Here's how you can activate this helpful feature:
Pick your project from the list and hit the ENABLE button.
Once that's done, click MANAGE. In the menu on the left, you'll find Credentials. Click on that and then on Create credentials. From the drop-down menu, select API key.
Voilà! You now have a new API key on the list. Grab it and copy it to your notepad.
Tuning up your Home Assistant
Keep your notepad at arm's reach and pull up the configuration.yaml. Here's where you'll need to conjure up another unique string for your access_token. Tweak the following code with your info, and then give your Home Assistant a quick restart from the Web UI. Be patient until it's fully booted:
Now, grab your smartphone and fire up the Google Home app. Make your way to Home control (it's hiding in the menu). Tap the big + button to add new devices (in this case, our friend, the Home Assistant). The project you've just created will be sitting at the top of the list, sporting a [test] badge. Add the device and watch as all your devices set up in Home Assistant make their grand entrance!
About Liam Alexander Colman
Liam Alexander Colmanis an experienced Home Assistant user who has been utilizing the platform for a variety of projects over an extended period. His journey began with a Raspberry Pi, which quickly grew to three Raspberry Pis and eventually a full-fledged server. Liam's current operating system of choice is Unraid, with Home Assistant comfortably running in a Docker container. With a deep understanding of the intricacies of Home Assistant, Liam has an impressive setup, consisting of various Zigbee devices, and seamless integrations with existing products such as his Android TV box. For those interested in learning more about Liam's experience with Home Assistant, he shares his insights on how he first started using the platform and his subsequent journey.
Comments
STEVE
On the Google Cloud Platform- Homegraph API- Create Credentiials I only get these options:
OAuth Client ID
Service Account
Help Me Choose


On the Google Cloud Platform- Homegraph API- Create Credentiials I only get these options:
OAuth Client ID
Service Account
Help Me Choose
I do not see API Key.
Am I doing something wrong?