
On the agenda today, I'll walk you through opening up Home Assistant to the internet by setting up a custom URL via Duck DNS and putting a security blanket around it with Let's Encrypt. We'll also cover which router ports need a bit of tweaking to get everything up and running.
Contents
- Where we're at in the Home Assistant journey
- Be weary, privacy-conscious Home Assistant user
- Unleashing Duck DNS on Home Assistant
- Setting Home Assistant to a Static IP
- Signing up for a Duck DNS account
- Installing and configuring the Duck DNS add-on for Home Assistant
- Configuring Home Assistant's internal and external URL
- Guiding Home Assistant to the SSL certificates
Where we're at in the Home Assistant journey
So, you've got your Raspberry Pi loaded with Home Assistant, automated backups good to go, and the Studio Code Server add-on installed. Now it's game time. Ever dreamt of controlling your smart home from the beach or your office? This guide will show you how to make that dream a reality, all without spending a dime, thanks to Duck DNS.
Be weary, privacy-conscious Home Assistant user
A word of caution to those who prioritize privacy: the following steps may not be your cup of tea. We're about to open your Home Assistant to the online world, and that comes with certain risks. So, before we dive in, make sure you've set a password for your Home Assistant account that would make Fort Knox proud.
Unleashing Duck DNS on Home Assistant
Duck DNS, a dynamic DNS currently free of charge, is hosted on Amazon Web Services (AWS). It points a subdomain of duckdns.org to your chosen IP. With this nifty tool, you can usher any locally running service onto the internet stage (remember that just because you can do something, doesn't mean you should do it). It's compatible with virtually every operating system out there and a wide range of routers. Kept afloat by Patreon subscribers, Bitcoin donations, and various sponsors, Duck DNS is quite the versatile tool.
Pairing Duck DNS with Home Assistant is a breeze. No need to sweat about having a static IP or the right certificates. The Home Assistant add-on is like your personal tech butler – it updates your Duck DNS subdomain with your current public IP and ensures the free Let's Encrypt certificates are always in check.
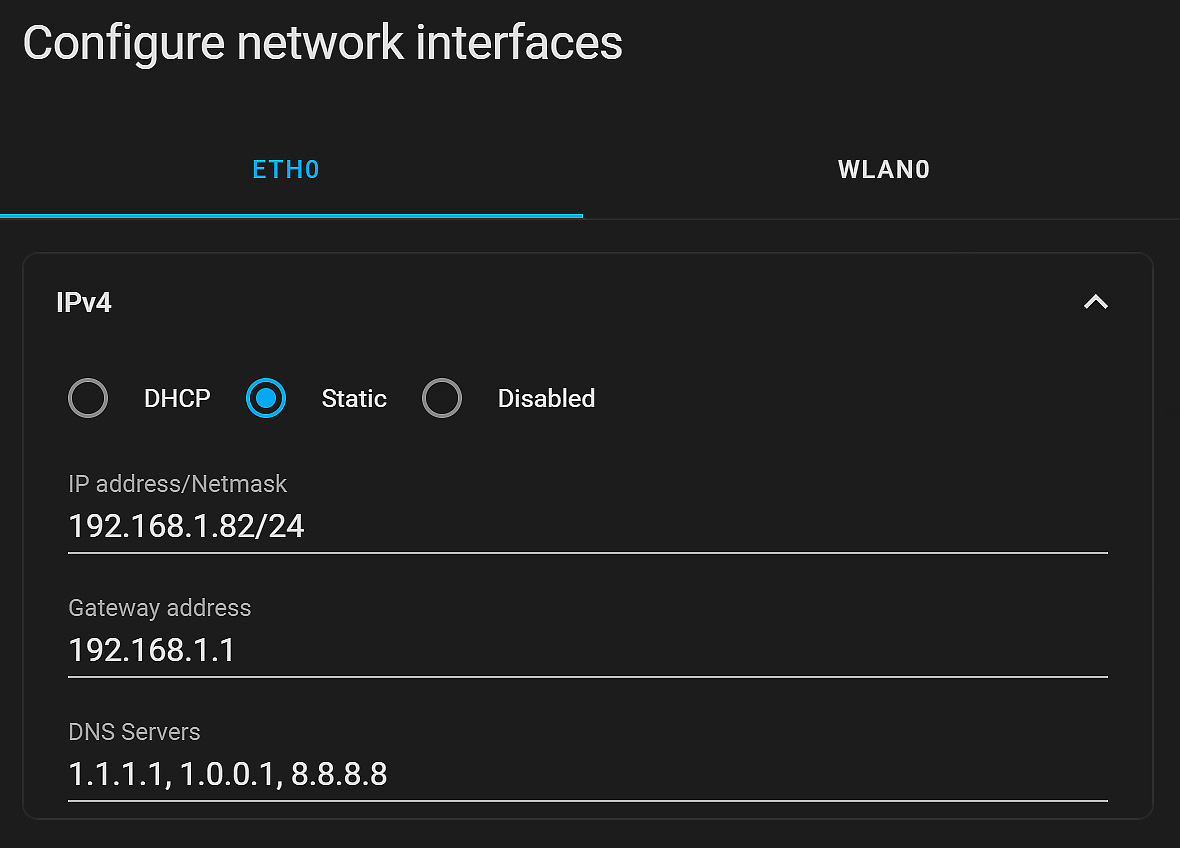
Setting Home Assistant to a Static IP
Before we go any further, it's crucial to set Home Assistant to use a static IP. The good news? Home Assistant has an inbuilt feature for this. Head over to the Home Assistant Dashboard, go to Settings, System, and then Network. Here, you'll find the 'Configure network interfaces' card, listing your wired and wireless network interfaces.
If you've been following my advice, you'll be using a wired connection, aka ETH0. Simply switch from DHCP to Static, and Home Assistant will autofill the current configuration it got from the DHCP. In case the info doesn't appear automatically, I've previously covered how to find your gateway and IP address.
Why is all this necessary? Well, we'll need to set up port forwarding later. If the DHCP lease expires and your Raspberry Pi running Home Assistant gets a new IP address, the port forwarding will hit a snag.
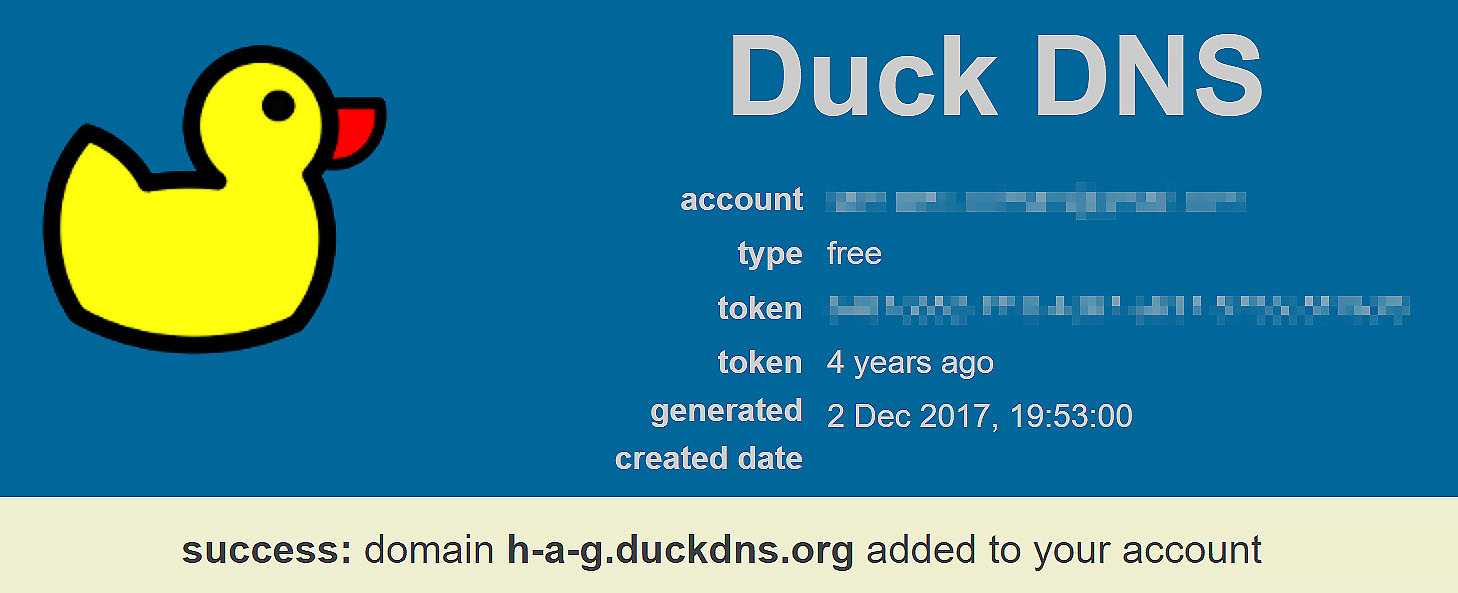
Signing up for a Duck DNS account
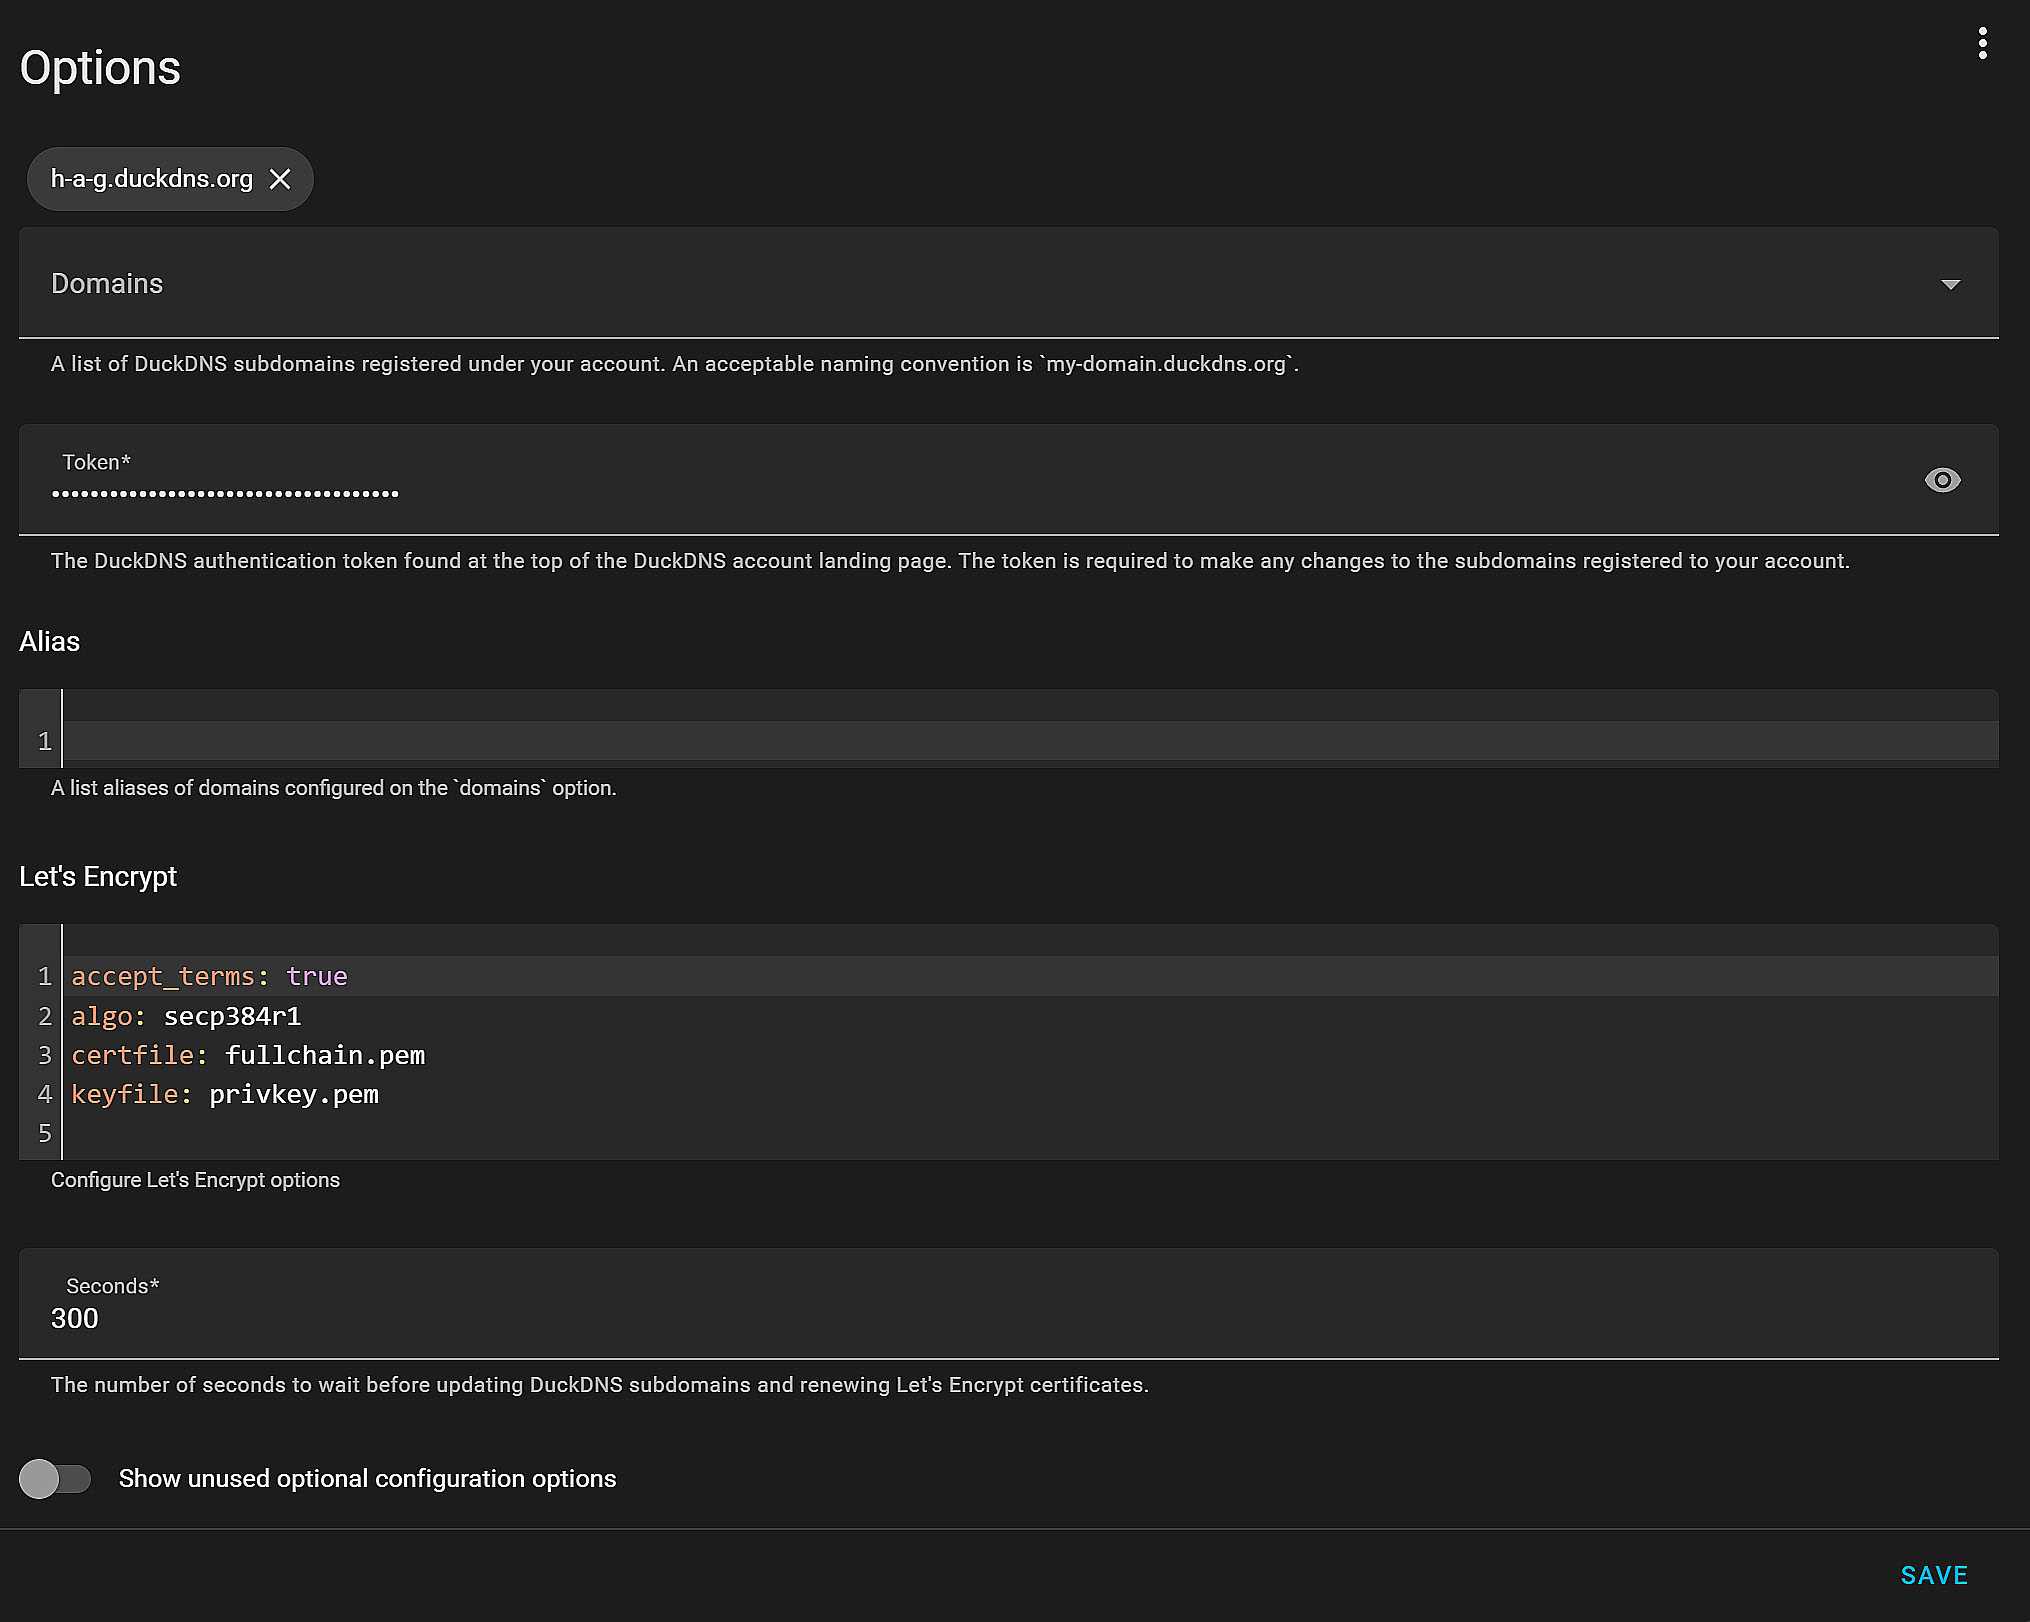
Jumping into the world of Duck DNS is as easy as pie. All it takes is a log-in via your Twitter, Google, GitHub, or Reddit account. Once you're in, it's time to claim your subdomain, which you can do right there in the visible text field. Now, listen up, pay attention to your token (it's like your secret handshake with Duck DNS). As with all tokens and passwords, it's precious, like your grandma's secret cookie recipe. So, never, ever share it.
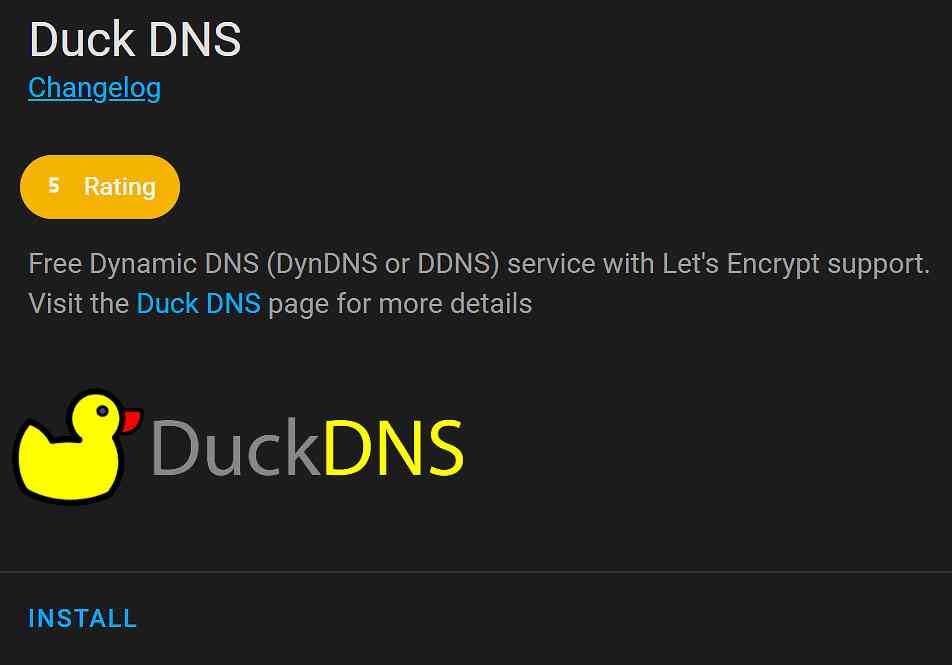
I've covered the installation of Home Assistant add-ons in a previous guide. If you are unsure on how to proceed, refresh your memory by reading that article. The Duck DNS add-on is found as part of the official add-ons. Simply select and install it to get started.
Installing and configuring the Duck DNS add-on for Home Assistant
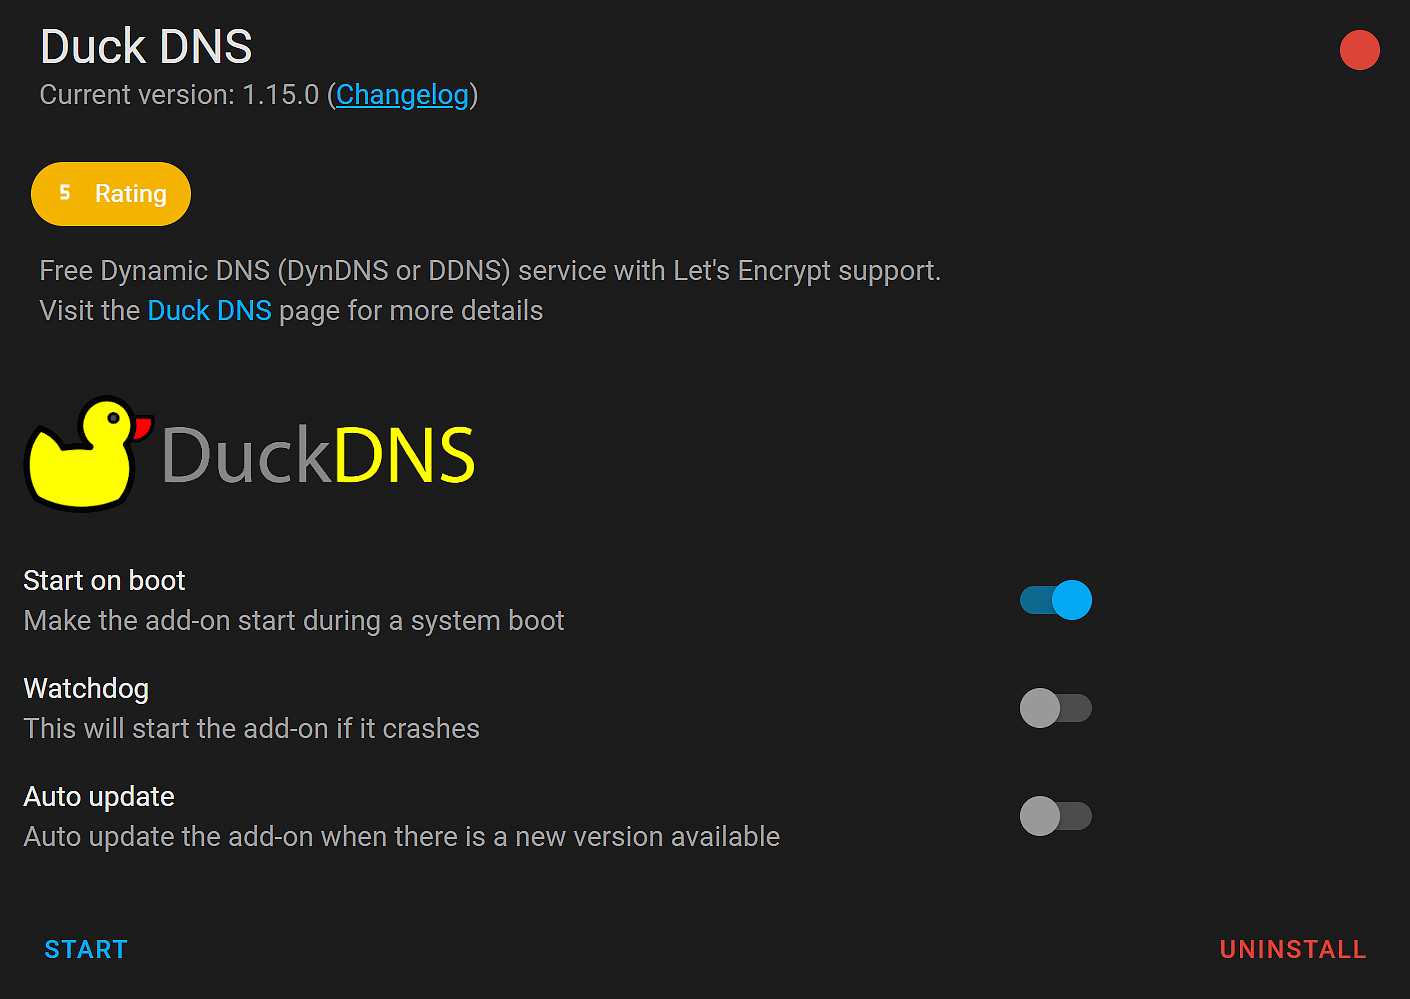
Once you've got the Duck DNS add-on installed, don't jump the gun. You can't just hit the start button. You'll need to set it up first.
Head over to the Configuration tab and punch in your domain name and token (remember the secret handshake?). There's a small tweak you need to make in the Let's Encrypt text field: switch accept_terms: false to accept_terms: true. That's it. This is all about getting your hands on a free SSL certificate from Let’s Encrypt. It's like a security blanket for your connection. If you're keen, you can learn more about their terms of service on their website. Once you're done, hit the save button to seal the deal.
Now, you can finally start the Duck DNS add-on. But, hold on a sec. You can also choose to deploy the watchdog and auto-updates. It's like having a guard dog and a personal assistant at your service.
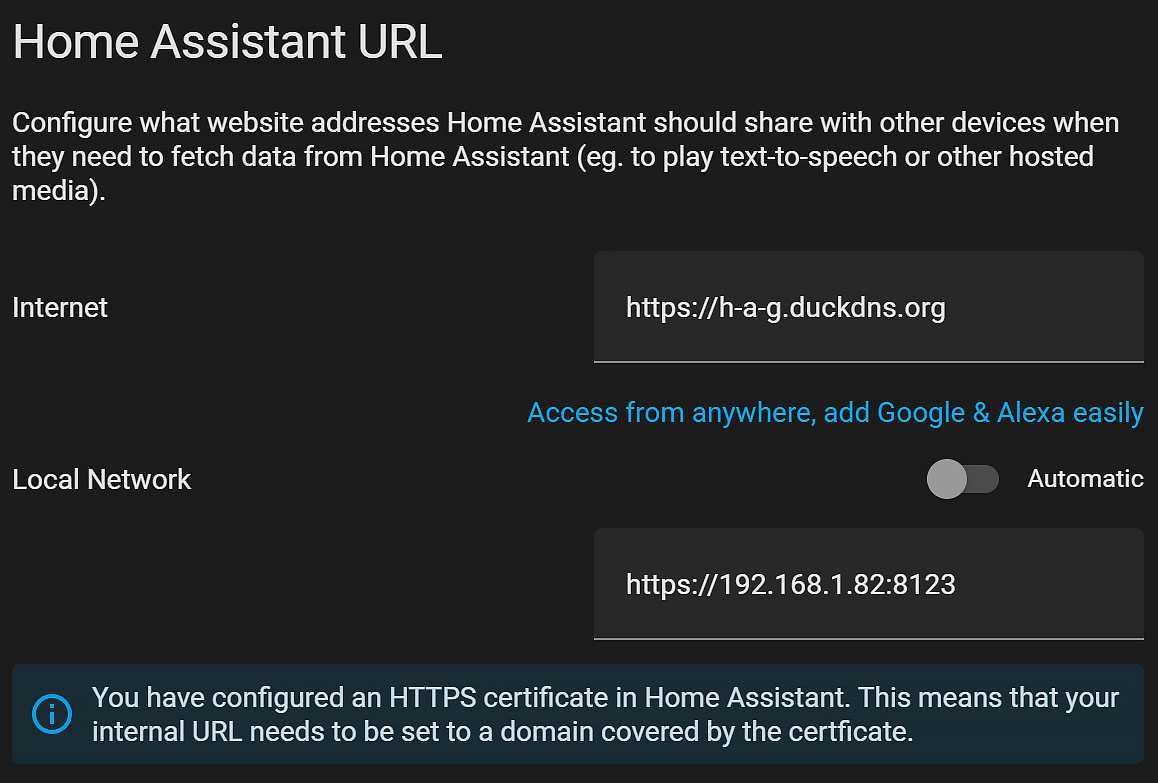
Configuring Home Assistant's internal and external URL
After you've got the Duck DNS add-on all set up, it's time to sort out Home Assistant's internal and external URLs. It's a bit like setting up a private entrance for your home and a separate one for guests. You use the local URL for when you're home, and the external one when you're out and about. Head back to the same place where you set up the static IP address, and key in the right URLs.
Guiding Home Assistant to the SSL certificates
The final step is to let Home Assistant know where the SSL certificates hang out. For this, you can call upon the help of the Studio Code Server add-on to open up the 'configuration.yaml' file. Scroll down to the bottom of the file and add this code:
http:
  ssl_certificate: /ssl/fullchain.pem
  ssl_key: /ssl/privkey.pem
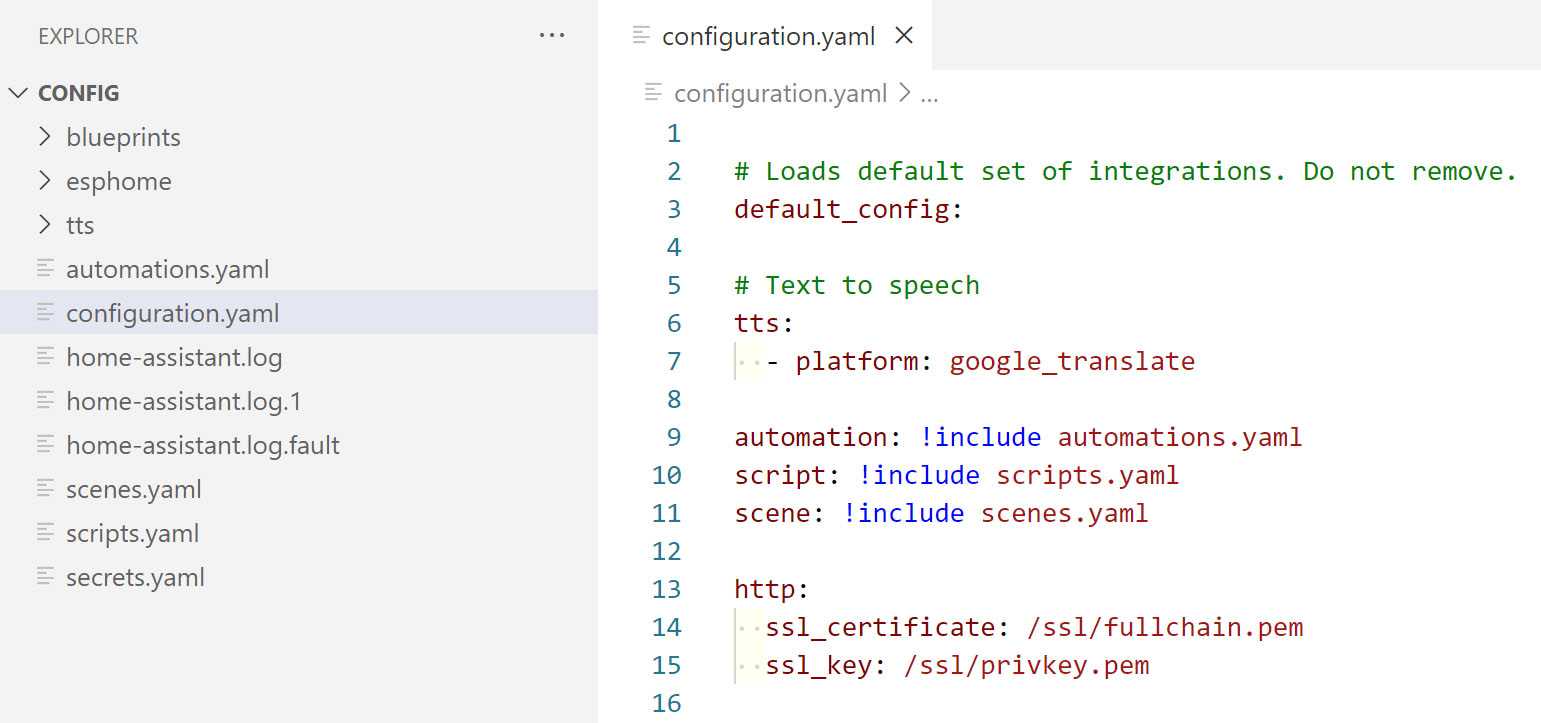
That's it! You've now got Home Assistant fully clued in on the whereabouts of your SSL certificates. It's like giving Home Assistant the treasure map to your digital gold. Enjoy your journey with Duck DNS and Home Assistant!
