I have always been a fan of the Mushroom cards for the Home Assistant Dashboard. However, if there was one aspect to critique, it would be their limited customizability. The latest release, Mushroom version 1.10.0, addresses this issue by allowing users to add a splash of colour and a badge icon to template cards.
Contents
Stability and New Features in Mushroom Cards
Apart from the two new features, this release maintains the stability of the Mushroom cards. The developers, who work on this project in their spare time, have always prioritized keeping Mushroom cards stable, clean, and simple before introducing new features.
The two new features significantly enhance the customizability of your Dashboard. Additionally, a Graph Card and a Plant Card are already in development, promising more exciting updates.
Utilizing the Mushroom Template Card Badge Icon and Colour
The new Mushroom Template Card badge icon and colour features allow you to add dynamism to your Home Assistant Dashboard. These features support templates, enabling you to use dynamic values. Of course, you can simply add a single colour and a Material Design Icon if you prefer a static approach, but leveraging the power of templates can make your Home Assistant Dashboard much more interactive.

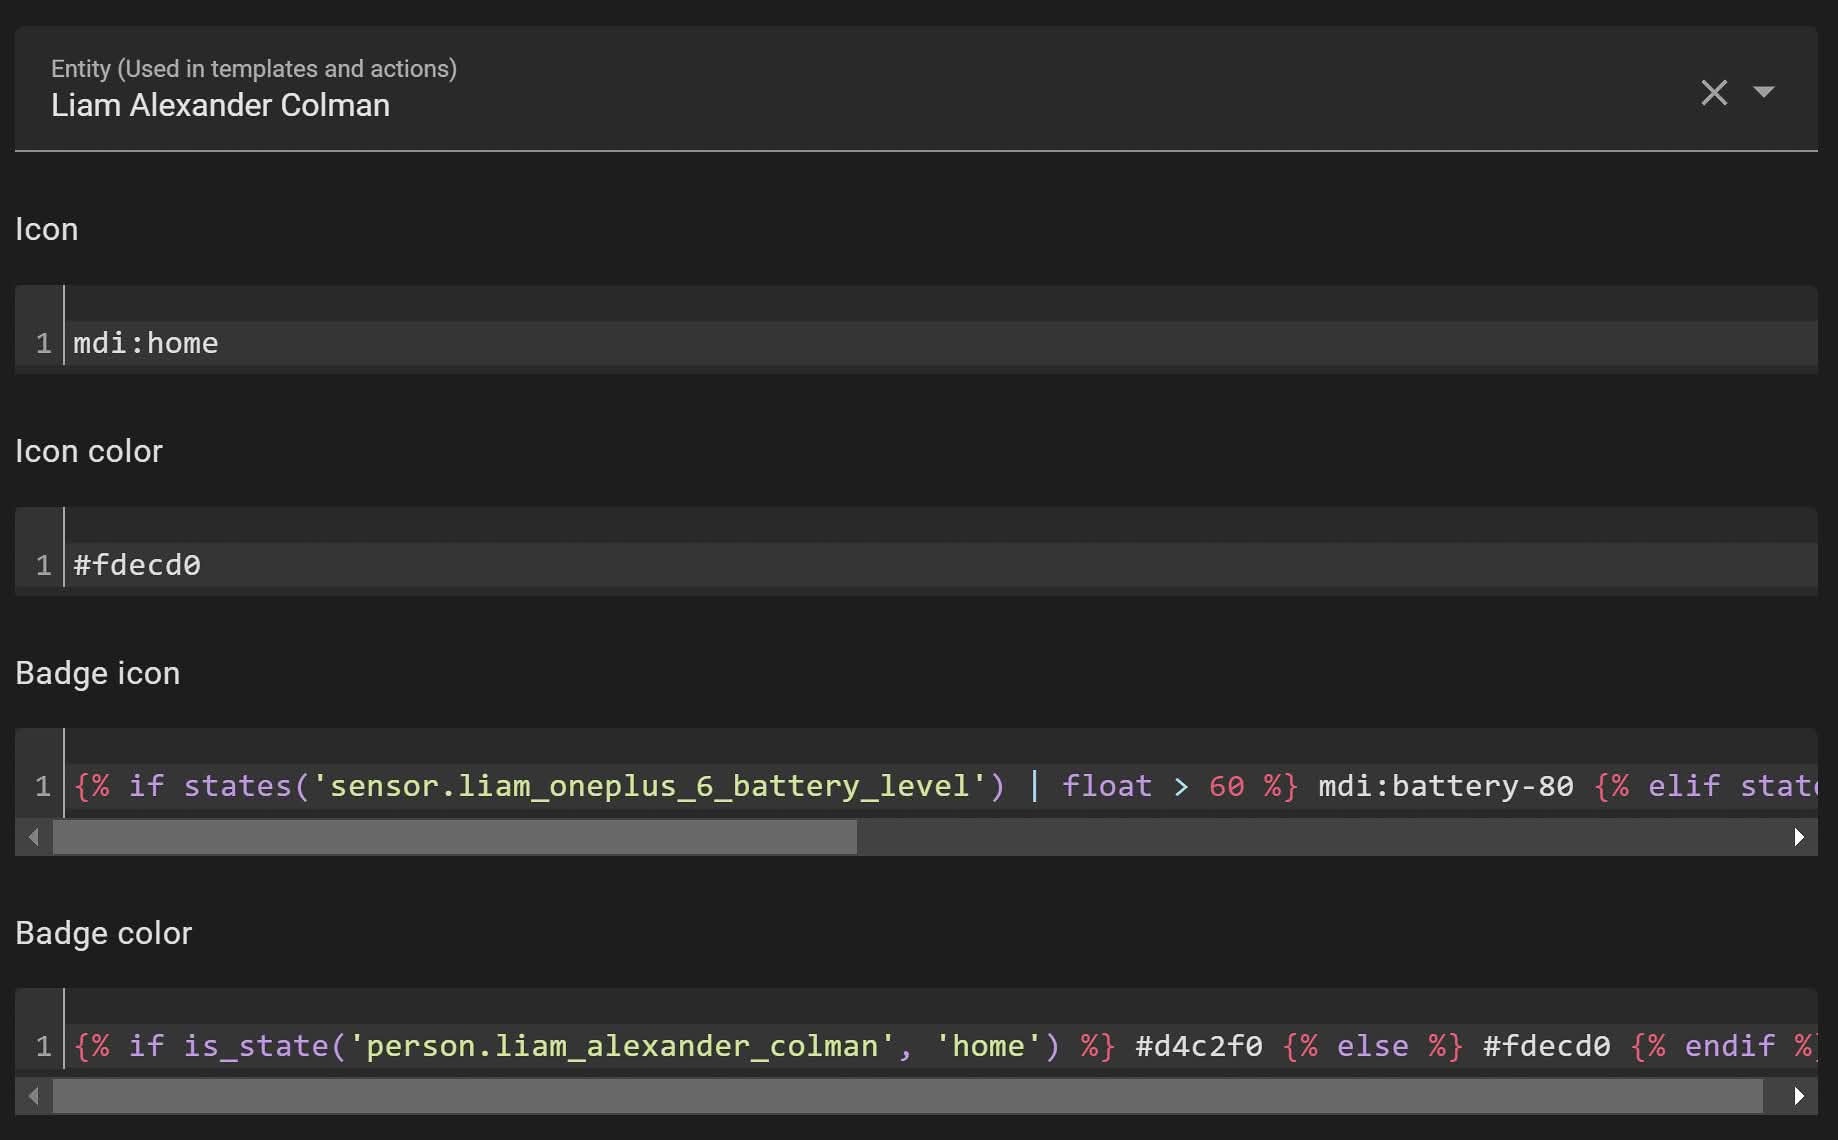
Creating a Dynamic Badge
In the example below, the badge changes colour depending on whether I am home or not. This is achieved by adding the following string to the badge colour field:
{% if is_state('person.liam_alexander_colman', 'home') %} #d4c2f0 {% else %} #fdecd0 {% endif %}You can use named colours instead of hexadecimal values:
{% if is_state('person.liam_alexander_colman', 'home') %} green {% else %} red {% endif %}Furthermore, you are not limited to two colours. The example below changes the icon to green if my phone's battery is between 60-100%, orange if it's between 40-60%, and red if it's below 40%:
{% if states('sensor.liam_phone_battery') | float > 60 %}
    green
{% elif states('sensor.liam_phone_battery') | float > 40 %}
    orange
{% else %}
    red
{% endif %}
Creating a Dynamic Icon
Similarly, you can use templates for the icon's colour in a template card. Using the same example with icons, it would look like this:
{% if states('sensor.liam_phone_battery') | float > 60 %}
    mdi:battery-80
{% elif states('sensor.liam_phone_battery') | float > 40 %}
    mdi:battery-40
{% else %}
    mdi:battery-alert
{% endif %}
Ensure you remove any spaces when copying the examples above. For clarity, the code has been formatted.
Summary
The Mushroom template card's new badge icon and colour features provide significant enhancements to your Home Assistant Dashboard. By leveraging templates, you can create dynamic and interactive elements that respond to real-time data, making your Dashboard both functional and visually appealing.
Stay tuned for upcoming features like the graph card and plant card, which promise to add even more versatility to your Home Assistant setup. Experiment with these new features and enjoy the added customizability they bring to your home automation experience.

Just the thing I was looking for. Nice one