In an earlier piece, we delved into the most sought-after custom cards for the Home Assistant Dashboard. While those cards continue to dominate GitHub's star rankings, a fresh batch is swiftly catching up. This article shines a spotlight on five rising stars in the Home Assistant Dashboard's custom cards cosmos.
These custom cards, all launched within the past year or so, may already be familiar to some. To ensure their relevance, only cards that are under active development and bug-free have been included. These cards are all available for installation via the Home Assistant Community Store.
Contents
Vacuum Card: The digital aide for your automated cleaner
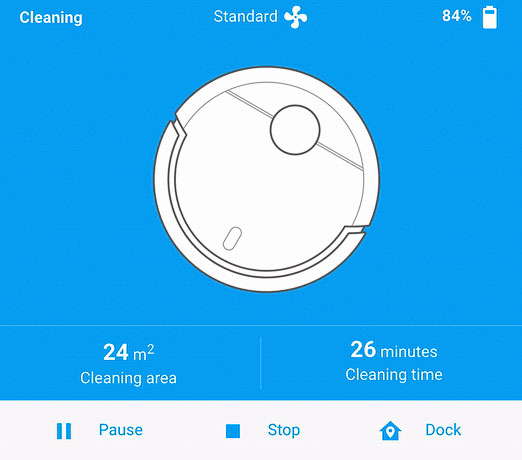
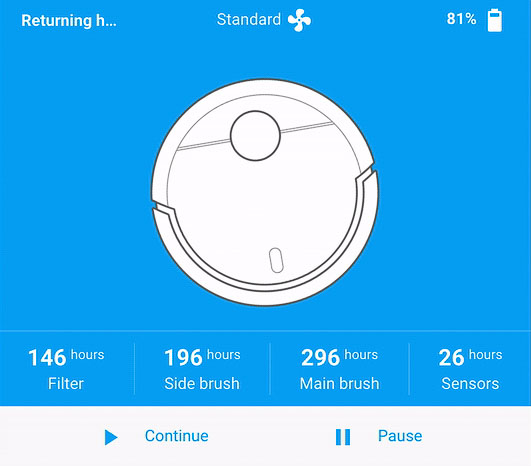
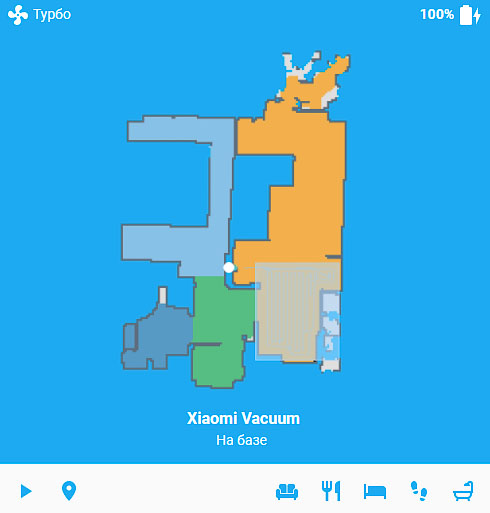
The Vacum Card lives up to its name, catering specifically to robot vacuum cleaners. This custom card for the Home Assistant Dashboard offers up-to-date information about the vacuum's status and allows you to issue commands without any additional buttons. While I can't speak from personal experience, given its 381 GitHub stars, it seems to have found favour within the community.
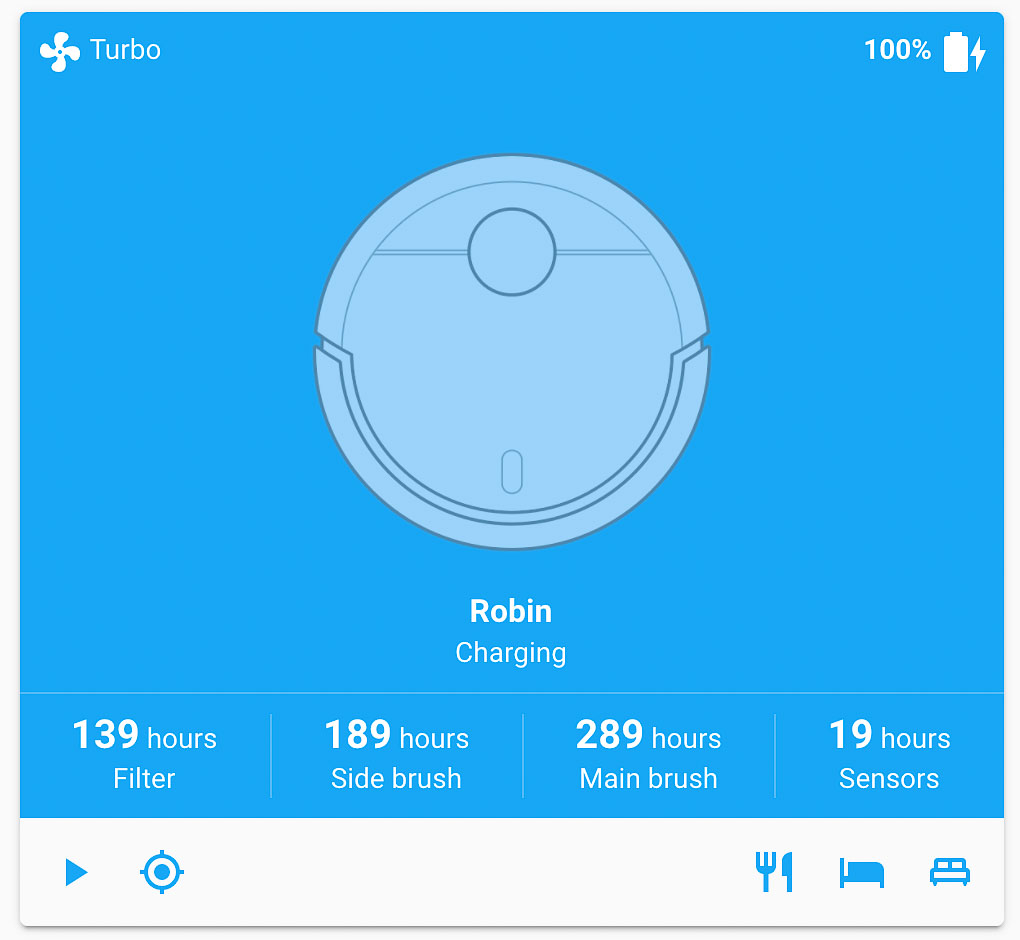
The card itself supports a broad range of popular robot vacuums, including models from Roborock, Xiaomi, iRobot, and Ecovacs Robotics. If you're curious about your machine's compatibility, a comprehensive list of supported models is available in the repository. Given that the Vacuum Card relies on standard robot vacuum features such as pause, start, stop, and return_to_base, most models integrated with Home Assistant should work with this card. The card also allows you to replace the default image with a PNG or SVG file of your model. To add a touch of flair, you can enable an animation, or opt for a more subtle look with the compact card, which hides the image entirely. If available, a map display is also an option.
The Vacuum Card for Home Assistant can show various information based on the robot vacuum's state. For instance, when the vacuum is docked, you can view details about the filter and brushes. During cleaning, the card can show the cleaning area and duration. Interactive icons at the bottom of the card trigger predefined commands. This feature is handy for initiating manual zoned cleaning with a simple click.
Powering up: Battery State Card for the Home Assistant Dashboard
The Battery State Card is an innovative addition to the Home Assistant Dashboard, claiming the mantle from the seemingly dormant Lovelace Battery Entity card, which regrettably hasn't been consigned to the GitHub archives. This custom card is a paragon of adaptability, and in my tenure as a Home Assistant user, few have come close in terms of flexibility and personalisation.
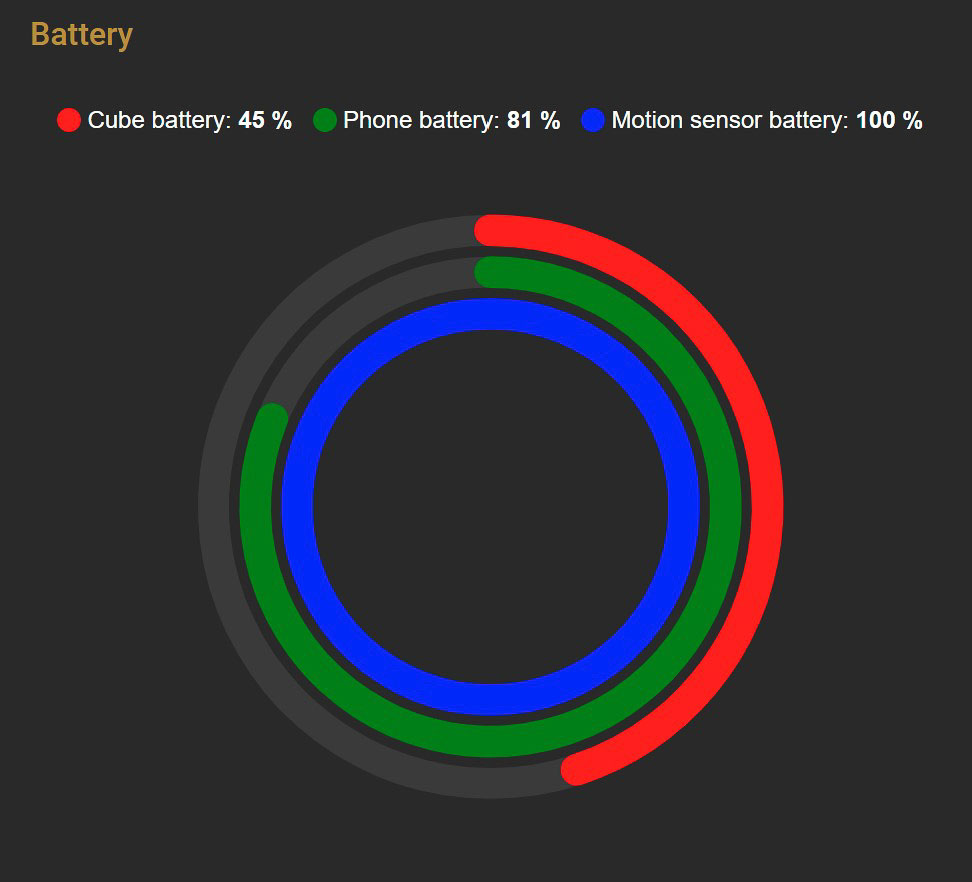
Amongst its many virtues, the Battery State Card's collapsibility feature is a clear standout, allowing for a streamlined and uncluttered Home Assistant Dashboard. Yet, it retains the capacity to offer a comprehensive view of all battery states in a single card, a classic case of having your cake and eating it too. The card's utility extends beyond simply providing a snapshot of the battery status of your wireless home automation gadgets. It can also display readings from any sensor, and supports automatic sorting and colour gradients for dynamic icons.
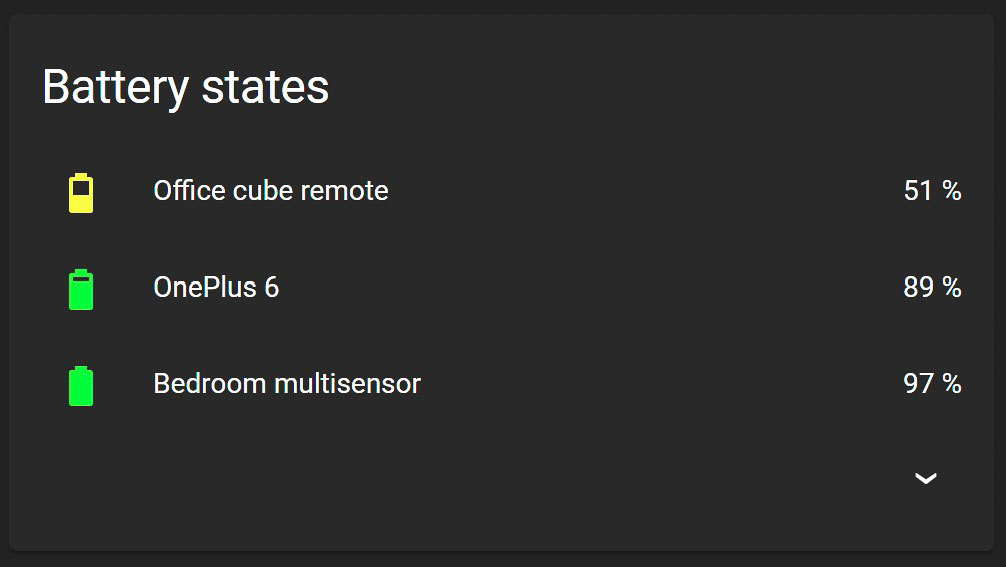
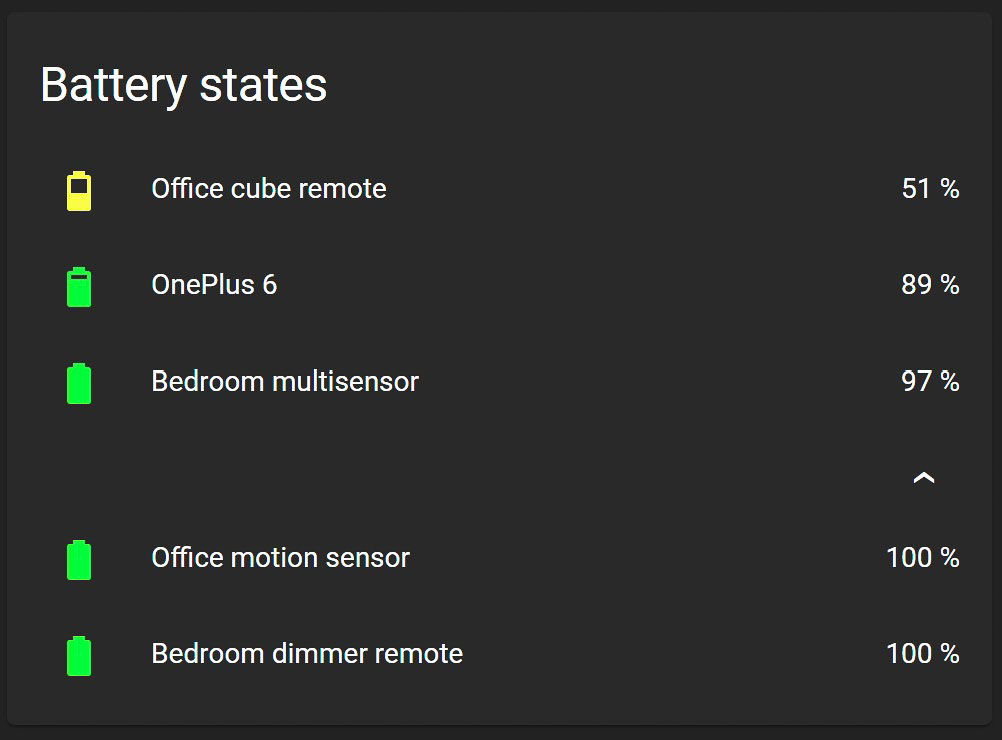
The example above showcases its capabilities, with the list limited to the top three entries when collapsed, sorted to put devices with the lowest battery percentage in pole position, and adorned with dynamically coloured icons. The ability to display secondary information and configure a charging indication adds further layers of detail.
Tired of the manual labour involved in adding devices to the Battery State Card? Fear not. With the filter setup, automation takes over, adding any entity that includes the string battery_level or battery to the card. Now that's a power move.
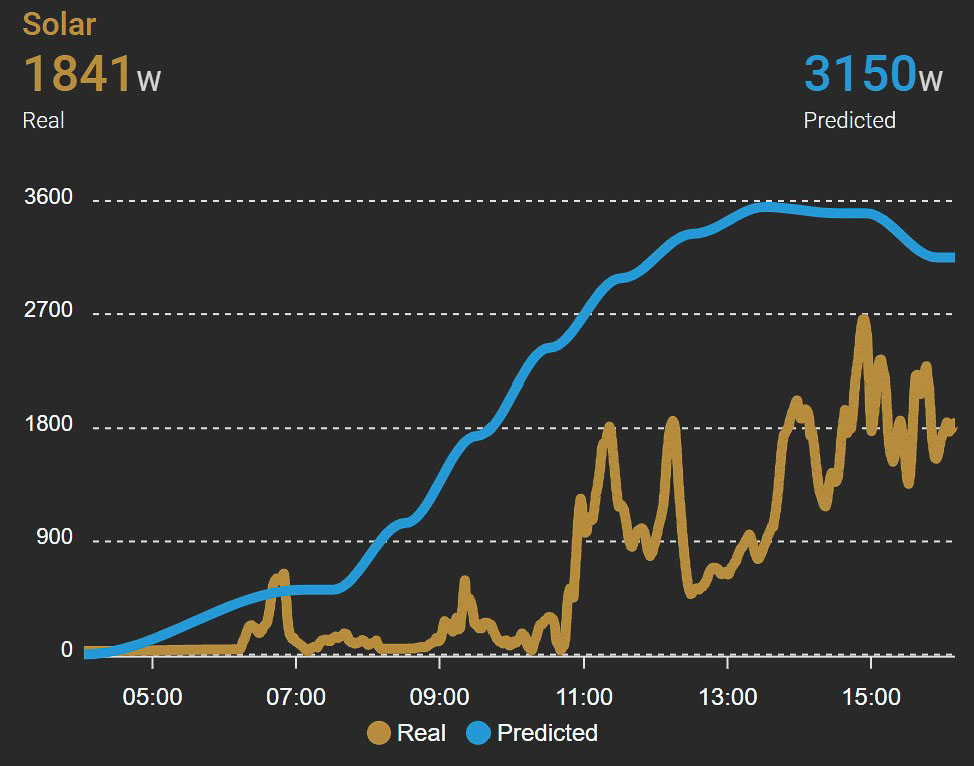
ApexCharts Card: Fancy graphs for your Home Assistant Dashboard
For me and many other Home Assistant community members, the ApexCharts Card has replaced the still popular Lovelace Mini Graph Card. This custom card uses the ApexCharts.js library and gives the user the option to customize just about every aspect of the chart. You might have even unknowingly come across graphs built using this open-source library used on websites, as it is very popular. Using the ApexCharts Card you can create radial bar, pie, donut, line, and scatter charts.
What sets the ApexCharts Card apart from the Lovelace Mini Graph Card are its available graphs and customizability. With the newer option, you are no longer limited to just line and bar graphs. You might be asking yourself why one would use charts in the Home Assistant Dashboard. We all want a beautiful dashboard with cards displaying useful, and sometimes not so useful, data, right? For example, you could integrate your Unraid NAS and display all hard drives using a single radial bar chart.
Scheduler Card: Sometimes timed automations rule
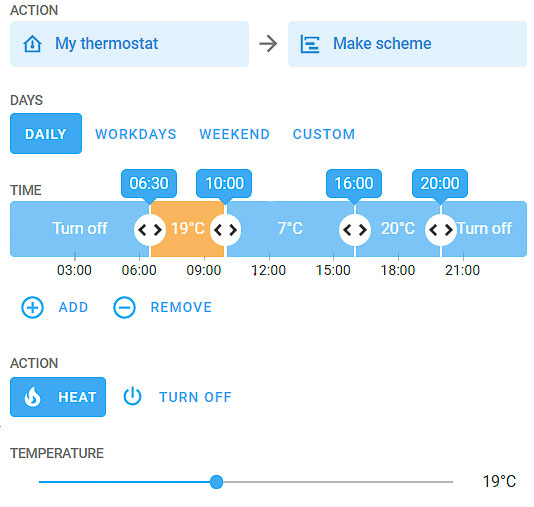
The final two Home Assistant custom cards, I am presenting in this article, are more complex than the previous three presented so far. The Scheduler card relies on the Scheduler custom component. For you, that means you will need to install the custom component using HACS before you try the Scheduler Card. The Scheduler custom component is the brains of the operation, and it controls your existing devices based on time.
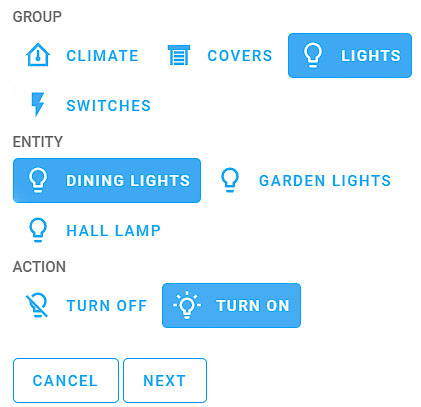
The Scheduler Card gives the Scheduler custom component an easy-to-use interface. You can easily configure lights to turn off or on, covers to go up or down, switches to toggle, and climate adjustments using this card. The actions can be set to occur on a daily or weekly basis. There is also the option of executing the action only on weekdays, or you can completely customize the schedule.
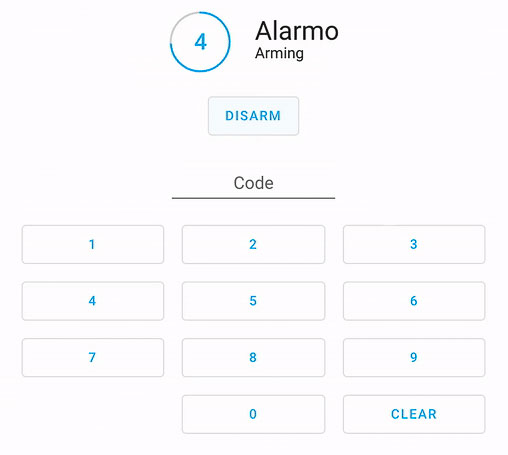
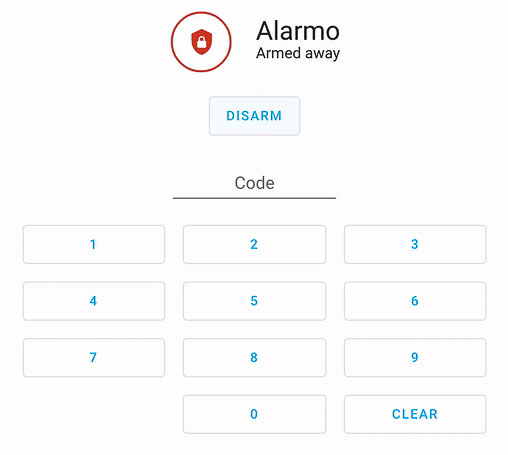
Alarmo: Integrating the manual alarm control panel
Alarmo is an integration for the manual alarm control panel domain in Home Assistant. While the custom card is part of Alarmo, it is only one third of the full package. A custom component and a separate panel make up for the rest.
The Alarmo custom component controls the states of the alarm panel entities in Home Assistant, while the Alarmo panel is a GUI for configuring the settings of the alarm. The Alarmo custom card for the Home Assistant Dashboard allows you to arm or disarm the alarm. The custom card itself, is probably the least interesting part of the Alarmo package, with its functionality boiling down to an option to arm or disarm the alarm. Alarmo is, in fact, also compatible with the official Alarm Panel card.