Disclosure: This post contains affiliate links. If you click through and make a purchase, I will earn a commission, at no additional cost to you. Read my full disclosure here.
Congratulations on your recent acquisition of Home Assistant knowledge and the essential hardware to boot. You're now ready to dive into the exciting world of the Raspberry Pi 4 Model B, turning this pint-sized powerhouse into an open-source smart home hub. But before we begin, ensure you have the following items at hand:
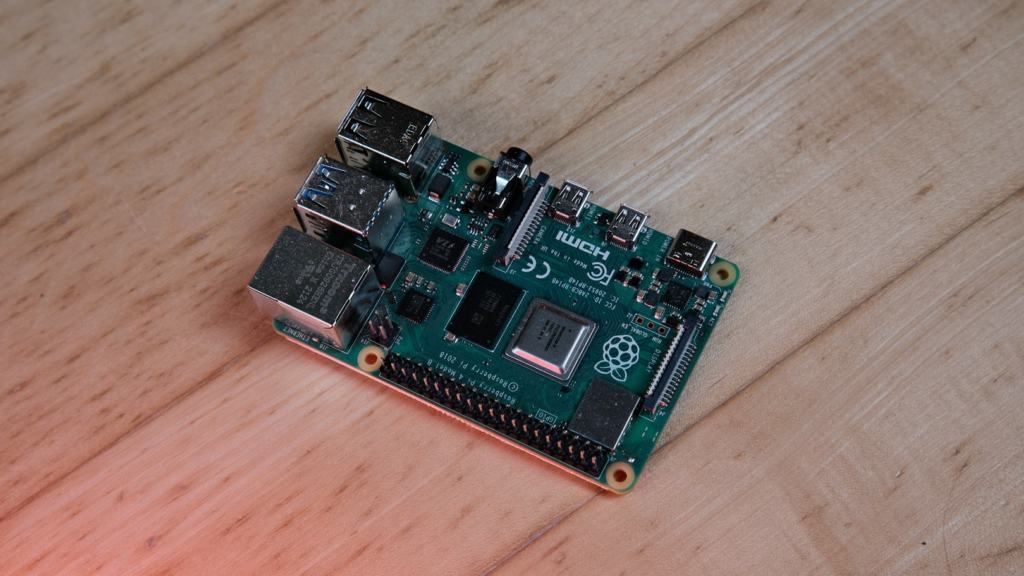
For a seamless experience, I would strongly suggest using the Raspberry Pi 4 Model B or the Raspberry Pi 3 Model B+. Older models might not cut the mustard. Equally important is a reliable power supply; the official one is a safe bet.
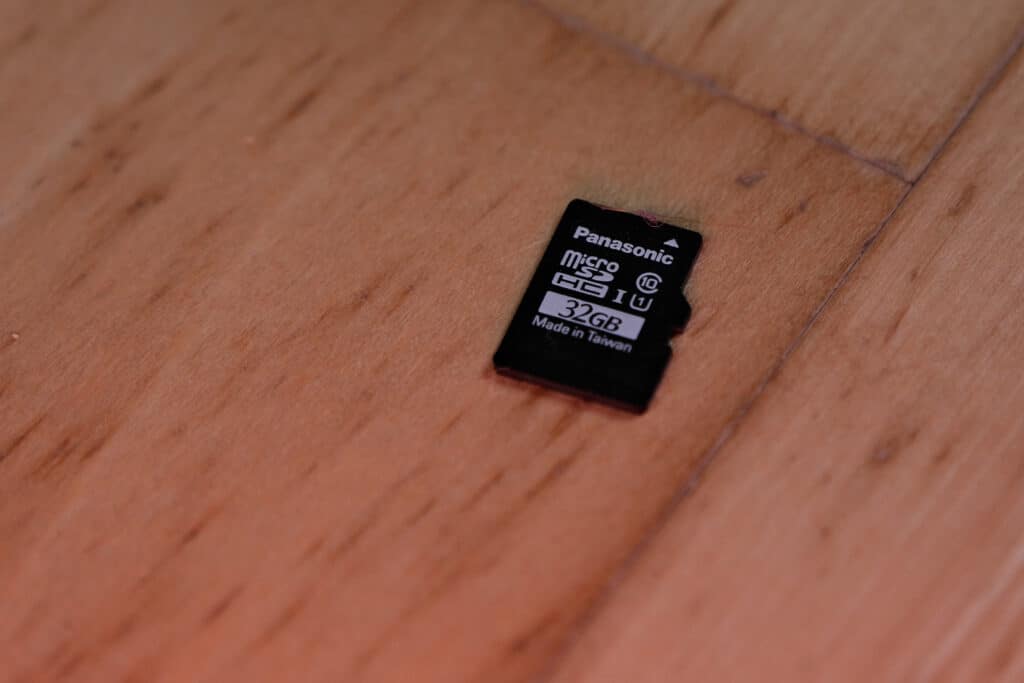
A microSD card equipped to handle Home Assistant and a microSD or SD card reader with the right adapter are indispensable. The card reader shown in the picture came with a kit I purchased, but won't be a permanent fixture in my setup.
You'll need a computer running Windows, Linux, or macOS equipped with balenaEtcher to write the microSD card.
An Ethernet cable to connect your Raspberry Pi to your switch or router is also necessary.
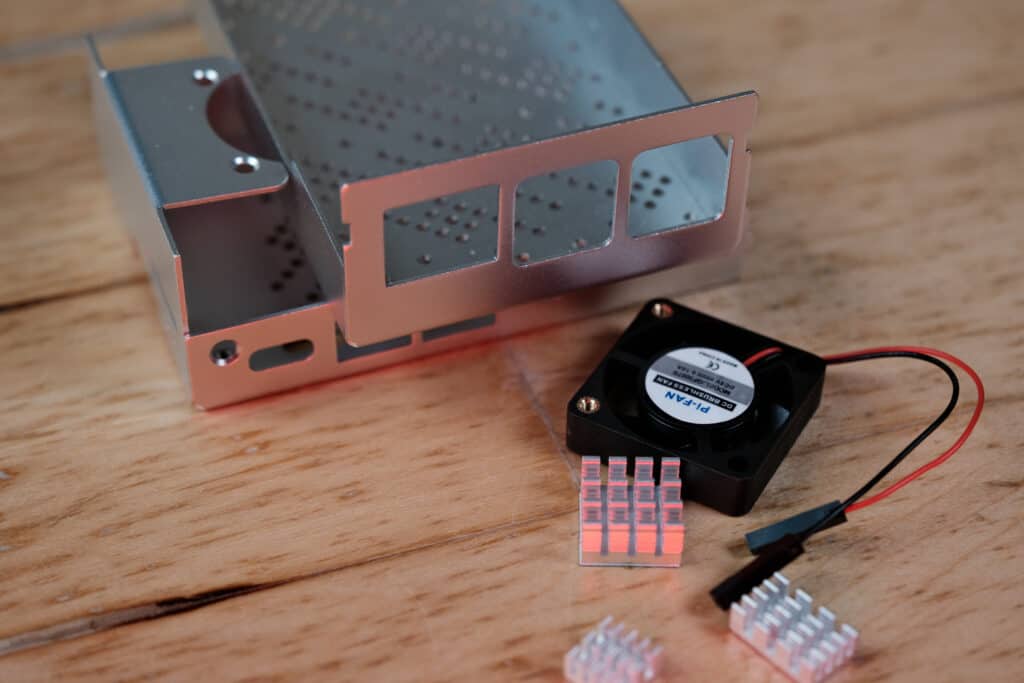
While not compulsory, a case and fan for your Raspberry Pi can provide added protection. I had one as it was part of the kit I bought.
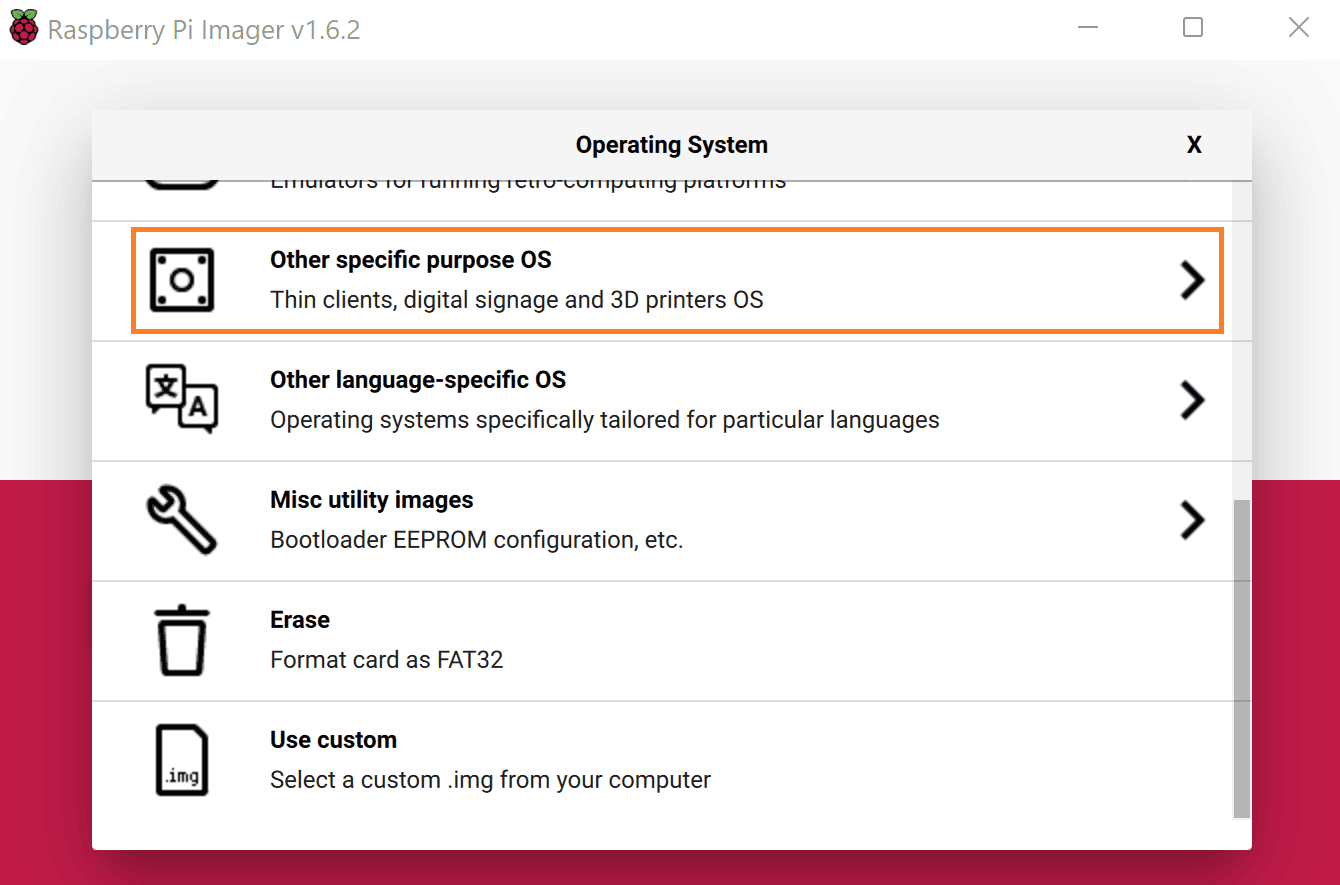
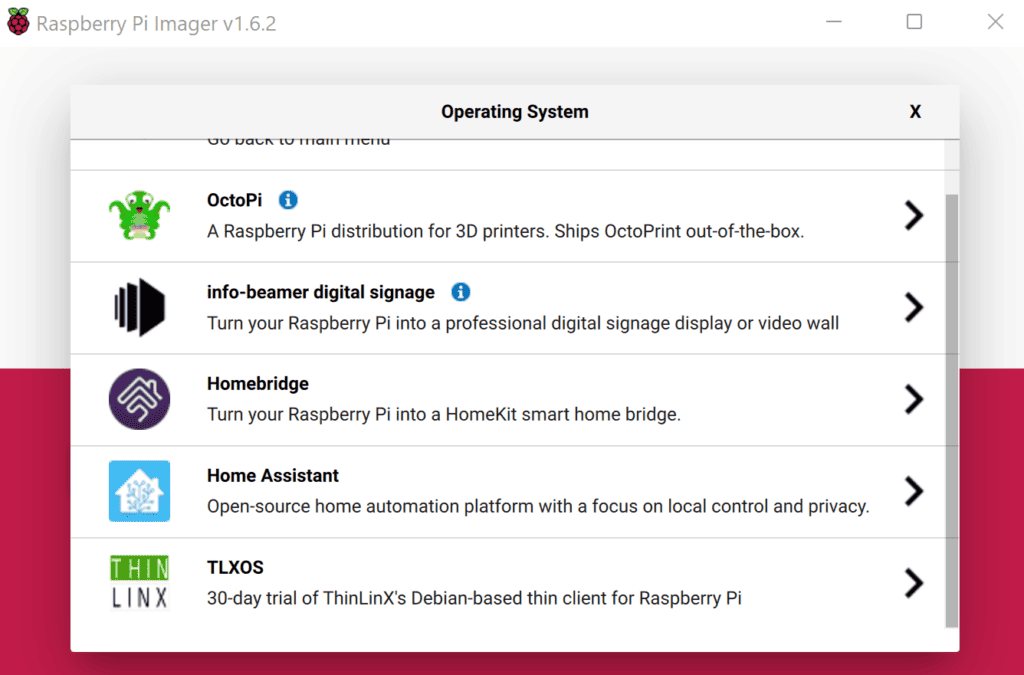
Why I don't recommend using the Raspberry Pi Imager to install Home Assistant
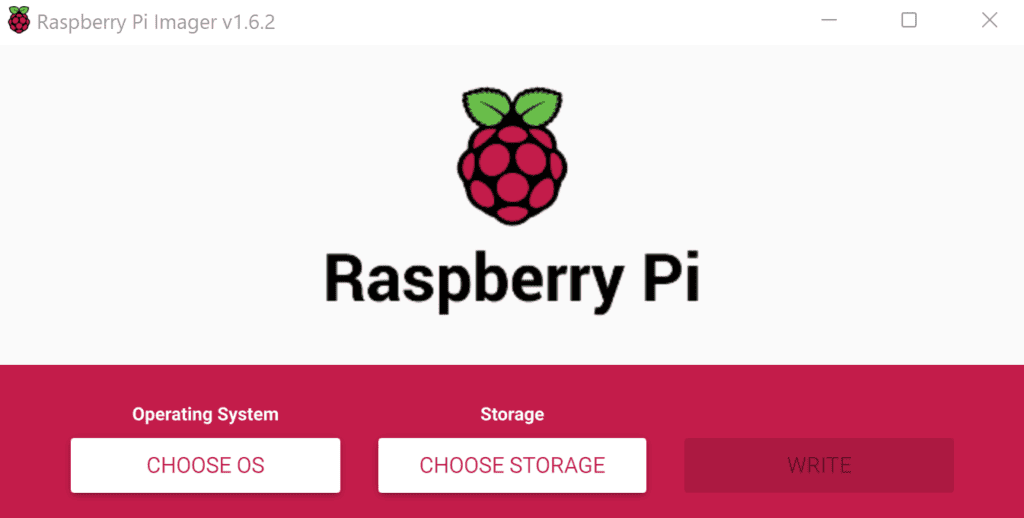
Raspberry Pi Imager, the official tool from the Raspberry Pi Foundation, has made the process of installing Home Assistant OS on a Raspberry Pi a walk in the park. Whether you're trying to install Raspberry Pi OS or other operating systems, this handy piece of software is your one-stop-shop, cutting out the need for any extra downloads or configurations. But, hold your horses! There's a little snag to be aware of. The Home Assistant OS image you get through the Raspberry Pi Imager might not be the freshest one off the shelf.
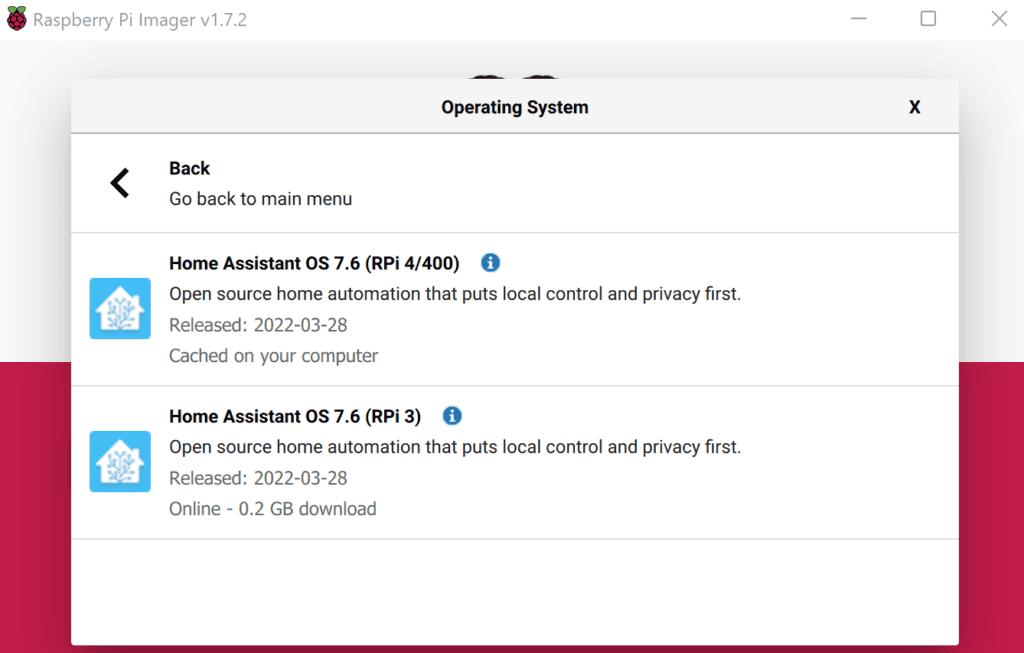
Sure, you can update the Home Assistant Core, the Home Assistant Supervisor, and Home Assistant Operating System from the user interface. However, I'm a big believer in kicking things off with a squeaky clean install, using the most recent release. Just to give you a picture, while the Raspberry Pi Imager Repository is still serving up Home Assistant Operating System 7.6, the tech world has already moved on to version 8.1. To put it simply, the Raspberry Pi Imager is trailing behind by two whole releases.
Flashing Home Assistant Operating System to a microSD card using balenaEtcher
Instead, I recommend using balenaEtcher to install the Home Assistant Operating System, which includes the Supervisor and Home Assistant Core. This application is a versatile companion, ready to be installed on your Windows, macOS, or Linux device. Plus, there's a handy portable version you can download too. Once you've got it in your toolkit, you can grab the URL of the latest Home Assistant release from GitHub.
For both the Raspberry Pi 4 Model B and Raspberry Pi 3 Model B+, I recommend using the 64-Bit versions of Home Assistant Operating System. So, you would use the following URL for the Raspberry Pi 4:
Part in filename
Description
Example
haos
Home Assistant Operating System
rpi4
Platform
Raspberry Pi 4
64
32/64-Bit Version
64-Bit
8.1
Version
Home Assistant Operating System 8.1
For both the Raspberry Pi 4 Model B and Raspberry Pi 3 Model B+, I recommend using the 64-Bit versions of Home Assistant Operating System. So, you would use the following URL for the Raspberry Pi 4:
Once you've got the URL to the latest Home Assistant Operating System release, it's time to fire up balenaEtcher and select the 'Flash from URL' option.
Just drop the URL you copied earlier into the pop-up that appears. No need to worry about any pesky authentication steps.
Back in balenaEtcher's main window, you'll now be able to choose a target. Make sure to pick the right microSD card to avoid any heart-stopping moments of accidentally overwriting any secondary external hard-drives. Luckily, balenaEtcher is pretty good at keeping things you would rather not touch out of sight.
First boot of your Raspberry Pi running Home Assistant
Once you've successfully flashed your microSD card, it's time to introduce it to your Raspberry Pi. It's a simple 'plug and play' operation – just pop the card out of your computer and into the mini-machine. Next, tether your Raspberry Pi to your network with an Ethernet cable. Give it a few minutes to get acquainted, then fire up a web browser on your computer and punch in http://homeassistant.local:8123/. It's okay if your browser throws a tantrum and spits out an error message. This simply means your router isn't fluent in mDNS language, and you'll need to play detective to find the Raspberry Pi's IP address.
Finding the IP of the Raspberry Pi running Home Assistant using your DHCP server
Finding the IP address of a device on your network isn't unlike a digital scavenger hunt. Your first clue will be hidden in your DHCP server, often your router/modem. Here's how you can uncover it on Windows:
Summon Command Prompt by pressing the ⊞ Windows + R keys and typing cmd into the box.
Type ipconfig and press the ↵ Return key.
Your 'Default Gateway' will be revealed. It's usually 192.168.0.1 or 192.168.1.1.
Enter the IP into a browser to access your router/modem's interface.
Linux and macOS, your journey is similar with a slight twist: Open Terminal and type ifconfig -a.
Once inside your router/modem's interface, look for a list of devices that your DHCP server has gifted an IP address. The location of this list is as varied as the companies that make the devices. Hunt for a device named homeassistant. Found it? Great! Type the IP, followed by :8123 into your browser. For instance, I dial http://192.168.1.77:8123.
You can find out how to find the list of clients by googling for your router/modem model
Tracing the IP of your Raspberry Pi running Home Assistant via an app
As an alternative to the above, there are apps that can help you trace the IP address of devices on your network. Think of these as digital bloodhounds. Advanced IP Scanner is one such tool, available for free on Windows. Once it's up and running, get it to sniff out the IP range your computer is in.
The results of running the Advanced IP Scanner application let me find the IP of Home Assistant
For instance, I discovered from the ipconfig command that my computer's IP address is 192.168.**1**.30, so I entered 192.168.**1**.1-254. You may need to tweak the third number based on your range. In no time, the app will unveil the devices, including your Raspberry Pi running Home Assistant. I'm unable to test any macOS apps, but the website AlternativeTo can guide you to similar applications.
Your first rendezvous with Home Assistant
Having gotten a grasp on how to navigate Home Assistant, it's time to get your hands dirty. Your Raspberry Pi might present you with a screen indicating some wait time, depending on how long it's been switched on. For now, your job is simply to sit back and relax while the Home Assistant gears up and gets ready for you.
Once the setup is done, the system asks you for your name, username, and password. It's crucial to remember your password or, even smarter, stash it in a password manager. In this context, I can vouch for Bitwarden, a tool I use religiously without any company ties.
Next up, the system asks for some fundamental details like your time zone, elevation, unit system, and currency. You can either punch in this data manually or let Home Assistant do the heavy lifting by clicking the 'detect' button. However, please note that this will prompt a one-time request to an external service, which might be a no-go if your Raspberry Pi is barred from the internet. You can still figure out your elevation using a barometer or a bevy of online platforms that use mapping services.
If you have any devices that Home Assistant can identify automatically, they will pop up in the subsequent step. But don't sweat it; you can add these devices later on as well. So, I'll be bypassing this step for now.
That's it! Your Home Assistant setup is done and dusted. You now have the keys to your Home Assistant Dashboard.
When things don't go as planned
If you find yourself unable to connect to the Home Assistant interface, don't panic. Here are some troubleshooting tips that might help:
Revisit the IP address of the Raspberry Pi hosting Home Assistant. Ensure you're not jumbling up digits when typing it into your browser.
Inspect the network connection. Verify that the Raspberry Pi has a secure connection to the network via Ethernet.
Try giving your Raspberry Pi a quick reboot. You'd be surprised how many issues this simple step can resolve.
Confirm that your computer and the Raspberry Pi share the same network. If they're on separate networks, they might as well be speaking different languages.
Keep in mind, your Raspberry Pi isn't a sprinter; it's more a distance runner. It might take a few minutes to boot up and get Home Assistant up and running, particularly on the maiden voyage. So, if you can't access the interface immediately, take a breather, then give it another shot.
Here, I'll be answering some queries that frequently come my way. If you have any other questions or doubts, feel free to get in touch with me directly or, better yet, drop a comment for everyone's benefit.
What's the safe way to power off Home Assistant Operating System?
After setting up and configuring Home Assistant, you might be mulling over providing your Raspberry Pi with a permanent abode. However, it's worth noting that unplugging a Raspberry Pi while it's operating could potentially curtail the microSD card's lifespan. To switch off the Home Assistant Operating System safely, head to the developer tools, tap on the services tab, and execute the 'poweroff the host system' service.
Is it possible to connect a monitor to a Raspberry Pi running Home Assistant Operating System?
Technically, yes. But practically, it's of little use. The Home Assistant Operating System, while running on a Raspberry Pi, does have a graphical interface. However, it doesn't display your Home Assistant Dashboard, nor is there a way to make it do so.
About Liam Alexander Colman
Liam Alexander Colmanis an experienced Home Assistant user who has been utilizing the platform for a variety of projects over an extended period. His journey began with a Raspberry Pi, which quickly grew to three Raspberry Pis and eventually a full-fledged server. Liam's current operating system of choice is Unraid, with Home Assistant comfortably running in a Docker container. With a deep understanding of the intricacies of Home Assistant, Liam has an impressive setup, consisting of various Zigbee devices, and seamless integrations with existing products such as his Android TV box. For those interested in learning more about Liam's experience with Home Assistant, he shares his insights on how he first started using the platform and his subsequent journey.


Excellent and well-written guide. Thank you