A Comprehensive Guide to Integrating Unsupported Services with Home Assistant using Webhooks
Disclosure: This post contains affiliate links. If you click through and make a purchase, I will earn a commission, at no additional cost to you. Read my full disclosure here.
Home Assistant undoubtedly has one of the most extensive list of supported integrations. If you use any popular web service, be it Google Calendar, Todoist, or Forecast.Solar, you will be able to integrated them in a matter of minutes. Extensive the list may be, however, there are still a few candidates, some of which I use, missing.
The good news is that unsupported services can be, if they support it, easily integrated with Home Assistant using webhooks. In case you were worrying, webhooks are not the same as an API. Using APIs might be a daunting task, but webhooks are a piece of cake in comparison.
In this detailed Home Assistant guide, I will be using my task manager of choice, Amazing Marvin, to illustrate how webhooks work.
Integrating Amazing Marvin and Home Assistant using webhooks
While webhooks are easier to use, they often aren't quite as extensive as a full-blown API. This is certainly true for the popular task manager, Amazing Marvin. However, using webhooks, you can let Home Assistant know whenever you have added, edited, or completed tasks and projects. The full list of available webhooks is much more extensive and can be found in the MarvinAPI documentation.
Creating a new Home Assistant automation
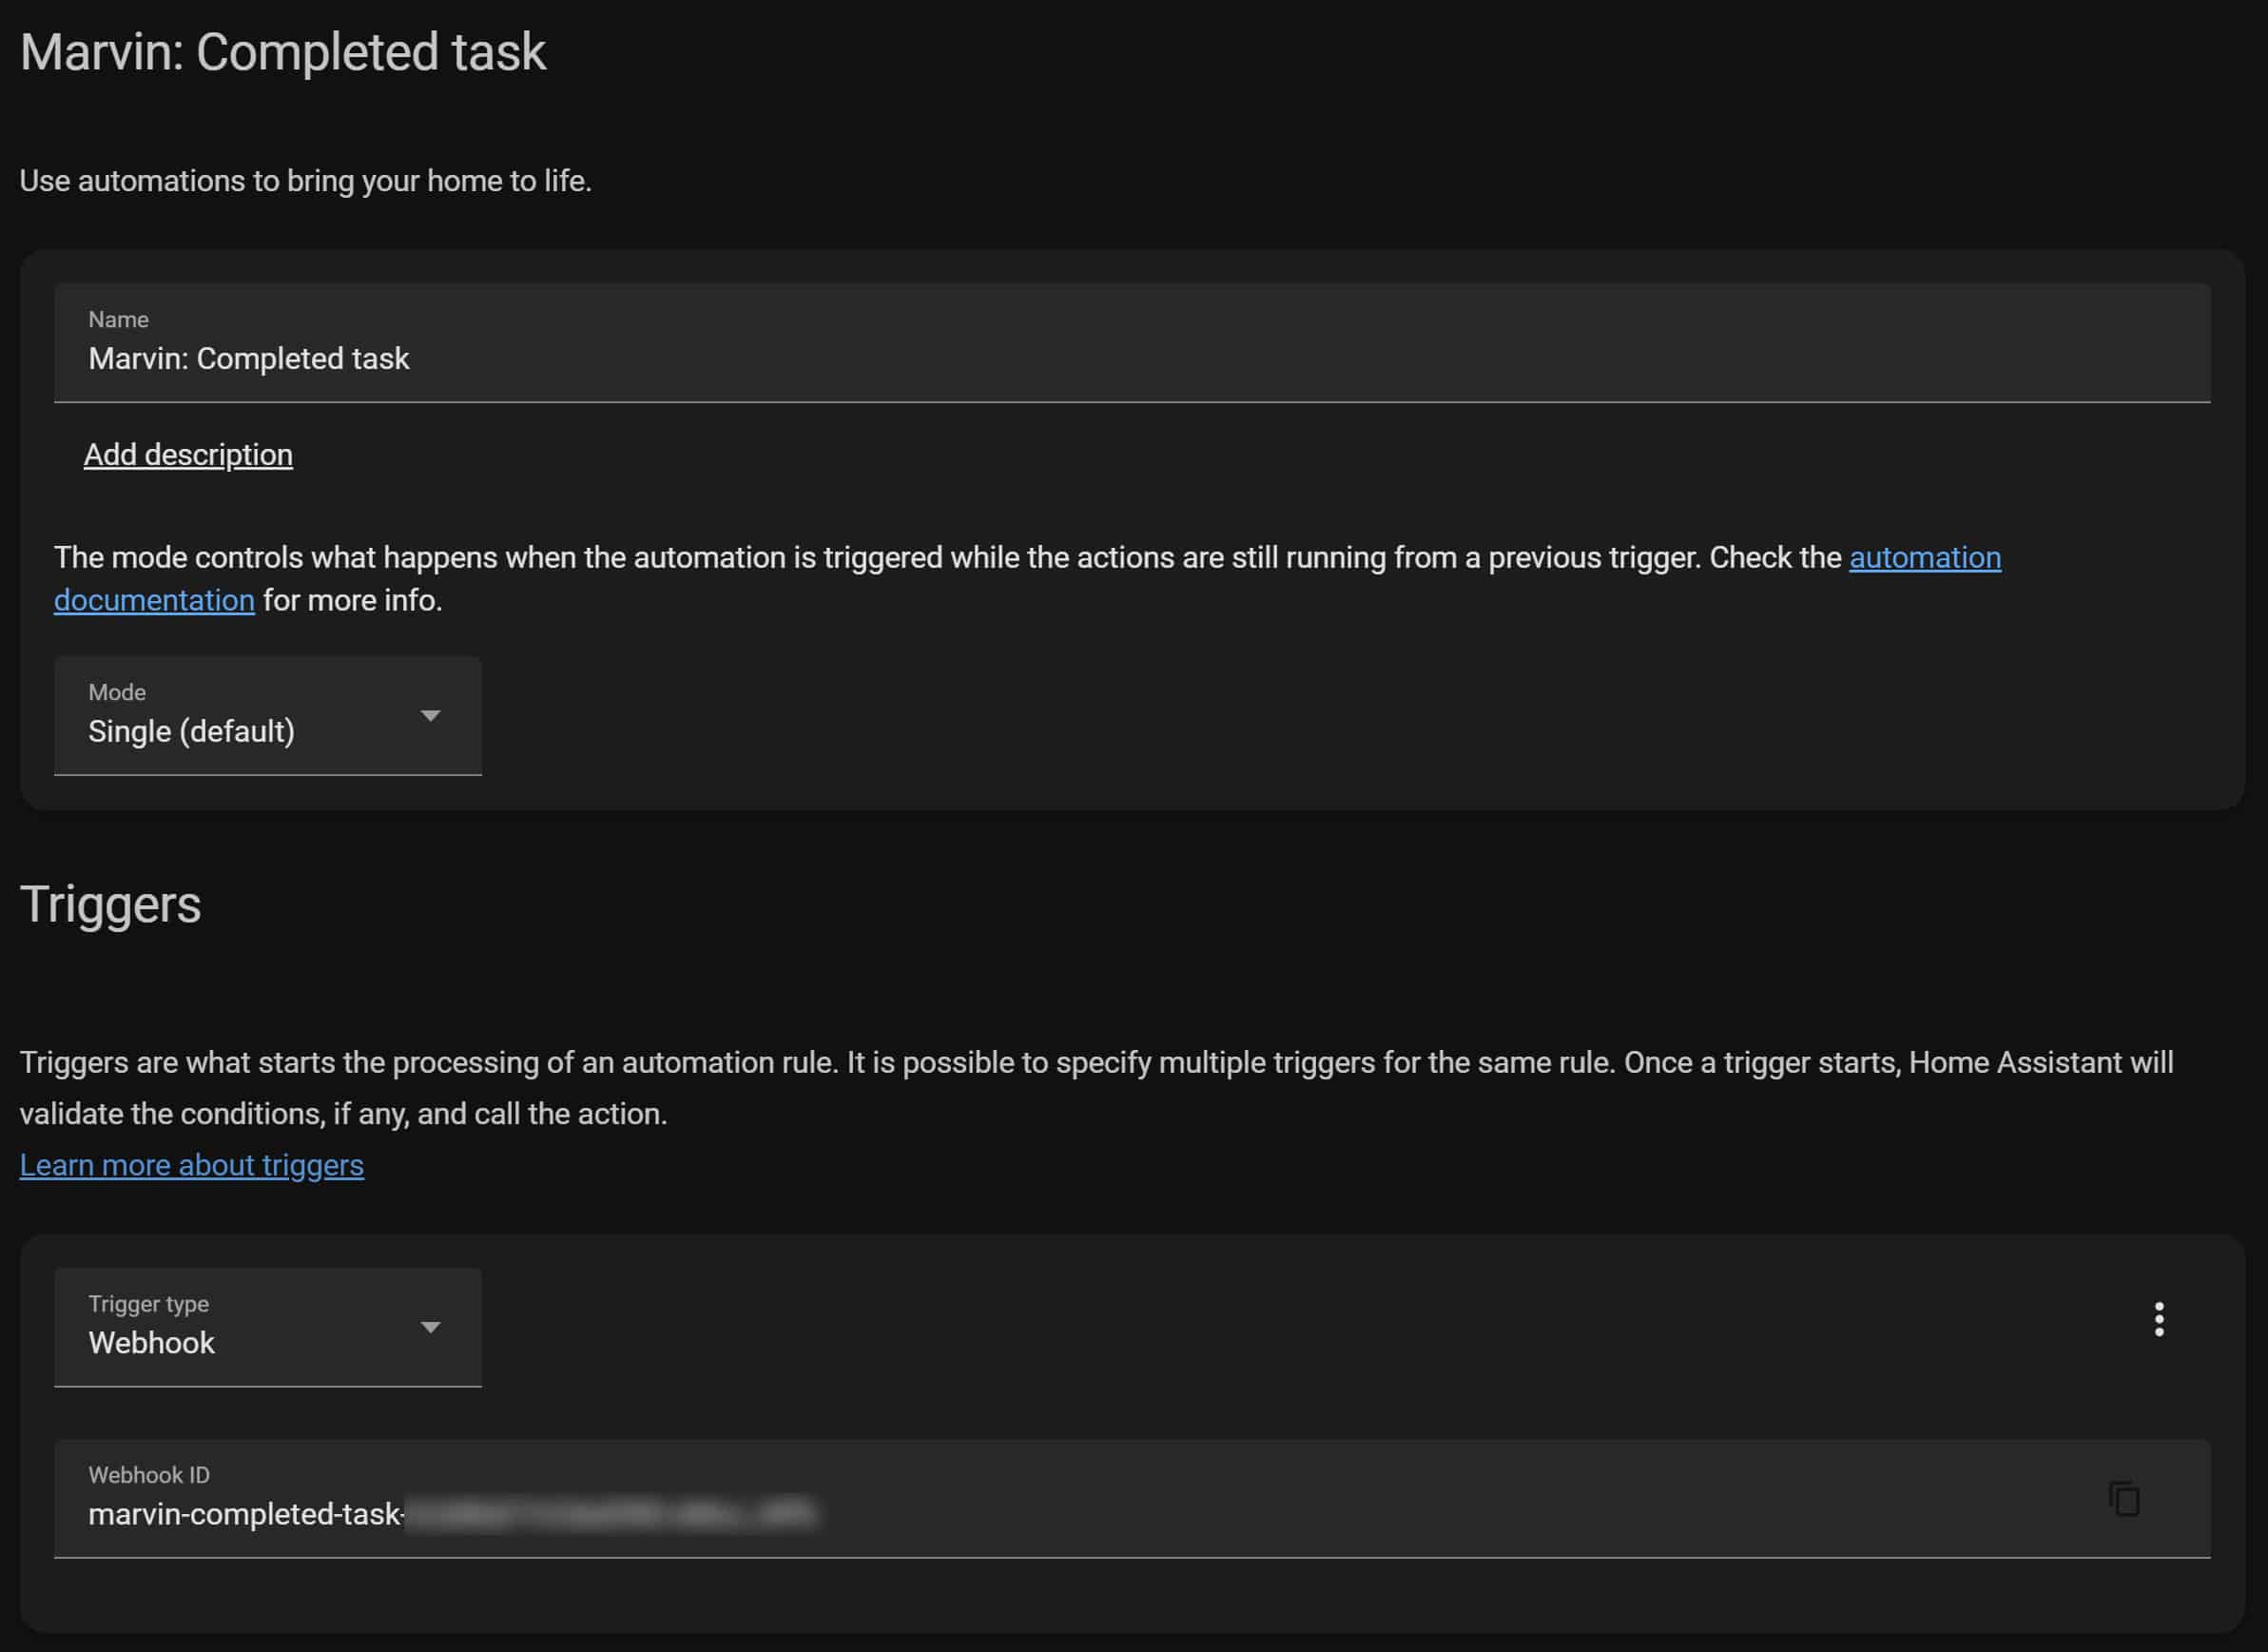
The first step in integrating Home Assistant and Amazing Marvin using webhooks is to create a new automation using the web interface.
Give the automation a fitting name and select Webhook as the trigger. As soon as you select the trigger, a URL should appear which can be copied using the icon on the far end. You must use the icon and not manually copy the text, as the icon will give you the full URL, which is what you need. As with any form of authentication, never share this URL with anyone. If your URL should ever leak, simply recreate the automation and a new one will be generated.
Enabling webhooks in Amazin Marvin
Next, head over to Amazing Marvin and search for API (beta) in the strategies. In the dropdown, select when you want Amazing Marvin to send Home Assistant a message. In my case, I want this webhook to be triggered whenever I complete a task. Paste the URL copied in the previous step in to the appropriate field.
Keep in mind that you are not limited to just one webhook, and you are free to add more. Amazing Marvin does, however, limit the usage to one webhook per 3 seconds.
Setting actions in Home Assistant when an Amazing Marvin task is complete
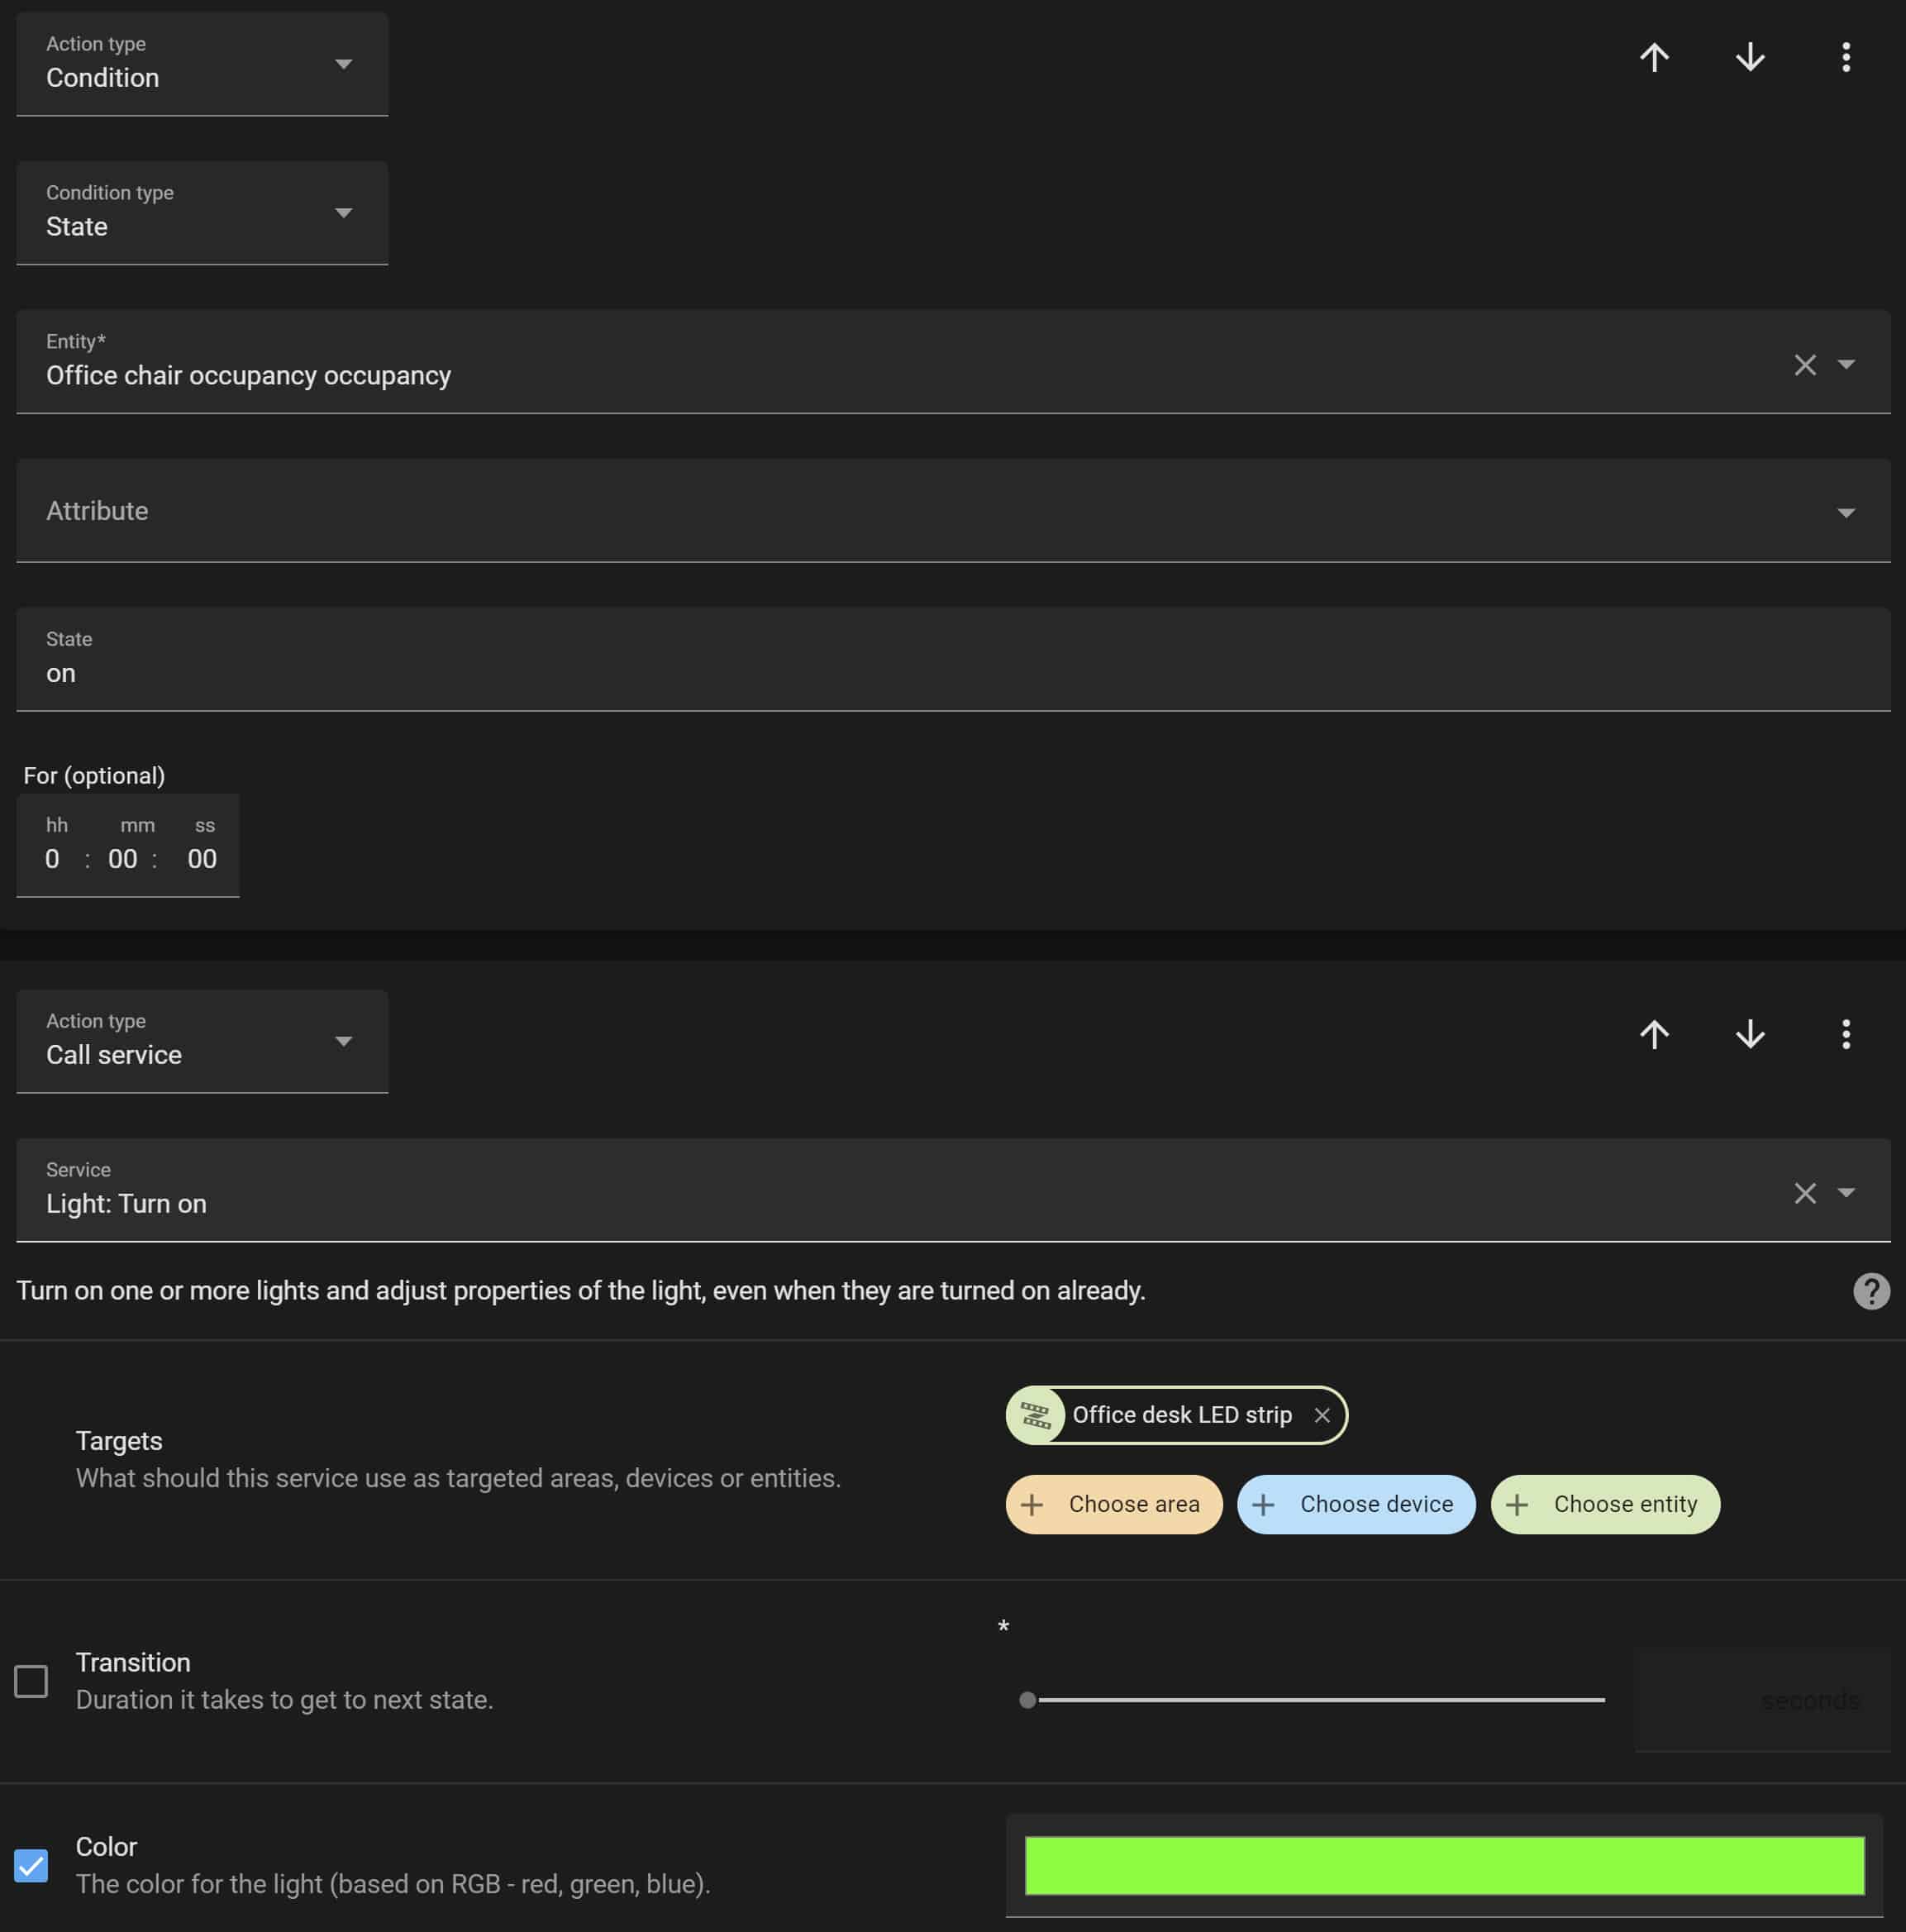
And that is it. Your Home Assistant will now be notified whenever you complete a task in Amazing Marvin. You can now add any actions to your automation that will be performed whenever you tick off a task.
In this example, Home Assistant will check whether I am sitting at my desk (using my recently built chair occupancy sensor), and will turn an LED strip green to celebrate my achievement.
Using a webhook's data payload in Home Assistant
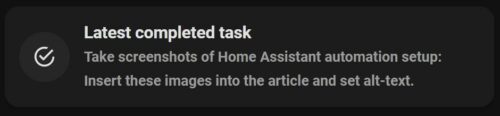
A webhook will not just send the message it happened whenever it is triggered. Additionally, a webhook will also send a data payload containing various bits of information. Concerning the Amazing Marvin webhook I just set up, the data payload contains, among others, the title of the card, the due date, and the note. This data can be used, for example, to display a message in the Dashboard.
The Dashboard card showing my latest completed Amazing Marvin task
Finding the webhook's payload data for Home Assistant
The first challenge we face is figuring out what payload data the webhook sends to Home Assistant. The easiest way of doing this is by using the site webhook.site. This site will give you a URL which you can use to temporarily replace the Home Assistant URL set up in the previous step.
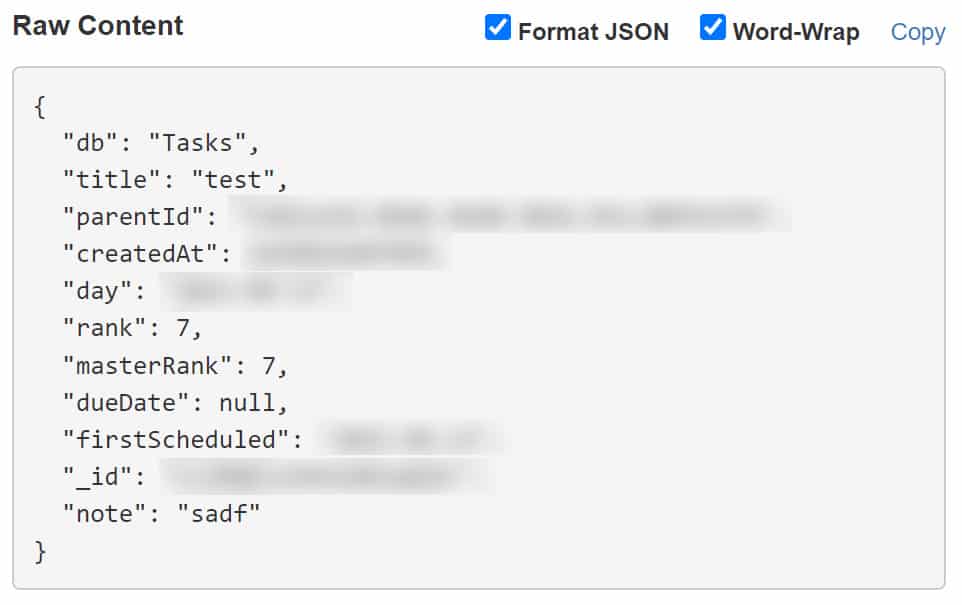
After adjusting the URL, I set up a dummy task, just so I could get a look at the webhook's payload data without having to send any sensitive information to an unknown server.
The only information of interest to us is the raw data. This contains all the data we can later use in Home Assistant in the JSON format.
Displaying the webhook's data payload in the Home Assistant Dashboard
My goal is to display the title of the completed task, alongside its note, in my Home Assistant dashboard. As a means of storing this data, I have set up two text helpers with appropriate names. You could also consolidate this information two just one helper, I, however, wanted to use the data individually.
Next, I went ahead and edited my already existing Amazon Marvin automation and added two additional actions. Each will update one of the helpers.
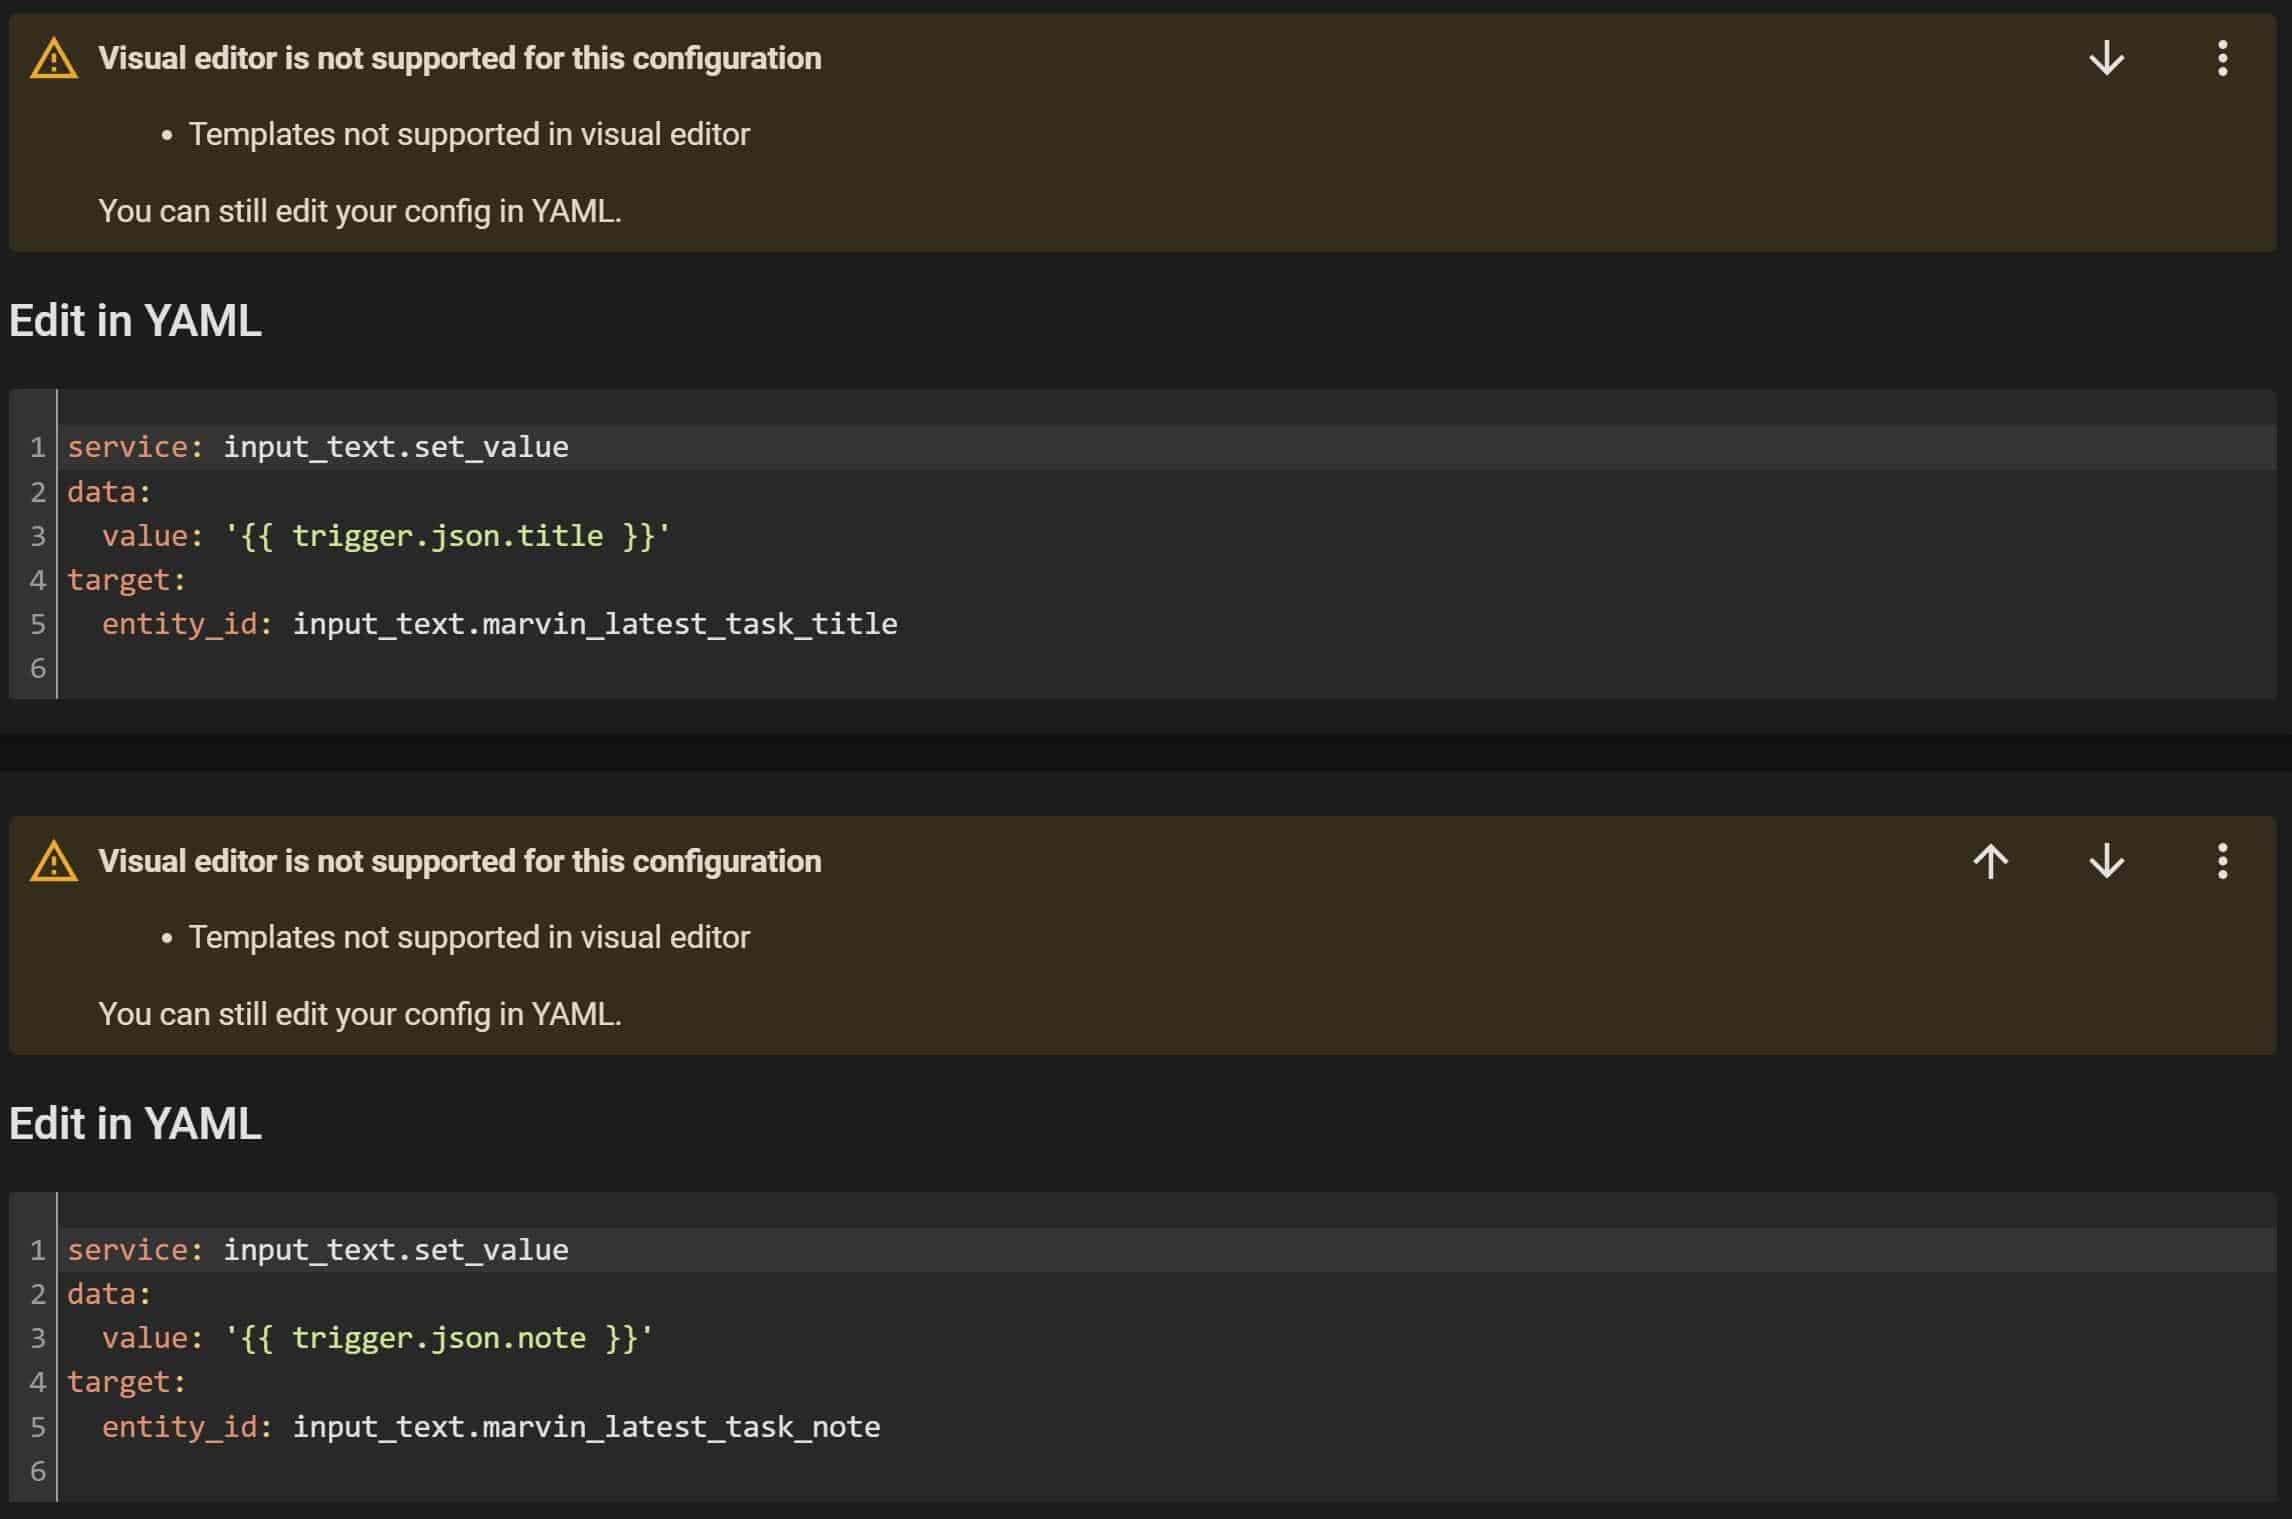
Because this automation uses a template, some YAML is necessary. Select the call service action type, choose the target, and as soon as you enter the template (e.g., trigger.state.title) the editor will appear.
Figuring out the correct template is as easy as using trigger.json., and adding the attribute previously found on webhook.site. You can now go ahead and display the two text helpers anywhere in your Home Assistant Dashboard.
About Liam Alexander Colman
Liam Alexander Colmanis an experienced Home Assistant user who has been utilizing the platform for a variety of projects over an extended period. His journey began with a Raspberry Pi, which quickly grew to three Raspberry Pis and eventually a full-fledged server. Liam's current operating system of choice is Unraid, with Home Assistant comfortably running in a Docker container. With a deep understanding of the intricacies of Home Assistant, Liam has an impressive setup, consisting of various Zigbee devices, and seamless integrations with existing products such as his Android TV box. For those interested in learning more about Liam's experience with Home Assistant, he shares his insights on how he first started using the platform and his subsequent journey.


“a fitting bane”? Interesting article otherwise.