How to integrate your Tesla electric car with Home Assistant
Disclosure: This post contains affiliate links. If you click through and make a purchase, I will earn a commission, at no additional cost to you. Read my full disclosure here.
A couple of releases back, the Home Assistant core team decided to remove the official Tesla integration due to login issues. This irked many users, but luckily the community took what was already done in the official integration and improved upon it.
The Tesla Custom Integration for Home Assistant is a fork of and the successor to the official integration. It was first released in April 2021, and has been frequently updated in since then. It offers just about all the functionality you would want from an integration with an electric car, and perhaps even more.
How to install the Tesla Custom Integration for Home Assistant
At this point, I am not going to recommend anything besides using HACS (Home Assistant Community Store) for the installation of custom components, themes, and Lovelace cards. To get started, follow the detailed steps listed on the HACS website.
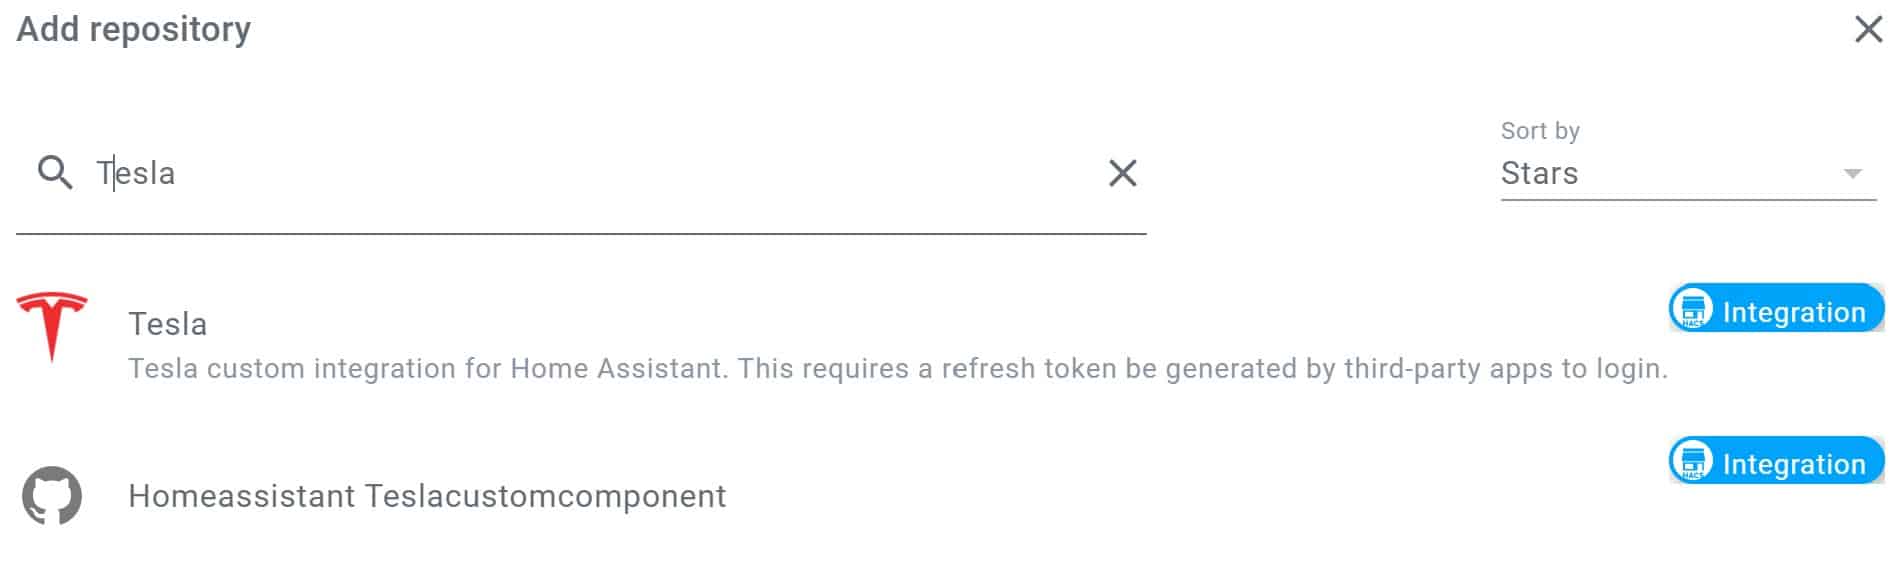
The Tesla custom integration in the Home Assistant Community Store
Once set up, simply search for the Tesla Custom Integration in the integration section of HACS. If you cannot find the component in HACS, you might have to manually add the repository using the three-dot menu (also known as the kebab menu) in the top-right corner.
Setting up the Tesla Custom Integration for Home Assistant
Once installed, the setup unfortunately isn't as easy as just entering a username and password. What you will need for this to work, is a Tesla refresh token. This is due to a change Tesla made in their authentication flow, with the good news being that you won't ever have to worry about entering a 2FA code. As always with authentication tokens, make sure you never publicly share them and if you accidentally do that, change the token as soon as possible.
There are three ways of acquiring the refresh token needed for the Tesla Custom Integration for Home Assistant:
If you are a subscriber to Nabu Casa, which you definitely should be if you love Home Assistant, you can use the link below to set up the integration using the Home Assistant dashboard. Alternatively, you can visit the dashboard, navigate to configuration and choose integrations. From there, you can click on the large “+” button and search for “Tesla Custom Integration”.
With that done, you can start using the integration. This integration adds many sensors, switches, a climate component, and even more, so it might take some until everything has been set up to your liking.
What the Tesla Custom Integration for Home Assistant can do
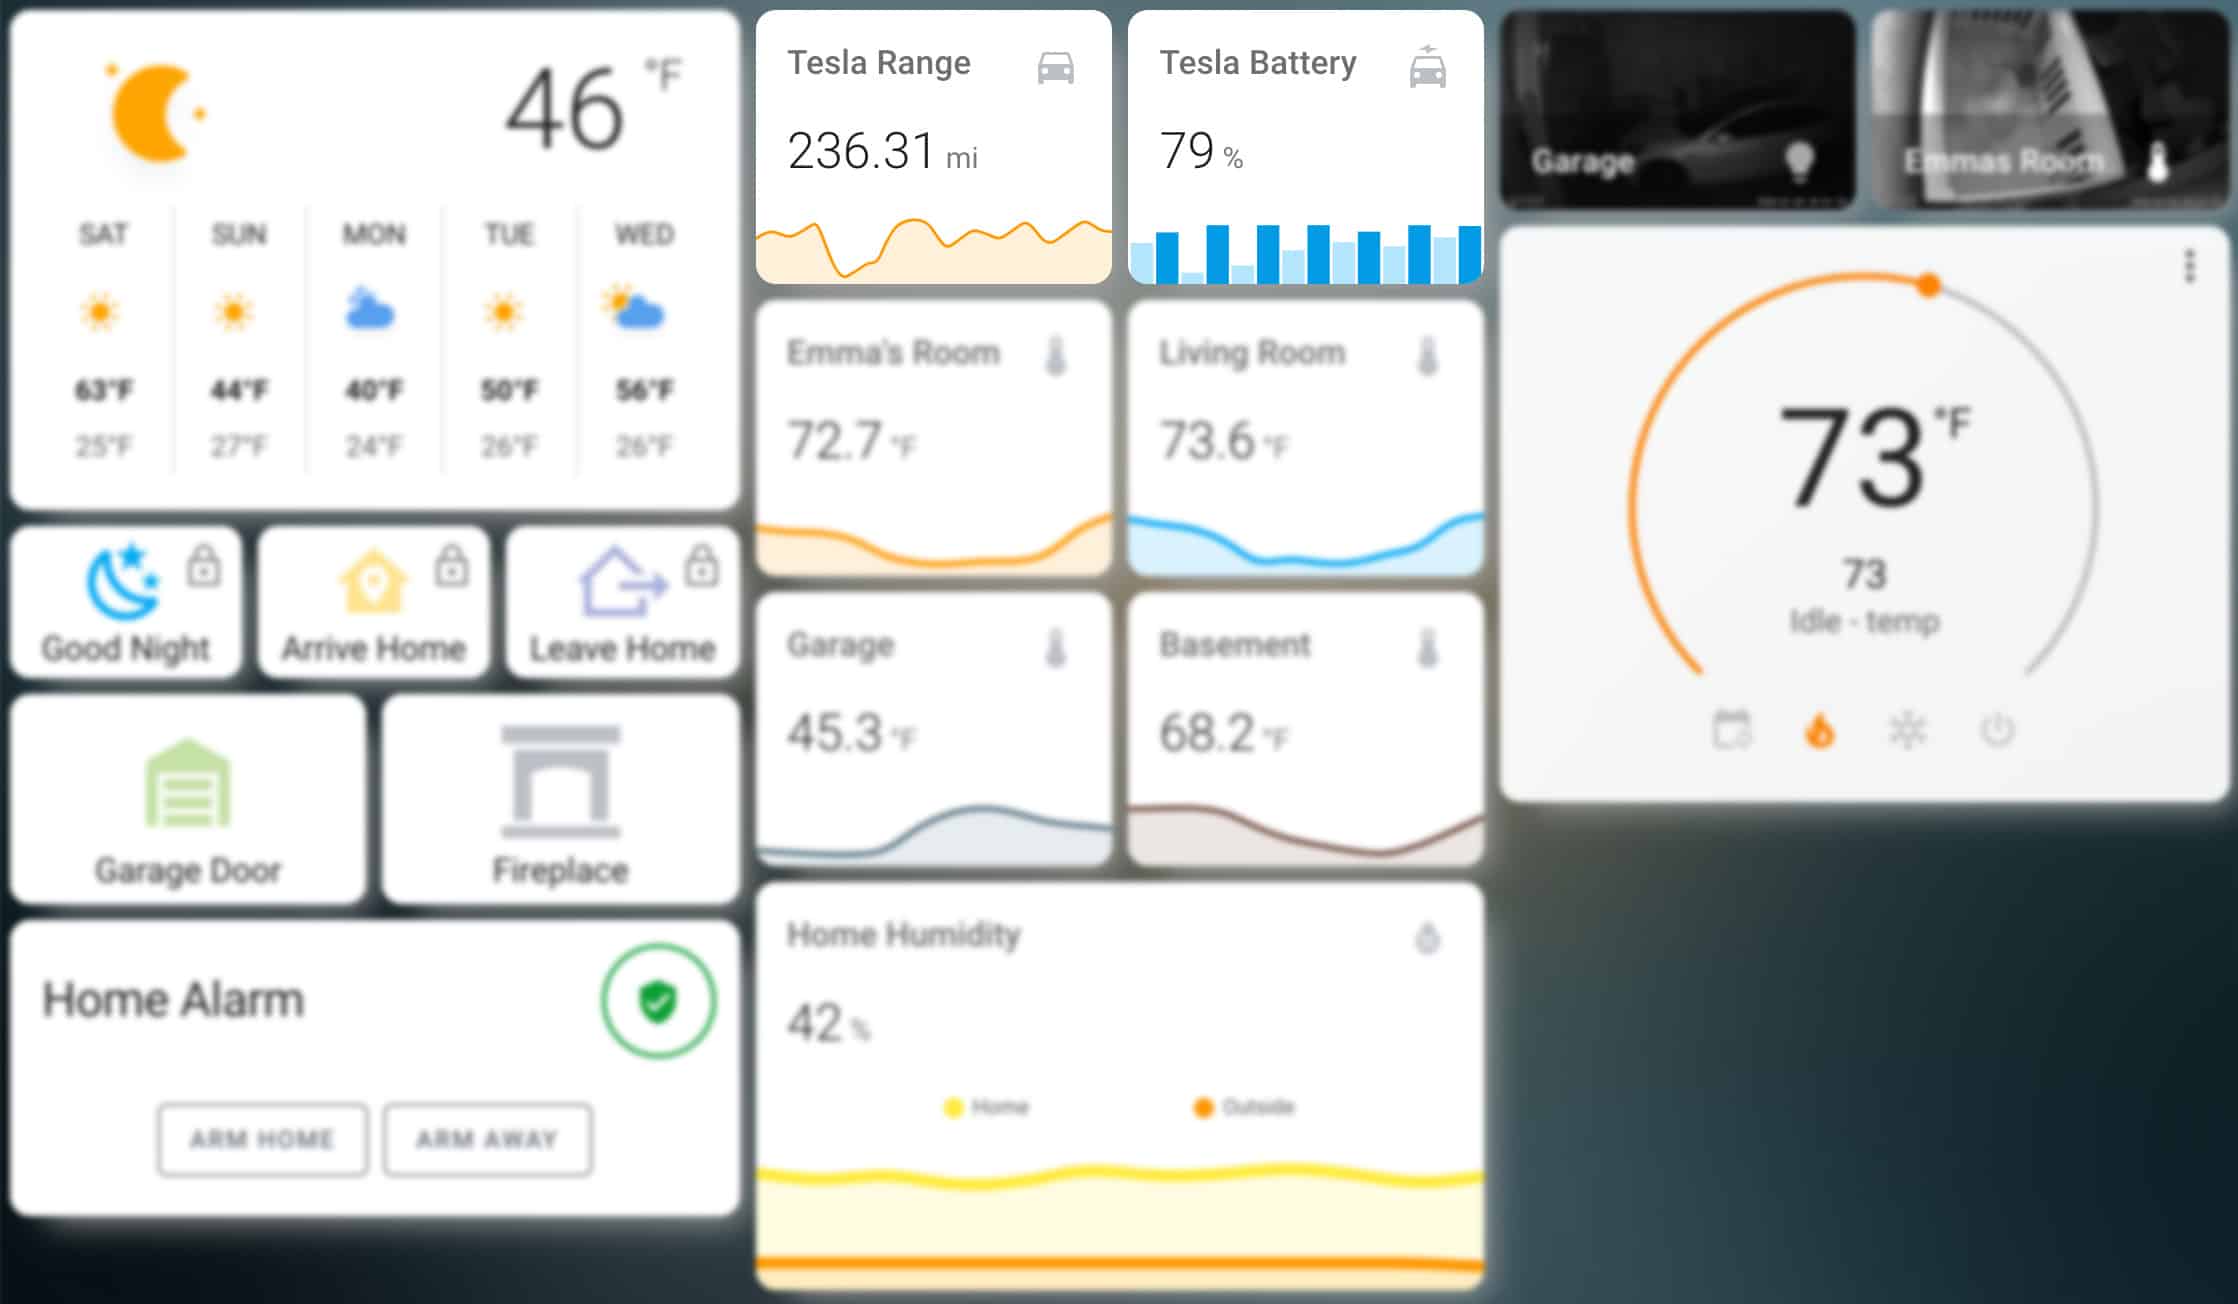
The first thing you will likely want to do is add some charts displaying information on your Tesla to the Home Assistant Lovelace dashboard. For this purpose, I recommend the highly customizable Apex Charts custom card.
Binary sensors you can display in the Home Assistant include information on whether an update is available, if the Tesla is parked or not, and the charging status. Sensors include the battery level, indoor and outdoor temperatures, odometer, estimate range, and charging rate.
Display Tesla sensors in the Home Assistant dashboard
As I, personally, do not own a Tesla, I am relying on community contributions, such as this one by alt_smarthouse on the Home Assistant forums, to show you what is possible. They keep it nice and simple, with the two most useful metrics displayed in a simple graph: range and battery.
A Tesla's range and battery status displayed in the Home Assistant Dashboard
A Home Assistant Dashboard card showing a Tesal EV and its various statuses
Home Assistant will also keep track of where your Tesla currently is, using the device tracker. That means you could also add it to a map in the dashboard, if you want to keep an eye on your vehicle at all times.
Using Home Assistant to control a Tesla
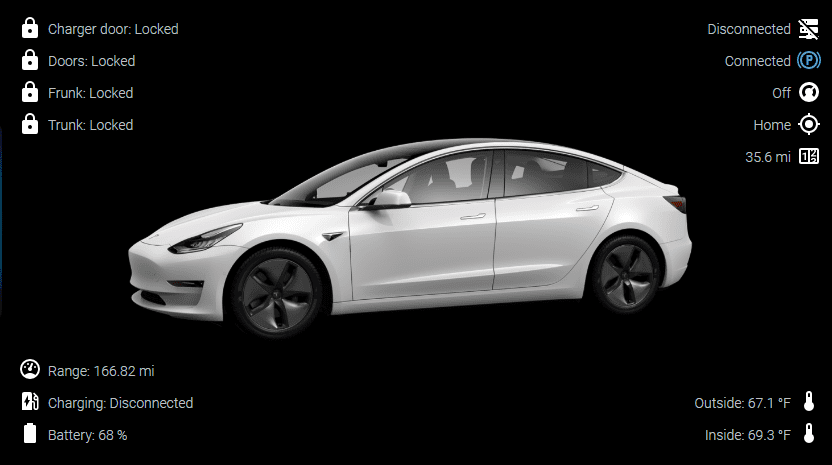
The Tesla Custom Integration doesn't just allow you to view information from your vehicle's many sensors. It also gives you numerous switches, as well as climate control and locks. One switch allows you to start or stop charging, as well as setting the maximum range. You can also disable polling of the Tesla to conserve its battery. Another switch allows you to toggle Sentry Mode.
The climate control gives you full control over your Tesla's HVAC system right from Home Assistant. You can easily toggle the HVAC and also set a target temperature — perfect for those cold winter mornings. It enables preset modes to switch between the max defrost, defrost, or normal operationmodes.
Finally, you can control all the Tesla's many doors. These include the door locks, the rear boot lock, the front boot (frunk) lock, and the charger door lock.
About Liam Alexander Colman
Liam Alexander Colmanis an experienced Home Assistant user who has been utilizing the platform for a variety of projects over an extended period. His journey began with a Raspberry Pi, which quickly grew to three Raspberry Pis and eventually a full-fledged server. Liam's current operating system of choice is Unraid, with Home Assistant comfortably running in a Docker container. With a deep understanding of the intricacies of Home Assistant, Liam has an impressive setup, consisting of various Zigbee devices, and seamless integrations with existing products such as his Android TV box. For those interested in learning more about Liam's experience with Home Assistant, he shares his insights on how he first started using the platform and his subsequent journey.