How to replace Home Assistant's default shopping list with Bring!
Disclosure: This post contains affiliate links. If you click through and make a purchase, I will earn a commission, at no additional cost to you. Read my full disclosure here.
I have never even given the default shopping list in Home Assistant a look-in. Why? Because I use Bring!, an Android, iOS, and web app, as my digital shopping list. Bring! allows me to easily share a shopping list with my partner and also supports numerous smartwatches (namely the Apple Watch and those running Wear OS) as well as the Google Assistant and Amazon Alexa. It also has the option to store loyalty cards, which makes my wallet a lot thinner.
What I never thought about was integrating Bring! with Home Assistant and whether it was even possible. By integrating the two services, I wouldn't have to open a web app just to check whether an item has already been added or not, and I could potentially have items added automatically or as part of a script.
No API means no official Home Assistant integration with Bring!
As Bring! doesn't offer an official and open API, there isn't an official integration available. Workarounds, web scraping and reverse engineering are not allowed in those. Luckily, though, the API Bring uses has been reverse engineered, allowing willing developers to use it for their applications. That is precisely what Vincent Le Bourlot on GitHub did, and his creation is something many have been asking for: A custom component for integrating Bring! with Home Assistant.
Please keep in mind that by using an unofficial API, this custom component could break at any time. The developers behind the Bring! app have shown no interest in offering an official API and if they don't change their minds on the matter, we will never see an official Home Assistant integration with Bring!.
How to install the Bring! custom compoment
As with just about every other custom component, the Bring! integration with Home Assistant can be installed using HACS (Home Assistant Community Store). Using HACS not only makes the installation easier, but it has the added benefit of notifying you whenever an update has been released.
Once you have HACS up and running you can add the repository for the custom component by clicking on the three-dot-menu. From there, add the following repository and select the category 'integration'. Once done, you should be able to install the 'Shopping List' custom component:
https://github.com/vlebourl/shopping_list
Setting up the Bring! integration
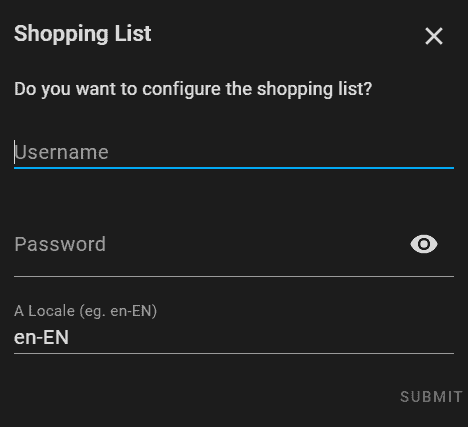
You will have to restart Home Assistant to finish off the setup of the Bring! custom component and once done, you should be able to add the 'Shopping List' integration from Home Assistant's web dashboard. When selected you will be prompted to enter your Bring! username and password. After clicking the submit button you will be able to choose your desired list and the integration is complete.
Viewing Bring! in Home Assistant
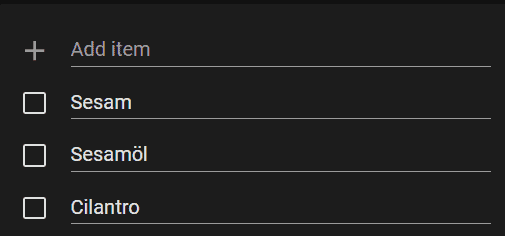
You have two options to view Bring! inside of Home Assistant. As this custom comment replaces the default shopping, you can access it from the menu, or you can add a shopping list card to your Lovelace dashboard.
Liam Alexander Colmanis an experienced Home Assistant user who has been utilizing the platform for a variety of projects over an extended period. His journey began with a Raspberry Pi, which quickly grew to three Raspberry Pis and eventually a full-fledged server. Liam's current operating system of choice is Unraid, with Home Assistant comfortably running in a Docker container. With a deep understanding of the intricacies of Home Assistant, Liam has an impressive setup, consisting of various Zigbee devices, and seamless integrations with existing products such as his Android TV box. For those interested in learning more about Liam's experience with Home Assistant, he shares his insights on how he first started using the platform and his subsequent journey.