The Google Home/Google Assistant integration with Home Assistant often feels like a one-way street. The Google Home app can interact with Home Assistant entities, but the reverse isn't as fluid. This is particularly noticeable for users of Google Assistant-enabled devices like the Google Nest Audio and Google Pixel Tablet, where timers and alarms are key features. Fortunately, the Home Assistant Google Home Community Integration offers a more dynamic solution.
Contents
- Understanding Google's Ecosystem: Google Home, Google Assistant, and Google Nest
- How to Install the Home Assistant Google Home Community Integration
- Setting Up the Google Home Integration
- Leveraging Google Assistant Timers and Alarms in Home Assistant
- The Convenience of 'Do Not Disturb' in Home Assistant
- Conclusion
Understanding Google's Ecosystem: Google Home, Google Assistant, and Google Nest
Firstly, let's clarify the terminology in Google's ecosystem:
- Google Assistant: This is an AI-powered virtual assistant, similar to Amazon's Alexa or Apple's Siri. It's integrated into various devices, enabling voice-activated assistance for a range of tasks.
- Google Home: Initially a line of Google's smart speakers, the term has evolved to broadly represent Google's smart home ecosystem, including devices like smart speakers and smart displays, all powered by Google Assistant.
- Google Nest: The current brand name for Google's smart home products, encompassing smart speakers, displays, thermostats, cameras, and more. This brand integrates Google Assistant for voice control and is the rebranded version of what was previously known as Google Home devices.
The Home Assistant Google Home Community Integration supports devices running Google Assistant, including the original Google Home smart speaker, Google Nest smart speakers and displays, and even some third-party devices like Lenovo's. However, some devices, such as Sonos speakers with Google Assistant, lack Local Home functionality and are incompatible with this integration.
How to Install the Home Assistant Google Home Community Integration
For installation, the Home Assistant Community Store (HACS) is your best bet. HACS, a standard for custom integrations and Home Assistant Dashboard cards, ensures easy updates and installation. The integration works across various Home Assistant setups, from OS on Raspberry Pi to Core in a Docker container.
After installing HACS, add the Google Home repository, which is included by default.
Setting Up the Google Home Integration
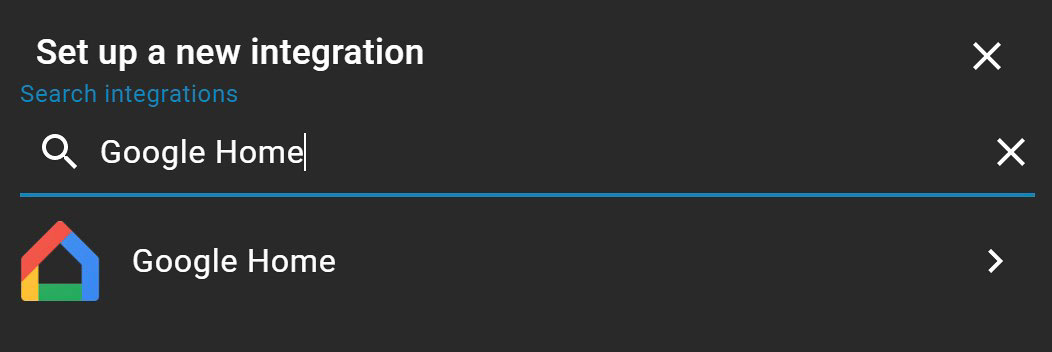
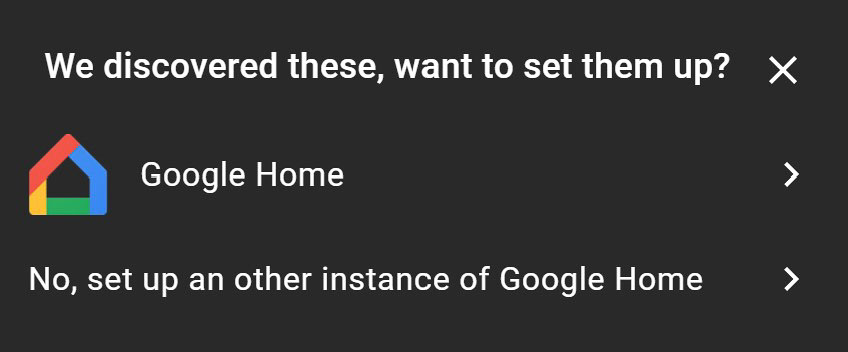
Post-installation, restart Home Assistant and navigate to settings to add the new integration. Search for Google Home and follow the prompts. Ensure your Google Assistant devices are discoverable on the same network. For Docker users, remember that host networking mode is essential.
During setup, you'll need to enter your credentials. Creating an app password is recommended for added security.
Leveraging Google Assistant Timers and Alarms in Home Assistant
This integration shines by displaying Google Assistant timers and alarms as sensors within Home Assistant. Multiple timers and alarms on a single device will aggregate under a single sensor, but each can be individually accessed through its attributes.
Timers and alarms can also be deleted using the following services:
google_home.delete_alarmgoogle_home.delete_timer
However, using these services requires the precise timer ID, which we'll explore in more detail in upcoming articles.

The Convenience of 'Do Not Disturb' in Home Assistant
A standout feature is the ability to activate 'Do Not Disturb' mode on your Google Assistant devices directly from Home Assistant, bypassing the need for voice commands. Each device gains a switch for easy control of this feature.
Conclusion
In summary, the Home Assistant Google Home Community Integration enriches your smart home experience, making it more interactive and intuitive. Whether managing alarms, viewing timers, or enabling 'Do Not Disturb', this integration is a significant upgrade for any Home Assistant user with Google Assistant devices. Stay tuned for more articles on optimizing your use of this handy integration.

