Microsoft's Visual Studio Code is a hot favourite for tinkering with Home Assistant YAML code. Even though YAML is gradually being phased out, there are still a good number of integrations that haven't made the transition to the UI. So, as long as we're stuck with YAML, we might as well make the editing process as sleek and streamlined as possible with the Home Assistant Config Helper.

A Microsoft tool beloved by all?
Microsoft has had its fair share of missteps. It's been called out for monopolistic antics and anticompetitive manoeuvres, not to mention the occasional whispers about security vulnerabilities and performance hiccups. But amidst this roller coaster ride, it's a pleasant shocker that they managed to nail one product just right.
Microsoft's Visual Studio Code has been flying high, leaving a trail of happy users in its wake. Free to use and open-source, it's become the go-to source-code editor of choice, as evidenced by the Stack Overflow 2019 Developer Survey, and this is just four years post-launch.
How to Install the Home Assistant Config Helper for Visual Studio Code
With Visual Studio Code open, hit Ctrl+Shift+X on your keyboard or click on the extensions icon in the left-hand menu. Then just type Home Assistant into the search box, and voilà, the first result should be the Home Assistant Config Helper. Click on the extension and hit "install". You'll then be nudged to configure the extension.
Setting Up the Home Assistant Config Helper
Once you've got the settings panel open, hunt down the Home Assistant Config Helper under Extensions. Then, key in the URL of your Home Assistant host. This can either be the internal or public address.
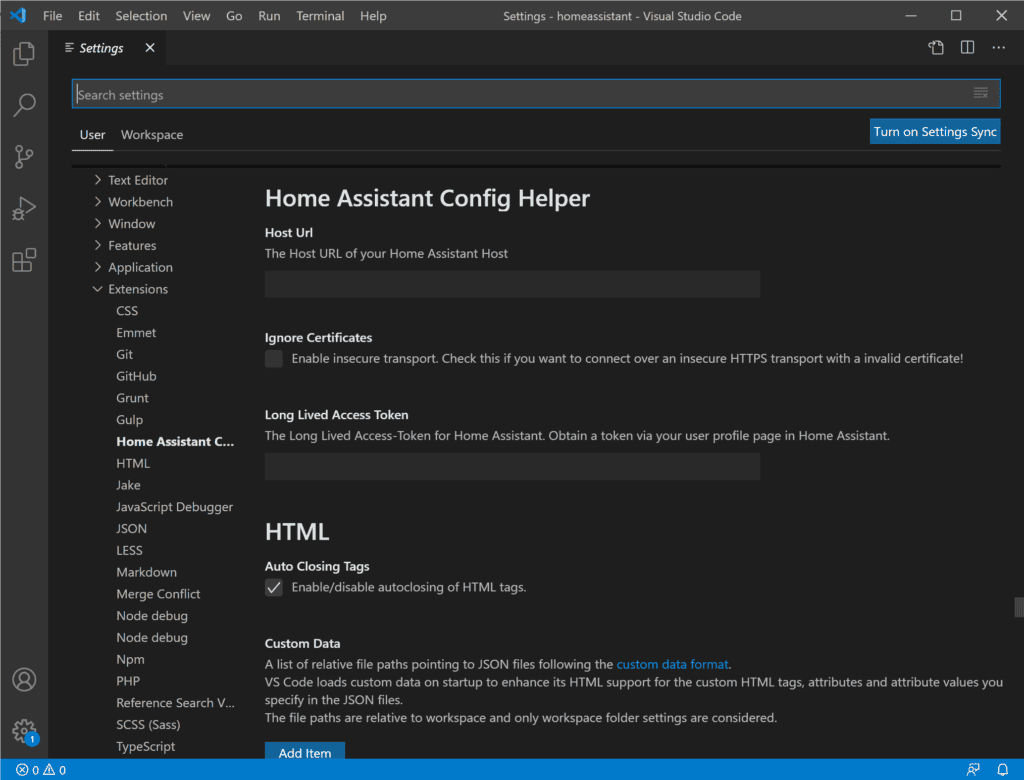
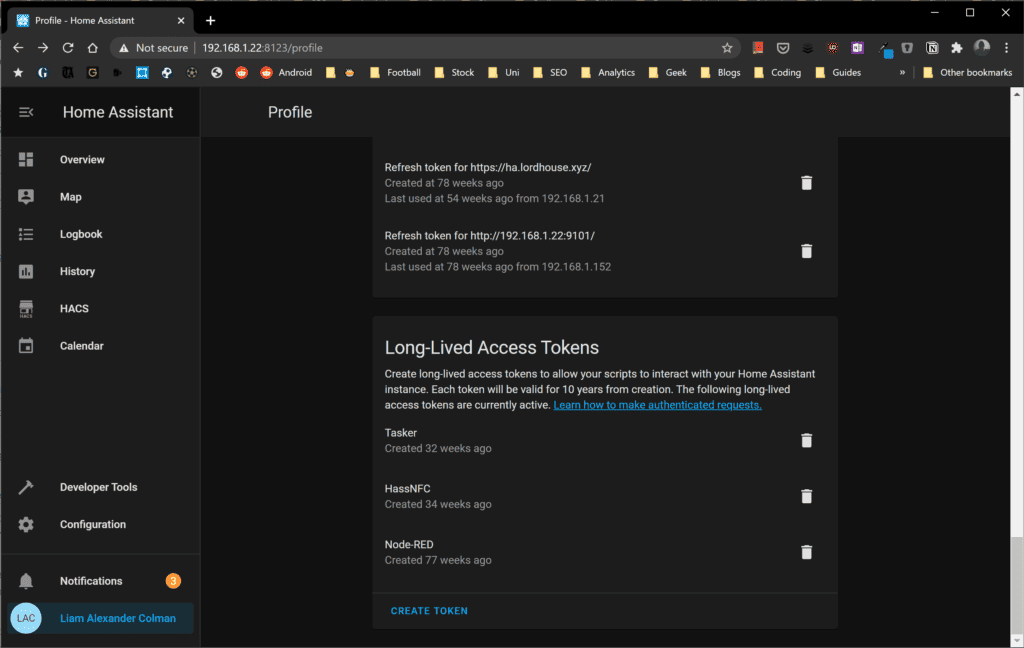
Next, open Home Assistant and click on your username in the main menu. Scroll down until you spot the Long-Lived Access Tokens section. Create a new token by clicking on create token. Name this token (something like Visual Studio Code would work) and click OK. You'll then be given the token. Copy and paste this token into the Visual Studio Code settings. Remember, this code is for your eyes only. If it ever falls into the wrong hands, make sure you immediately delete it in Home Assistant. You may need to restart Visual Studio Code for the settings to take effect.
Using the Home Assistant Config Helper
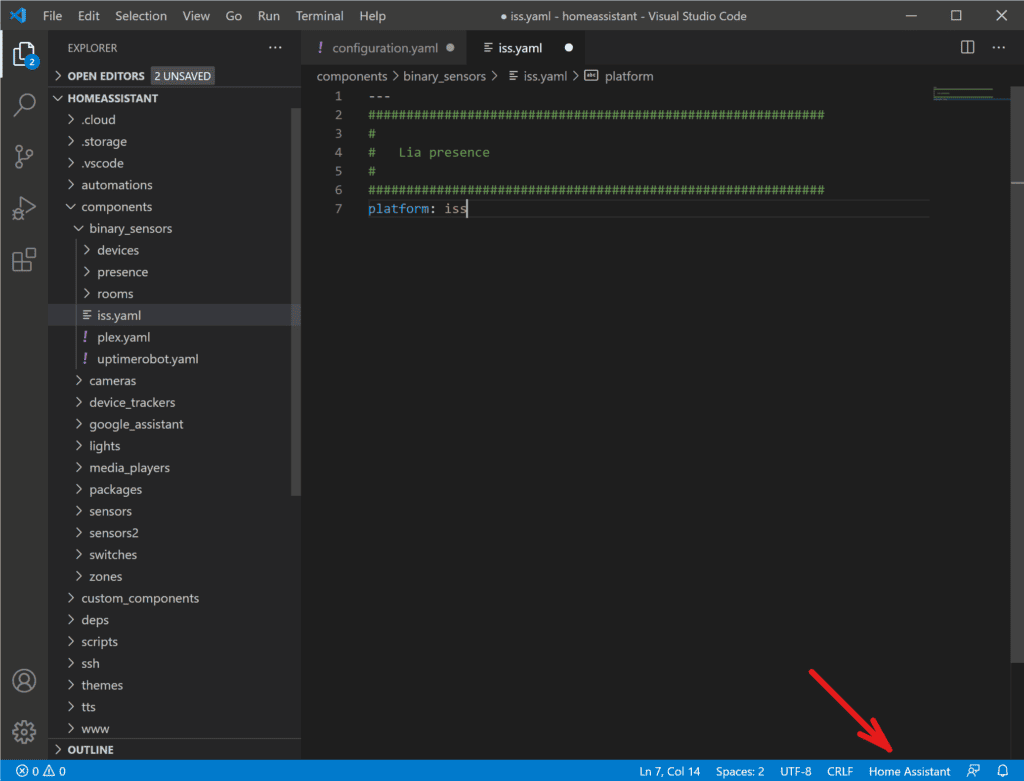
To start using the Home Assistant Config Helper, change the language in Visual Studio Code to Home Assistant in the bottom bar.
The Wonders of the Home Assistant Config Helper for Visual Studio Code
The Home Assistant Config Helper is like your personal assistant, accelerating your editing process. Let me walk you through a couple of its standout features. For a full list of features, feel free to visit the project's GitHub page.
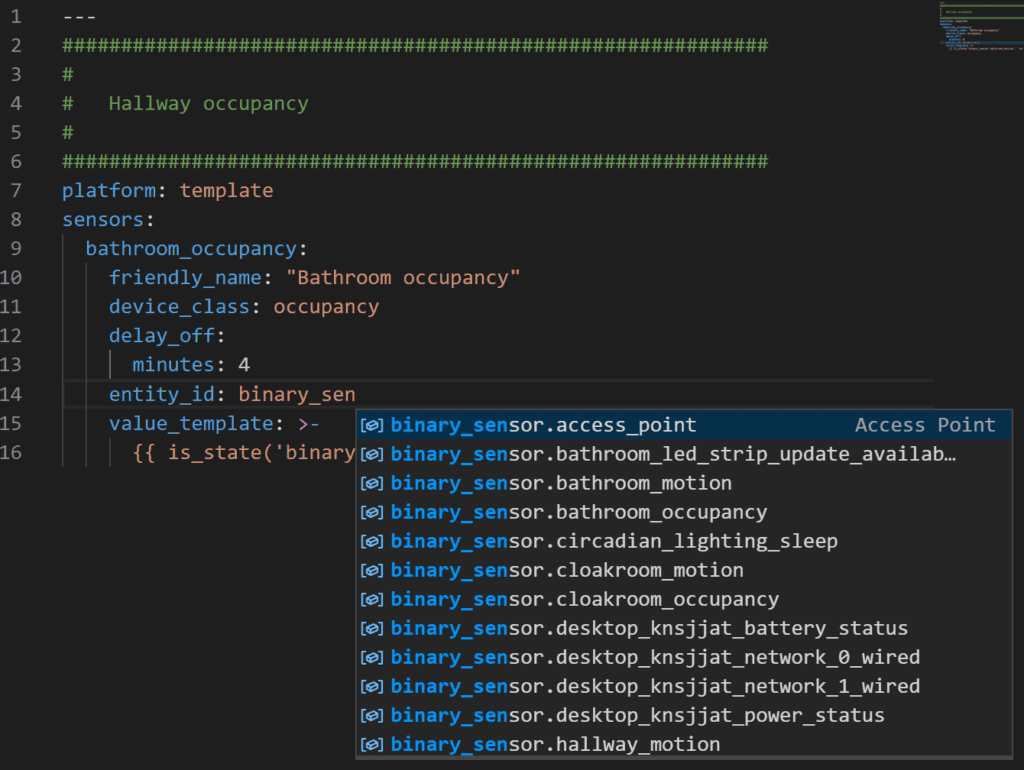
Completion for entity IDs, services, scenes, and triggers
Imagine you're crafting a new automation or setting up a binary sensor for room occupancy. Instead of wasting precious time hunting for the correct IDs of the entities you want to include, the Home Assistant Config Helper offers a list of all available entities for you to pick from. This also applies to scenes, triggers, and services.
Autocomplete and validation for configuration and Lovelace schema
Properties, values, and enums are auto-completed, and most schemes that Home Assistant uses are validated, making your job a whole lot easier.
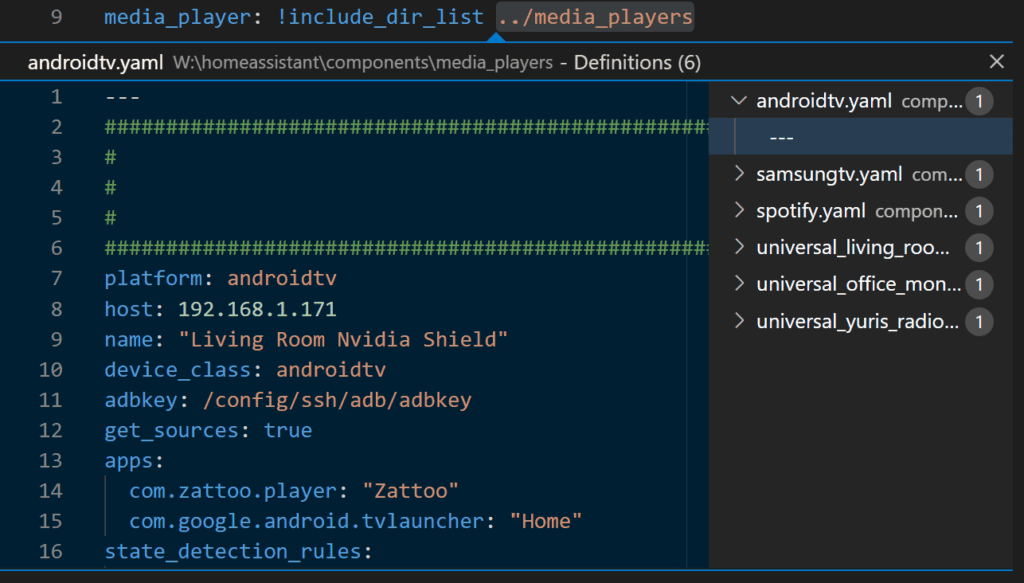
Easy navigation for includes
As someone who uses a whole bunch of includes in my configuration, I, personally, adore this feature. By highlighting an include and hitting F12, you can easily jump between files. If you're already using the Visual Studio Code add-on, then it's your lucky day, as there's nothing left for you to install. This extension is already part of the package.
