
Sleep as Android_ is a sleep tracking and smart alarm app for Android with over 10 million installations from the Google Play Store alone. Using it you can track sleep cycles using either a smartphone, a wearable, or a Sleep Phaser. As an Android user since the Motorola Milestone, I remember Sleep as Android being one of my first app purchases.
Since its release over ten years ago, many new features have been added to Sleep as Android, including snoring detection using TensorFlow and automatic sleep tracking. With the popularity of smart lighting growing, Sleep as Android also added the ability to connect to a Philips Hue hub or IKEA TRÅDFRI gateway for a simulated sunrise alarm. Unfortunately, there is no way of directly interacting with Home Assistant. That is, unless you use Tasker as a middleman.
To get things started, you will need to connect Tasker to Home Assistant using the guide I previously published. Tasker will allow you to connect not just Sleep as Android, but a whole host of apps to Home Assistant, some of which might be the subject of future guides (if you want to avoid missing them, you might be interested in signing up to the Home Assistant Guide Newsletter)
Contents
Available Sleep as Android events
Those that already use Sleep as Android know that it is a powerful app. Using Tasker, any of the following Sleep as Android events can be used to trigger services in Home Assistant:
- Sleep tracking started, stopped, paused, or resumed
- Snooze (alarm)
- Bedtime
- Alarm started or dismissed
- Snooze cancelled
- REM
- Audio recognition
- Anti-Snoring
- Smart period
Start Home Assistant automations with Sleep as Android events
As you might be able to tell from the list of events above, there are many things you could do by relaying data from Sleep as Android to Home Assistant via Tasker. You could let Home Assistant know whenever you are snoring or how many times you hit the snooze button before actually getting out of bed. The example used for this guide, however, will be a more basic feature I can envision many who use both Sleep as Android and Home Assistant will want to use.
Dim the lights at bedtime
Though a simple one, this automation should give you a broad idea of how Sleep as Android can interact with Home Assistant through Tasker. This automation will dim the lights whenever Sleep as Android thinks it is my bedtime.
Creating the automation in Home Assistant
To make things easier, I recommend you create a helper in Home Assistant, which Sleep as Android can toggle whenever it is bedtime. That way only the helper will have to be toggled from Tasker and the rest can be configured in Home Assistant. You could also use Tasker to dim the lights and execute all kinds of services in Home Assistant, but that would mean configuring everything in the app. I, personally, prefer Home Assistant to do the heavy lifting.
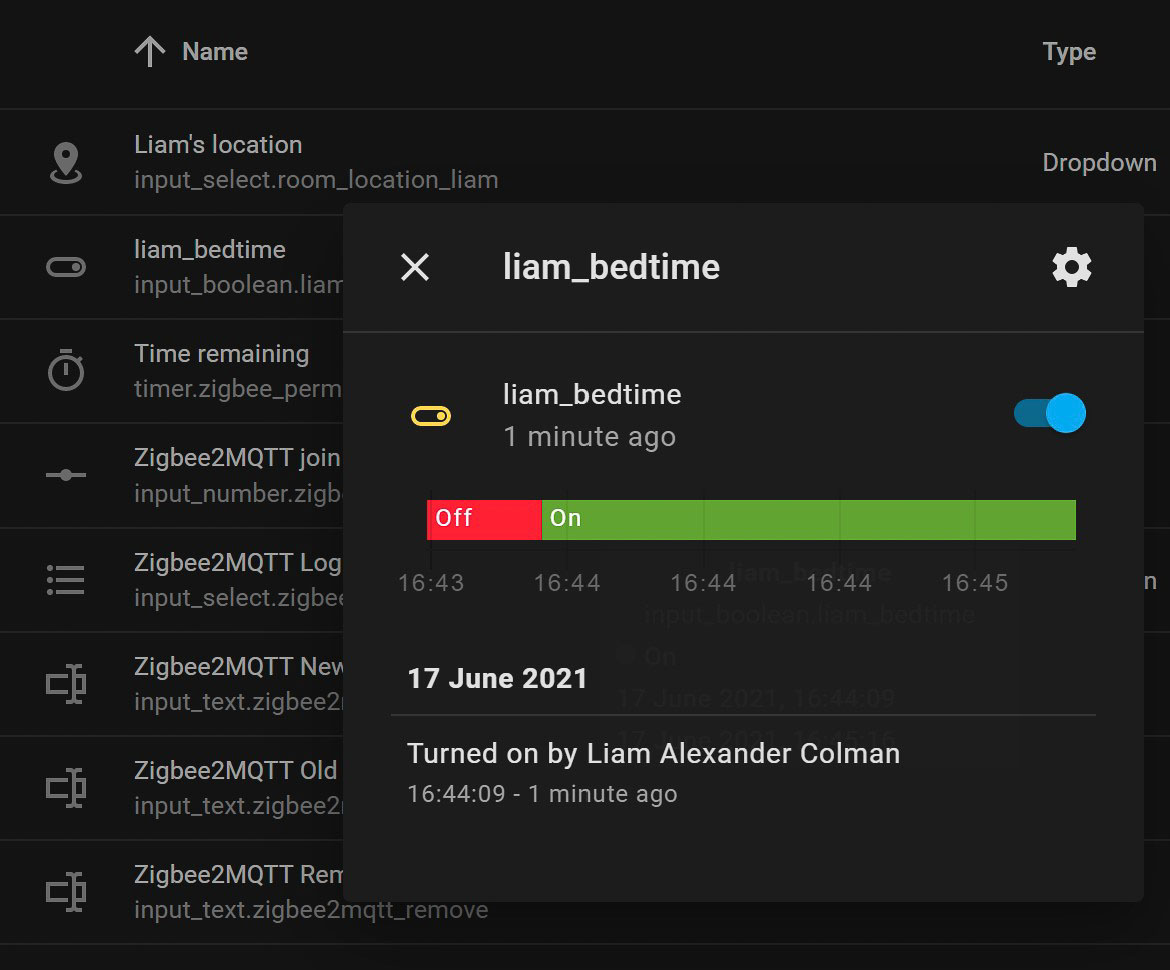
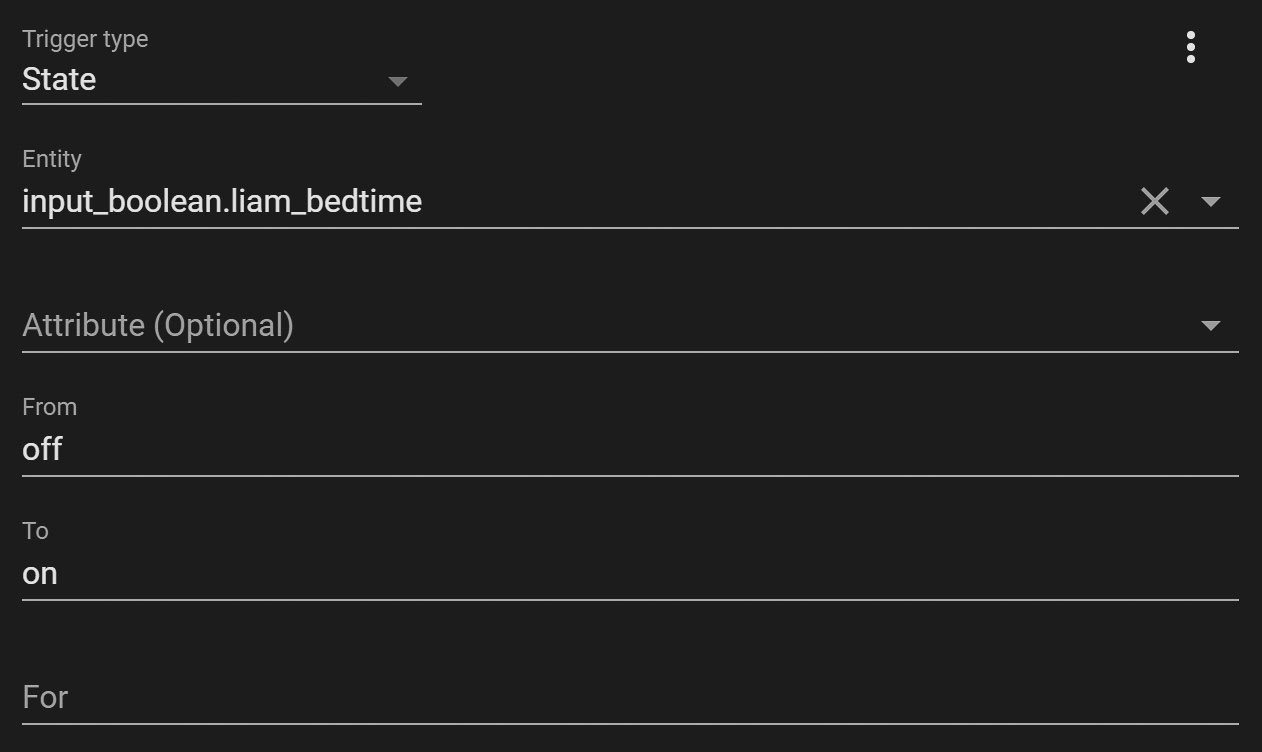
Before switching to Tasker, the automation can already be set up in Home Assistant. To do so, create a new and empty automation and give it a fitting name. In this case, the trigger will be the helper previously created. Whenever it switches from off to on, the automation will be executed.
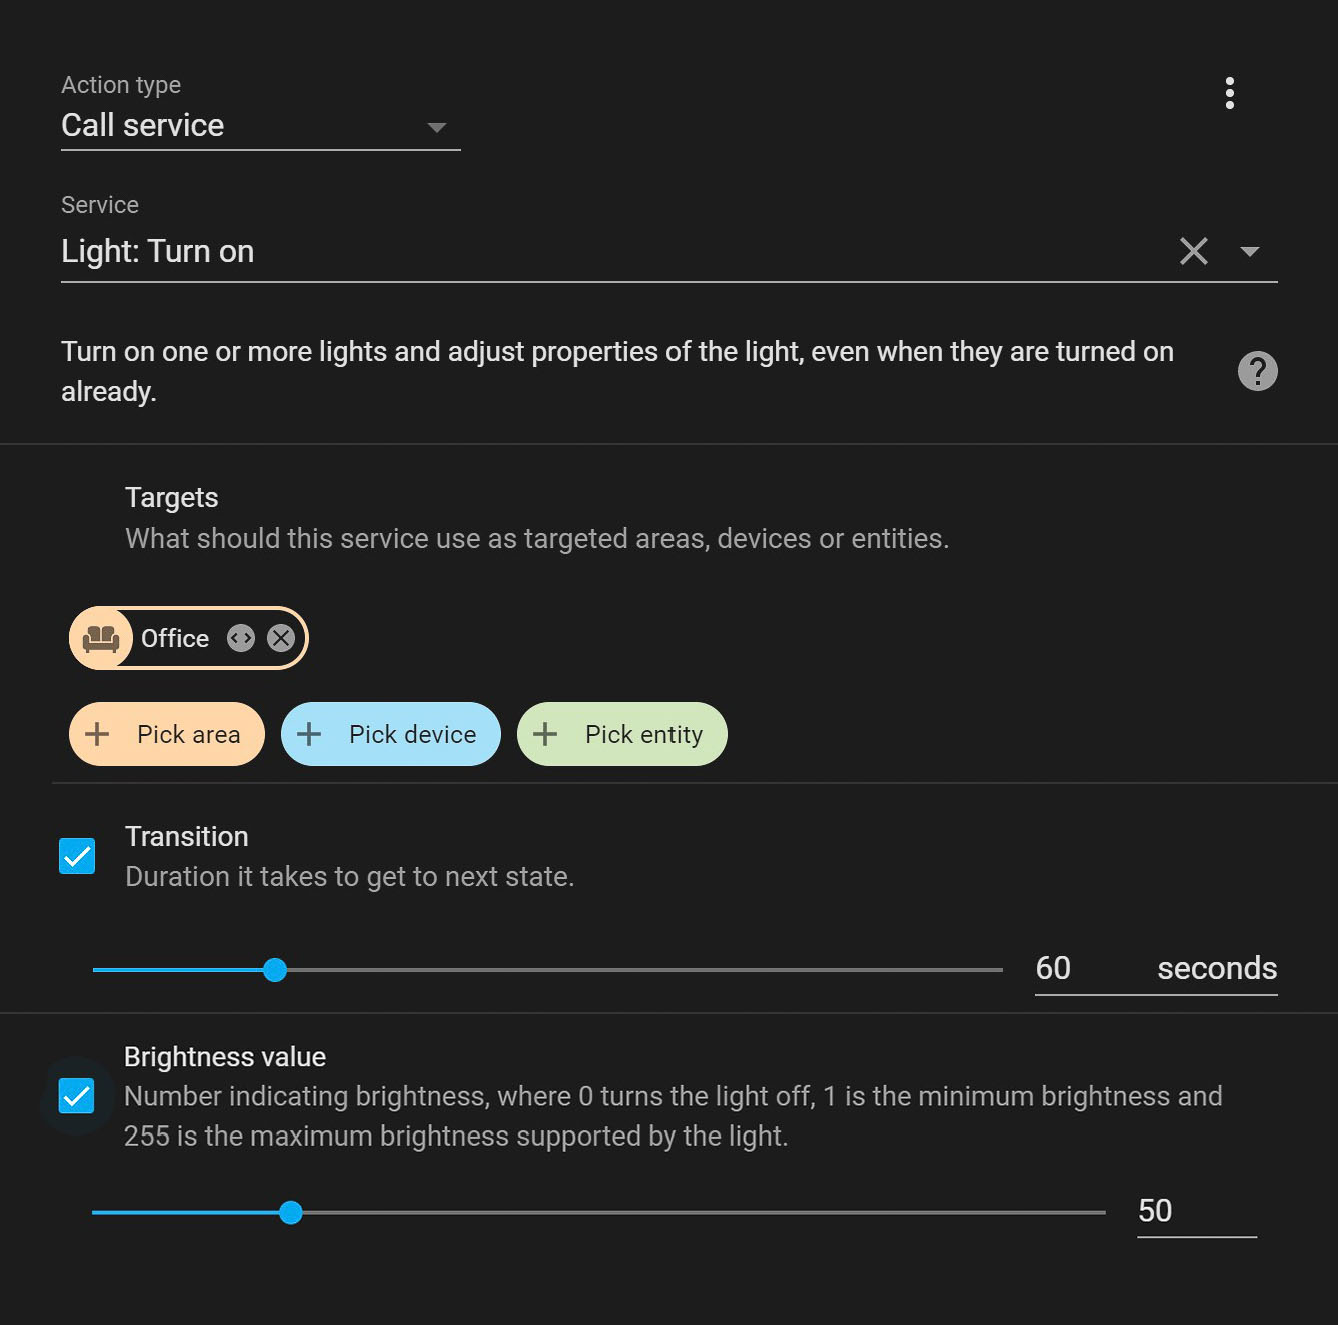
The action simply consists of a service call to turn on the lights at a certain brightness. The term turn on might seem a bit confusing, but the dimming will happen even if the lights are already on.
At this point, you can extend the automation with any actions and conditions. For example, I would first have Home Assistant check whether I am actually at home, before executing the action. You could also adjust the colour of RGB lights or have the Google Assistant tell you to get ready for bed.
Creating the task in Tasker
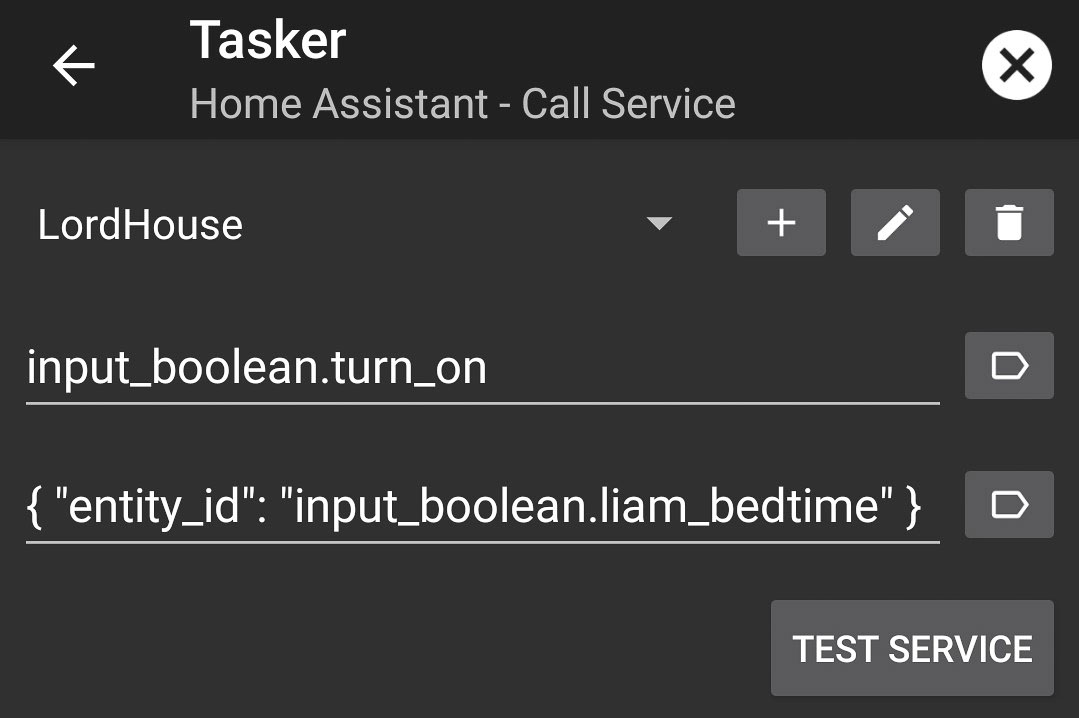
With the automation in place, we need to set up Tasker to toggle the helper whenever Sleep as Android wants us to go to bed. To accomplish this, open up Tasker and create a new task. Inside this task, you are going to use the Home Assistant Plugin for Tasker to call a service.
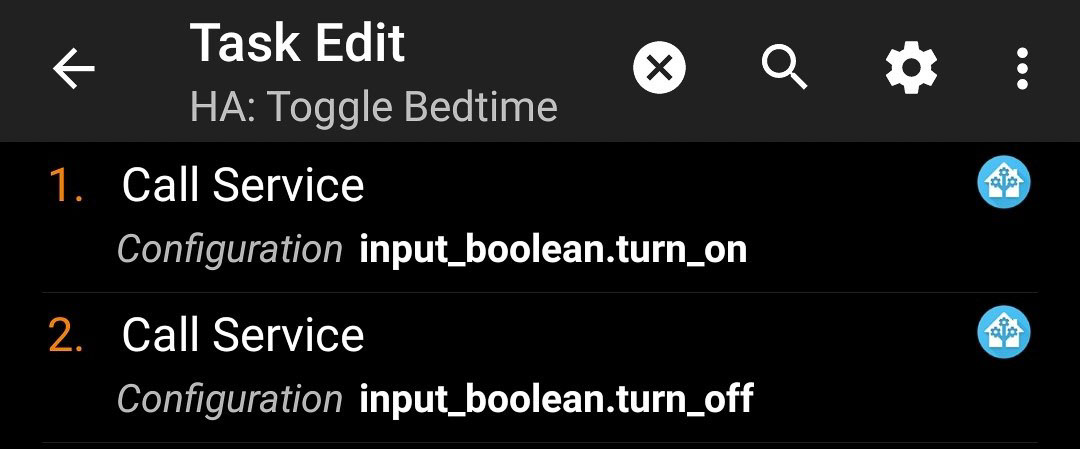
The service you want to call is input_boolean.turn_on and alongside it will send the helper previously created using JSON, in my case that is { "entity_id": "input_boolean.liam_bedtime" }.
In the first screenshot, you might notice that there are in fact two service calls set up. The second one will turn the input_boolean off again, so it is ready for the following day.
The first of many Tasker ideas
And just like that, Sleep as Android can be integrated with Home Assistant using Tasker. The automation shown in this guide is just the beginning of what is possible. Please let me know in the comments what automations you trigger using Tasker on your Android smartphone, and it might just be featured in a future article!
Hardware compatible with Sleep as Android
Sleep as Android can use several devices to track your sleeping habits without having to have your smartphone underneath the pillow. The easiest and most complete integration is with Polar's fitness-tracking devices, specifically the Polar H10 (heart rate and movement monitoring chest strap), Polar OH1 (optical sensor on arm), and Polar Verity Sense (optical sensor on arm).
I have tried using my Garmin Forerunner 645 with Sleep as Android, but the experience has been destitute. The same goes to my previous watch, which was running Wear OS. Other devices, such as Xiaomi's Mi Bands, require multiple applications to be installed on your smartphone. For that reason, the Polar trackers are all I can recommend with a good conscience.

Sleep as Android is supporting MQTT now, and there is a custom integration for HA https://github.com/IATkachenko/HA-SleepAsAndroid to use this feature.
I had never seen this – thanks! I leave this post up though as not everyone uses MQTT. But I might have to take a look at the custom integration sometime soon.