It's been a while since Home Assistant Blueprints were introduced in what was meant to be Home Assistant Core 1.0. Despite this, I hadn't found a reason to use one until now, as most of my devices were already configured. However, driven by curiosity, I recently decided to set up a new Aqara Cube using a Blueprint from the Home Assistant community.
Contents
The Aqara Cube: More Than a Gimmick
On a sidenote, despite occasionally being dubbed a gimmick, I genuinely enjoy using my Aqara Cubes. With the right configuration, the Aqara Cube offers around 50 possible actions. You can slide it, flip it, shake it, drop it, and rotate it. Each side, when facing upwards, can control different devices. Some even add stickers to their Aqara Cubes to remember which side controls what. While this article isn't a review, it's worth mentioning the versatility of the device.
Choosing the Right Home Assistant Blueprint
I used a Blueprint for my Aqara Cube provided by community member luckypoppy, specifically designed for Zigbee2MQTT. If you're using a different system to manage your Zigbee devices, you'll be pleased to find that there are also Blueprints available for ZHA and deCONZ.
Importing and Configuring a Home Assistant Blueprint
To add the Blueprint to your Home Assistant, simply copy the appropriate URL (yes, directly from the forum post), navigate to the Blueprints section in the Home Assistant Configuration, click on IMPORT BLUEPRINT, and paste the URL. Before importing, you can preview the code, though it won't show you the configuration experience.
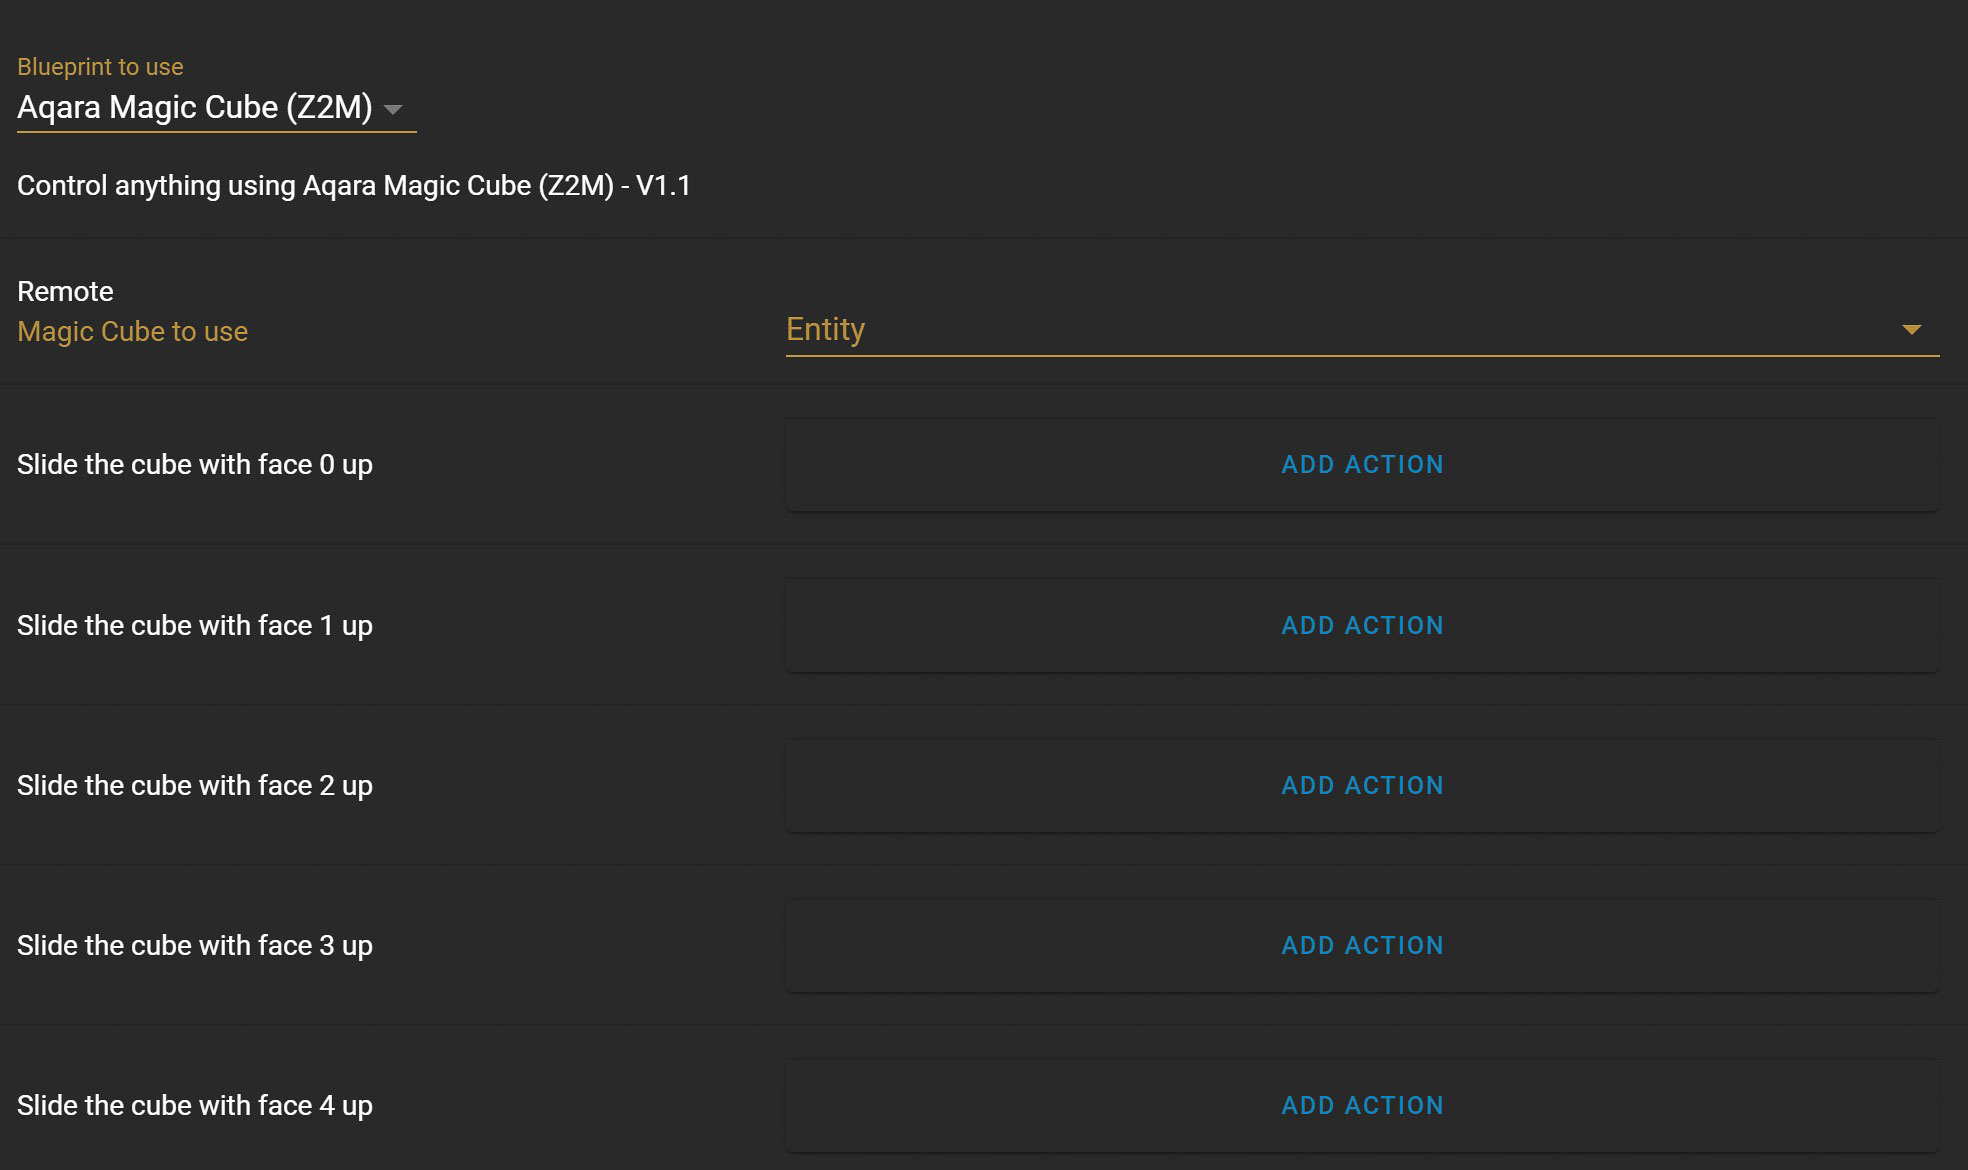
Once imported, you can create an automation based on the Blueprint by clicking on CREATE AUTOMATION. In the subsequent window, you'll find it easy to configure your automation using the web interface alone, without the need for complex YAML code. The Blueprint I used offers numerous options, as each action corresponds to a unique upward-facing side of the Aqara Cube. It saved me the hassle of configuring each side manually. And don't worry, you only need to configure the actions you'll use; leave the rest untouched.

Blueprints Are Making Home Assistant More Accessible
Home Assistant is all about openness and accessibility. As an open-source application with a robust community, it's special partly because of the people supporting it. Blueprints allow community members to take their support a step further by easily sharing their configurations as templates with others. This feature makes Home Assistant much more approachable for beginners.
Fostering Innovation and Collaboration
Blueprints do more than just simplify the setup process; they foster a spirit of innovation and collaboration within the Home Assistant community. Users can build upon each other's work, iterating and improving Blueprints, which leads to rapid development and dissemination of new ideas and solutions. This not only enriches the user experience but also propels Home Assistant to the forefront of home automation possibilities, setting a standard for what an engaged and collaborative community can achieve.
