
There are many ways of blocking ads and trackers from your browser. These come mainly in the form of extensions, such as the popular uBlock Origin. But there is a better, more efficient, and more wide-ranging type of blocker and Pi-hole is one of them.
The issue with browser extensions is that they can slow down your system, ad blockers are known to be a common cause of lag. And for me, one of the biggest advantages an application such as Pi-hole have over browser extensions is that they can actually speed up your browsing experience. But more on that later.


Best choice
Pi-hole is designed for use on embedded devices with network capability, such as the popular and cheap Raspberry Pi. But if you’re already running a server at home it can be installed on a Linux machine or as a Docker container.
A quick word on ad blockers
I run ads on this site. Too many some might say. But guess what, running a website costs money. The ads I run on my websites barely cover the hosting and domain costs in a good month. So, why would anyone in their right mind write a review on ad blockers when they rely on ads? Because applications such as Pi-hole do more than just ad blocking.
I disable all ad blocking on websites I support. The same goes for websites where I know the creator is reliant on ads for their income. I use the whitelist for websites I want to support. And I’d hope you’ll do the same for me and my website.
But what I don’t like are trackers. Because I run multiple websites I use social media for promotion of my articles. And I do not want to be tracked by Facebook or Twitter. Because let’s face it, Facebook is just weird.
Besides the tracker blocking I also use the DHCP built in to Pi-Hole. I’ll go over that feature further down in this review.
The basics of Pi-hole
Before I get into the review I want to cover the basics of Pi-hole and answer some frequently asked questions. It is important to know what Pi-hole is and how it works to fully understand this review.
What is Pi-hole?
Pi-hole is a popular network-level ad and tracking blocker. Network-level refers to the fact that Pi-hole will block ads and trackers on any device connected to the same network. That way devices that otherwise wouldn’t support ad and tracker blockers, such as TVs, smartphones (Android and iOS without root or third-party app stores), tablets, and game consoles, will also benefit from Pi-hole’s blocking capabilities.
The application acts as a DNS server for a network. To enable it you will have to replace the pre-configured DNS server on your router. Pi-hole will then block known tracking and advertising domains.
Because Pi-hole blocks domains, ads and trackers won’t be downloaded in the first place. Browser extensions will first download the ad and then block it. By using Pi-hole you can actually speed up your browsing experience because less data has to be downloaded.
What is Gravity?
Gravity is a script which retrieves blocklists, and then consolidates them into one unique list for the DNS server to use. It also serves to complete the process of manual whitelisting, blacklisting and wildcard update. This script runs automatically each week, but it can be invoked manually using the web interface. If you’re already running Pi-hole you’ll find the option under Tools in the main navigation.

Does Pi-hole cost anything?
Pi-hole is free software. There is no paid version with more features and there aren’t any optional plugins or add-ons you can purchase. Pi-hole supported by donations and patrons. There are also a handful of affiliate links you can use to support the project. Supporting open-source projects such as Pi-hole in any way you can keep the development active!
If you don’t have any already you will have to pay for hardware to run Pi-hole on. Luckily, though Pi-hole is very lightweight and doesn’t need much processing power. All that is needed is 2 GB free of storage space (though 4 GB recommended) and a system with 512 MB of RAM. Pi-hole can even run on the Raspberry Pi Zero.


Do I need a Raspberry Pi to run Pi-hole
No. Pi-hole's roots began with the Raspberry Pi, hence the name. However, there are multiple supported Linux distributions. Ubuntu, Debian, Fedora, and CentOS are all officially supported. There is also an official Docker container. So if you have an existing server or an Unraid system you can easily install Pi-hole without purchasing a Raspberry Pi.
How is Pi-hole installed?
Pi-hole doesn’t have a ready-made OS such as Home Assistant does for the Raspberry Pi. But the installation couldn’t be easier. In fact, it’s a single command:
curl -sSL https://install.pi-hole.net | bashThe easiest way of installing Pi-hole on a Raspberry Pi is by installing Raspberry Pi OS and enabling SSH by placing a file named
SSHon your SD card (see the third option in this help document). That way you can connect to your Raspberry using an SSH client such as MobaXterm without ever having to hook it up to a monitor and keyboard.
Configuring your router to enable Pi-hole
To enable Pi-hole you need access to your router’s web interface. Once you’re logged in you have to edit the DNS server to point to your Pi-hole. And just like that Pi-hole will be active on your network.

How I use Pi-hole
As mentioned earlier, I mainly use Pi-hole for its tracker blocking capabilities and not just to block ads. I also use the built-in DHCP server because it gives me more detailed information in the dashboard. When I was using Pi-hole with my router's DHCP server, the only device I saw in the clients list was that router and not the devices connected to it.
The experience as a user isn’t changed by using Pi-hole’s DHCP server. Though it is interesting to see which devices have the most blocked requests. I never realized how often my Samsung TV called home without using this feature.
Updating Pi-hole
The Pi-hole application itself can’t be updated from the web interface. Instead, this is done using the shell command
pihole -upThis command will check Pi-hole Core, the web interface and FTL repositories to determine what upgrades (if any) are required. Gravity, which checks your ad lists, can be updated using the web interface, as mentioned earlier.
Does Pi-hole work?
The short answer is yes, Pi-hole does work. With a Pi-hole set up and connected to your network all domains in your Gravity will be blocked. Depending on which ad lists you have set up Pi-hole will do a better or worse job. But that goes for all blockers. I’ll detail the role of these lists and where to find them further on in this review.
The Pi-hole installation is straight-forward and quick. You don’t need any knowledge of Linux to get Pi-hole set up on a Raspberry Pi. Though some technical knowledge is needed. You will have to set up a Raspberry Pi (if using one) and configure your router to use the Pi-hole as a DNS server. Though there are many guides available only on both of those tasks.
Where to find lists for Pi-hole
Your tracker and ad blocker are only as good as the list of domains which are in its blacklist. Pi-hole does come preconfigured with a few lists but these leave much to be desired. Finding lists can be a bit of a challenge, so I’ll share two collections I personally use.
The first is The Block List Project. Their mission is to help create a safer browsing experience by blocking malicious sites. The Block List Project has lists that block Facebook, TikTok malware, phishing, and so on.
The second is The Big Blocklist Collection. This is a curated list of lists in which each also has a rating attached to it.
When adding many lists, there is a high chance of false positives. If you find that a site you want to access has been blocked you can simply add it to the whitelist or remove the offending list if it contains too many false positives.
You can add ad lists to your Pi-hole under Group Management in the main navigation.
Other features
One feature I plan on using is Local DNS Records. Using these records you can create domains for your self-hosted services. For example, if you wanted homeassistant.local to point to your Home Assistant you could configure that using Pi-hole.
Where Pi-hole falls short
If you have a device you don’t want blocking enabled on, you will have to manually change that device’s DNS settings to exclude it. There is no option in the web interface to disable blocking on individual devices. The only option is to disable tracking completely.
Pi-hole does not yet have any parental controls. You can add domains you want to block to your blacklist but these will be blocked on your whole network and not just for individual users. As with the issue mentioned in the previous paragraph, Pi-hole is an all or nothing type of application.
I wasn’t sure whether I should mention this here or not but because a few of you might not be aware of this I’ll include it: Pi-hole only works when you are connected to the same network. It won’t work outside your own and can’t protect you when connected to public hotspots. There is the option of installing a VPN server and connecting to your home network when you aren’t actually there. That would be one option if you want Pi-hole’s blocking everywhere.
Pi-hole and Home Assistant
While you can’t install Pi-hole as a Home Assistant add-on there is still a Pi-hole integration present. The integration setup hasn’t been ported to the web interface yet and has to be configured using YAML code. Here’s how I have my integration set up:
pi_hole:
  - host: IP_ADDRESS
    api_key: API_KEY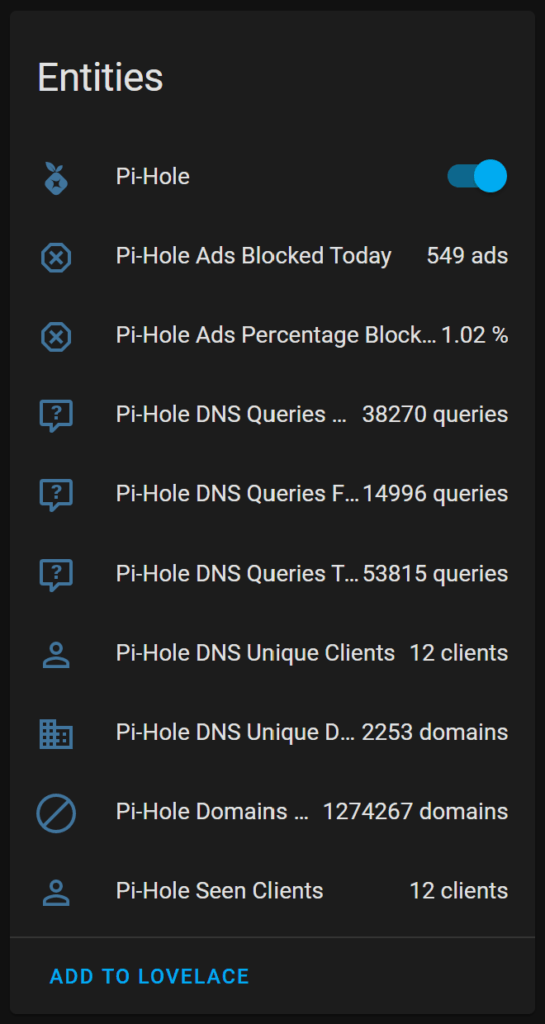
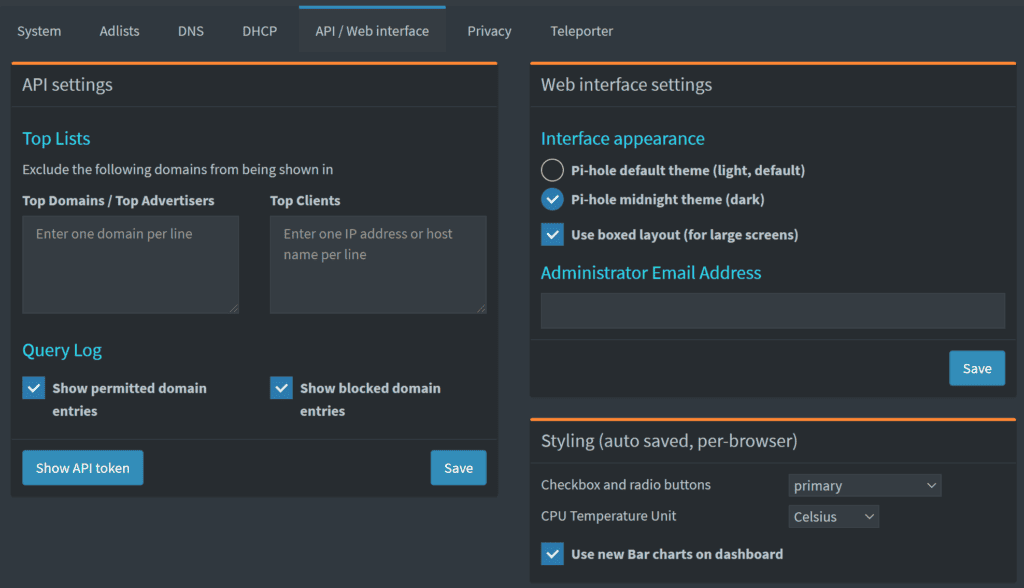
The API key is needed if you want to control Pi-hole from Home Assistant. If you do use the integration I suggest you set this up for easy control over your Pi-hole without having to log in to your Pi-hole web interface. The API key can be found in the settings under API/Web interface.
What are the alternatives to Pi-hole?
Pi-hole has recently lost a lot of ground, and users, to AdGuard Home. I’ve seen comments from previous die-hard Pi-hole fans saying that AdGuard Home is more feature rich and is being developed at a faster rate. AdGuard Home also boasts features such as parental controls (adult content blocking), which are absent in Pi-hole.
Both Pi-hole and AdGuard Home have Home Assistant integrations. The AdGuard Home integrations boasts more features such as switches to control protection, filtering, and parental controls.
There used to be an unofficial Pi-hole add-on for Home Assistant though it has now been deprecated and should not be used any more. The add-on won’t be receiving any fixes and new features and that poses a significant security risk. The developer of said add-on also recommends AdGuard home as a better alternative.
I personally haven’t tested AdGuard Home yet and thus can’t give my opinion on it. But I’m fairly certain I will be testing it at some point in the near future. And you will, of course, find my experiences and comparisons to Pi-hole in written form on this website.
The bottom line: Should you use Pi-hole
If you want to block ads and tracking on your network Pi-hole will certainly do the job for you. It is easy to set up and has a web interface. To use Pi-hole outside your network you could set up a VPN server.
Pi-hole has faced a lot of criticism concerning slow development and lack of features. Many are recommending AdGuard Home instead of Pi-hole. I haven’t tried AdGuard Home yet, but it is certainly worth checking out if you want features such as parental control.
I will be sticking with Pi-hole for now. It does everything I need it to do. Once I’ve thoroughly tested AdGuard Home I will be sharing my thoughts here. But for the time being I’ll be recommending Pi-hole.
