For smart home enthusiasts with a DIY attitude, the ESP8266 microcontroller and the many boards it powers hold a place of high regard. Paired with ESPHome, the open-source framework now under the wing of Nabu Casa, this combination offers an unparalleled ease in crafting and deploying custom firmware for smart devices. This in-depth exploration dives into the essence of the ESP8266's appeal and its seamless integration with ESPHome.
Contents
- Introduction to the ESP8266
- ESP8266 Specifications at a Glance
- The Rise of User-Friendly ESP8266 Boards
- Applications of the D1 Mini: From Smart Blinds to DIY Lighting
- Clarifying the NodeMCU Confusion
- Exploring Alternative and Niche ESP8266 Boards
- The Ubiquity of ESP8266: From Sonoff to Xiaomi and Zemismart
Introduction to the ESP8266
Launched in December 2013 by Espressif Systems, the ESP8266 emerged as a cornerstone in microcontroller technology. This chip melds a cost-effective Wi-Fi module with a robust microcontroller, presenting a versatile tool for smart home and IoT projects. Its initial journey in Western markets faced hurdles, notably the scarcity of English documentation. Nonetheless, the tide turned as the ESP-01 module, crafted by Ai-Thinker, caught the attention of the maker community. The subsequent English translation of its specifications expanded its reach, cementing its status in the maker realm.

ESP8266 Specifications at a Glance
The technical prowess of the ESP8266 is notable. Equipped with a CPU capable of operating at 80 MHz (with the potential to double to 160 MHz), it also boasts 32 KiB of instruction memory and 80 KiB of user-data memory. Though perhaps more importantly, its utility is perfected by 16 GPIO pins, offering extensive versatility in device interactions.
While its specifications may seem modest in comparison to contemporary computers or smartphones, the ESP8266 underscores the rapid advancement and availability in technology. Notably, devices like the LOLIN D1 Mini, which utilize the ESP8266, are available at a price point lower than a cup of coffee, emphasizing both affordability and power. In contrast to historical computing marvels such as the Apollo Guidance Computer (AGC)—which was pivotal in the first moon mission with its 2.048 MHz processor and constrained memory capacity (4 KB of RAM and 72 KB of ROM)—the ESP8266 epitomizes the modern era of microcontrollers, blending efficiency with cost-effectiveness.
The integration with the Arduino core for the ESP8266 Wi-Fi chip marked a significant milestone, simplifying programming tasks and broadening its appeal across the maker community for its straightforward Wi-Fi integration.
The Rise of User-Friendly ESP8266 Boards
The ESP8266 MCU is the chip component that includes the processor, Wi-Fi functionality, and memory. It can operate as a standalone microcontroller with its built-in CPU and memory, capable of handling basic applications and internet connectivity tasks. The MCU can process digital signals and connect to other devices or internet services via its Wi-Fi capabilities. However, the raw MCU is a small chip that requires external circuitry to be fully operational in most projects. It lacks accessible input/output (I/O) pins, a USB port for programming and communication, voltage regulation, and other essential features for development.


An ESP8266 development board, on the other hand, is a more user-friendly platform that incorporates the ESP8266 MCU along with various additional components that facilitate development and deployment of projects. These boards are designed to be more accessible to hobbyists, educators, and professionals alike. Common features included in ESP8266 development boards are:
- USB Port: Allows for easy programming of the MCU directly from a computer. The USB port also provides a power supply for the board and a communication interface. Most commonly found are USB Micro-B ports, though more recently USB-C ports have been appearing on modern boards.
- Voltage Regulator: Enables the board to be powered by a range of voltages (commonly 5V from the USB port) and regulates it down to the 3.3V required by the ESP8266 MCU. This makes it safer and easier to connect the board to various power sources.
- GPIO Pins: General Purpose Input/Output pins are broken out from the MCU to the edge of the board, providing easy access for connecting sensors, actuators, and other peripherals. These pins often include support for analog inputs, digital I/O, PWM, I2C, SPI, and UART communication.
- Reset and Flash Buttons: Facilitate entering into flash mode for firmware updates and resetting the board without needing to power cycle it.
- On-Board Antenna: While the ESP8266 MCU has Wi-Fi capabilities, development boards typically include an improved external or PCB antenna for better wireless performance.
Examples of popular ESP8266-based development boards include the NodeMCU and the LOLIN (formerly WEMOS) D1 Mini. These boards are designed with hobbyists and prototyping in mind, making it easier to connect to the internet and build IoT projects without dealing with the intricacies of the raw MCU's small form factor and minimal external circuitry requirements.
The LOLIN (formerly WEMOS) D1 mini ESP8266 Board (And Its Clones)
The LOLIN (formerly WEMOS) D1 mini represents the epitome of beginner-friendly ESP8266 boards. Its compact size and low cost, coupled with its array of 11 digital I/O pins, renders it perfect for a myriad of applications. The board's affordability, along with the straightforward process of flashing it via ESPHome Web Tools, has endeared it to hobbyists across the globe. The LOLIN D1 Mini distinguishes itself for several reasons:
- Compact Size:Measuring just 25.6 mm × 34.2 mm, it's ideally suited for projects where space is at a premium.
- Ease of Use:Equipped with a USB Micro-B port (and, more recently, a USB-C port) for both power and programming, setup is a breeze.
- Affordability:Its cost-effectiveness makes it accessible to a broad audience, including hobbyists, students, and those working on budget-conscious projects.
- Integrated Wi-Fi:With built-in Wi-Fi capability, it easily connects to the internet or local networks.
- Versatile GPIO Pins:It supports various sensors and peripherals across multiple communication protocols.
- Strong Community Support:A rich ecosystem of tutorials, libraries, and compatible accessories stands behind it.
- Flexible Programming:Offering compatibility with Arduino IDE, MicroPython, and more, it caters to a wide range of user preferences.
- Broad Compatibility:Its utility is enhanced by compatibility with an extensive array of shields and components.
In short, the D1 Mini delivers an exemplary balance of functionality, user-friendliness, and value, securing its place as a favoured choice for Internet of Things (IoT) and, more specifically, ESPHome projects.

Choosing Between Clones and Originals
The market teems with D1 Mini clones; however, opting for the marginally more expensive original from LOLIN's official store may yield better reliability. While clones frequently match up in performance, the original tends to be the more dependable choice, as highlighted by both enthusiasts and experts.
Applications of the D1 Mini: From Smart Blinds to DIY Lighting
The D1 Mini has powered projects as varied as automated blinds, the Home Assistant Tags kit, and numerous inventive DIY lighting solutions using WLED. For straightforward tasks like sensor data collection, the power supplied through the Micro-USB port suffices for both the board and connected sensors, keeping the necessary wiring to a minimum.
Expanding Your D1 Mini ESP8266 with Shields
Exploring the official LOLIN store unveils a plethora of add-ons known as shields, including display shields, LED shields, battery shields, and many more. These shields serve as the ideal springboard into the world of ESP8266 and ESPHome, offering a solder-free option for enthusiasts not keen on manual wiring on a perfboard.
The beauty of using a shield lies in its simplicity. You can attach some legs to the LOLIN D1 Mini board, then solder the shield on top. This approach significantly eases the integration process, although it generally limits you to using a single shield due to spatial constraints.
However, certain shields are designed to be stackable. A prime example is the power shield, which is compatible with almost every sensor, connecting only to the 5V and GND pins. When considering stacking multiple shields, it's imperative to consult the documentation thoroughly. This ensures that there's no overlap in GPIO pin requirements, which could lead to conflicts or functionality issues.
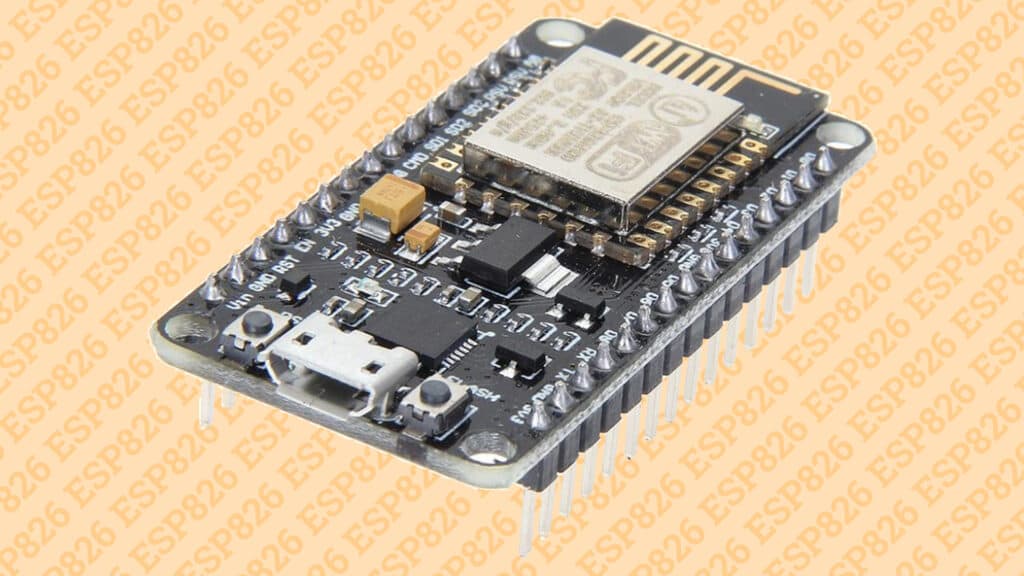
Clarifying the NodeMCU Confusion
The term “NodeMCU” frequently emerges within the ESPHome and maker circles, sparking a bit of confusion. Contrary to what some may assume, NodeMCU itself isn't an ESP8266 board, but rather an open-source firmware designed to facilitate programming on the ESP8266 microchip. To bridge the gap for enthusiasts, several development kits equipped with the ESP8266 chip have been marketed under the NodeMCU brand, leading to its association with the hardware itself.
The NodeMCU development kit distinguishes itself with a larger form factor compared to the more compact D1 mini. However, both kits share key features that appeal to makers: a Micro-USB port for straightforward flashing and a history of being replicated by numerous manufacturers. When considering hardware for ESPHome projects, the choice between the larger NodeMCU kit or its clones and the more streamlined D1 mini largely depends on the specific needs of the project. The latter often suffices for a wide range of applications.
Exploring Alternative and Niche ESP8266 Boards
Beyond the common choices, the ESP8266 ecosystem is rich with various boards, each offering unique features to cater to specialized projects. Certain boards boast additional memory, the option to connect an external antenna, or even a Li-ion battery charging capability. For instance, LOLIN's D1 mini Pro allows for external antenna connection and provides a larger flash memory, making it an attractive option for projects requiring these specific functionalities. Nevertheless, for the vast majority of applications, the standard D1 mini remains a versatile and sufficient choice.
The Ubiquity of ESP8266: From Sonoff to Xiaomi and Zemismart
Thanks to its affordability and versatility, the ESP8266 chip has found its way into a myriad of prebuilt devices, ranging from iTead's Sonoff Wi-Fi switches to the H801 RGBW LED controller and Xiaomi's range of smart air purifiers. The key takeaway for enthusiasts is the chip's adaptability: if a device is powered by an ESP8266 (or its more powerful sibling, the ESP32 microchip), and it supports flashing, it's a viable candidate for running ESPHome. This opens up a world of possibilities for integrating a wide array of devices into custom home automation setups, further demonstrating the chip's utility in the smart home domain.


